
HTML for Beginners: Learn To Code HTML Today
Disclosure: Your support helps keep the site running! We earn a referral fee for some of the services we recommend on this page. Learn more
From the small business owner to the student creating a class project, or even casual individuals working on a blog or personal project online, HTML knowledge is incredibly useful. Although the prospect of having to learn a programming language certainly does seem daunting, the good news is that HTML uses common words so that it is fairly simple to pick up.
In this guide we cover the basics in a (hopefully) easy-to-understand manner, perfect for the absolute beginner. However, we don’t stop at the basics – even seasoned webmasters will find useful tips to expand your working knowledge of HTML. We will even dive into XHTML, DHTML, and the newest stuff in HTML5.

A Brief History of HTML 1-4
HTML was invented by Tim Berners-Lee in the late 1980s and early 1990s. The first “public” release was in 1991. It was based on an earlier markup language, SGML (Standardized General Markup Language).
The major innovation of HTML was its use of the hyperlink. We are so used to this now that it is hard to understand how revolutionary this idea was at the time.
The hyperlink allows any document to reference any other document, and provides immediate access to that other document. Hyperlinks are what make the World Wide Web a web, and not just a library or database.
The IETF took up HTML as a standard and published the first HTML proposal in 1993. HTML 2.0, the first full official specification was released in 1995. By 1997, the W3C had taken over stewardship of the standard, and HTML 3.2 was released.
HTML 4.0 was released towards the end of 1997, and again the following year with a few updates. This version of the standard, with its three variations (strict, transitional, and frameset) defined HTML most of the next decade.
It was the version in force during the rise of the web’s most iconic properties: Wikipedia, Google, Facebook, WordPress, Myspace, AOL. If you learned how to build web pages before 2008, you almost certainly learned this version.
Alongside HTML 4.0 was a related project called XHTML. This was first released in 2000 and 2001, as an XML-based implementation of HTML 4.0. Since XML had a stricter syntax than HTML, and could be easily validated by an XML parser, it was thought that introducing XHTML would force web content authors to create more precise documents.
For the most part, this did not happen. In practice, XHTML — along with the three varieties of HTML4, and the wild variation in browser rendering — contributed to the general confusion concerning what was and wasn’t “standard” HTML.
One notable effect of XHTML is the idea that you must “close” empty tags with a trailing slash. If you are in the habit of typing <br /> instead of just <br>, you can thank XHTML — it was an XML syntax requirement that all tags must be closed.

General HTML
Start reading below, or use the navigation on the right to jump to a specific topic.
HTML Basics
This section introduces HTML, the language used to author web pages, and provides a little background regarding its history and the reason it is used.
What is HTML?
HTML is Hypertext Markup Language, a format for creating documents and web pages. It was originally invented in the early 1990s by Tim Berners-Lee, and was based on an earlier markup language called SGML (Standard Generalized Markup Language), which was based on an earlier format simply called GML (Generalized Markup Language) developed at IBM in the 1960s.
HTML consists primarily of matching pairs of angle-bracketed tags surrounding human-meaningful text (<span>like this</span>). The tags provide meaning, context, and display information to the text they surround.
What is a Markup Language?
Imagine any text-based document you have ever read: a website, a book, a PDF, a Word doc, a church bulletin. There is the text, of course — but theres something else: how the text is displayed. Some of the words are larger or smaller, some are italicized or in bold, some are a different color or a different font.
The file that one of these documents is saved into has to contain both the human-readable text and also the information about the display. A number of different ways to accomplish this have been tried, and the most convenient way to do it is to store the information in line with the text itself.
So, for example, if you want to make some text bold or italic, you might do something like this:
I want to make [start bold]these words bold[end bold] and [start italic]these other words italic[end italic].Which, in theory, should produce something like:
I want to make these words bold and these other words italic.
These inline matching pairs of style declarations are called tags, and something like this is the basis of almost every markup language. But this format shown above isnt HTML, its just a little made-up example.
The example above has many problems with it, and the inventors of HTML (and SGML and GML) came up with something similar, but much better:
- Square brackets are often used in text, so reserving them for use in tags could cause problems. Instead HTML uses angle brackets:
<and>. - Writing
startandendover and over is very tedious. HTML simplifies this by using the tag name itself as “start” declaration. The tag name with a slash in front of it (/) is used as the ending tag. - Rather than the whole words “bold” and “italic,” HTML uses abbreviations to make it faster to type and less obtrusive to read.
So, taking these things into account, the above example would look like:
I want to make <b>these words bold</b> and <i>these other words italic</i>.I want to make these words bold and these other words italic.
Recently, there has been a move away from explicitly declaring typographical details (like bold and italic) and instead using the markup to convey the meaning, not just the look. Therefore, the <b> and <i> tags are no longer recommended for use. Instead, the preferred tags are <strong> and <em> (emphasis). So in contemporary documents the sentence above would be:
I want to make <strong>these words stand out</strong> and to <em>emphasize these words</em>.I want to make these words stand out and to emphasize these words.
HTML is, at its core, nothing more complicated than a set of defined markup tags.
What is hypertext?
Hypertext is a word that was invented in the 1960s to describe documents that contain links that allow the reader to jump to other places in the document or to another document altogether. These links, which we now take for granted in the modern web, were a big deal when computers were first coming into maturity.
The “hyper” concept of internal and external linking was so revolutionary to the way content is organized on the internet that the word shows up in a number of places:
- HTML is the “HyperText markup language”
http://stands for “HyperText Transfer Protocol- A link from one page to another is called a “hyperlink,” and the data attribute that specifies where a link is pointing to is called a “hyper reference.”
Where and How is HTML used?
HTML is used for almost all web pages. The web page you are reading right now uses HTML. It is the default language of websites.
It can also be used for other types of documents, like ebooks.
HTML documents are rendered by a web browser (the application you are using to read this page). HTML rendering hides all the tags, and changes the display of the rest of the content based on what those tags say it should look like.
Do I need to learn HTML to run my website?
Unless you plan to become a web developer, and build pages from scratch, you don’t need to know all the intricate details of HTML.
If you are just using a blogging platform, a site builder, or a Content Management System (CMS) set up by someone else, you may be able to get by without knowing any HTML — there are “graphic” editors available that make adding content to a blog similar to writing in Microsoft Word or email.
However, sometimes those graphical editors dont work exactly the right way, and sometimes you will want to do something and not understand why you cant. Therefore, it is highly recommended that if you are going to be writing for the web, even just regular blog posts and announcements, that you get a good understanding of basic HTML concepts.
Additionally, there are details of how HTML documents are structured that have an effect on things like Search Engine Optimization (SEO) and data aggregation. If you are interested in staying informed about how your website appears to non-human visitors, understanding HTML is an important skill.
Similarly, website accessibility — the ability for a website to be navigated successfully by people with visual or other handicaps — is an increasingly important consideration. The blind rely on computerized screen readers to translate web sites into sound, and the quality and structure of the underlying HTML document has a big impact on the ability of the screen reader to work properly.
Mostly, HTML is the common underlying language of the contemporary internet. If you want to understand how the world works, it is a good idea to at least have some familiarity with HTML.
Bottom Line on HTML
HTML — Hypertext Markup Language — is the language used for creating web pages and other web-based documents. It consists mainly of matching pairs of angle-bracketed tags, enclosing sections of human-meaningful text. The tags, which are not displayed by web browsers, are used to provide information about how the text and page should be displayed.
HTML Elements and Tags
This section takes a close look at tags, the fundamental building blocks of HTML. It covers how they work, some exceptions to the normal way they work, and a brief discussion on tag attributes.
Structure of Tags
Generally, matching pairs of tags surround the section of text which they affect. Two matching pairs of tags, along with the content they enclose, are called an “element.”
<strong>This element begins and ends with the "strong" tag.</strong>The opening tag can contain additional attributes which provide more information about the contents of the tag and how to display them. These attributes are written as name-value pairs, separated by an equals ( = ) sign, with the value placed in quotes.
<a href="http://example.com">This is a link. The tag is an "a" for "anchor," and the href (hyper reference) attribute specifies where the link is pointing.</a>A few tags do not occur in matching pairs, because they are used to insert something, rather than describe text. These are called “empty” or “void” tags, and the most common one is the one used for inserting an image. The src attribute is used to specify the URL of the image.
<img src="https://media.whoishostingthis.com/2/v60/images/wiht-logo.png" />Notice there is no closing tag, and therefore no enclosed text. The slash right before the final angle bracket ( /> )is used to “self-close” the tag. This is not absolutely required, but it is a good reminder that whatever follows will not be enclosed. (It is required in XHTML, which will will discuss later in this article.)
There are several other empty tags. Two are fairly straight forward and common.
<br/>inserts a line-break.<hr/>inserts a horizontal rule (line) separator.
Others do not insert something visual, but are used to provide information about the page itself.
<link rel="stylesheet" type="text/css" href="theme.css" />
<meta name="description" content="Title of this page." />
Additionally, the <script> tag (which is used to add Javascript to a page) can be empty, but it doesnt have to be.
(More information on <link>, <meta>, and <script> tags will be provided later in this guide.)
Block-level vs. inline
With the exception of tags that provide information about the document itself, HTML tags fall into two categories, block and inline.
Block elements
Block elements represent rectangular blocks of content. They have an implied line break before and after. Block elements include sectional content like paragraphs ( <p> ), divisions ( <div> ), and headlines ( <h1>, <h2>, etc).
It is standard practice to type most block-level tags on individual lines above and below their content:
<div>
This is a div.
</div>
However, this is not always done, especially with headlines:
<h1>This is the title of a page</h1>
<h2>This is a major section</h2>
<p>
Some content in a paragraph.
</p>
Block-level elements can be nested, but some block-level elements can not contain other block-level elements:
<div>
  <h2> Title of an article</h2>
  <p>
    First paragraph of article.
  </p>
</div>
Paragraphs and headlines cannot contain other block-level elements.
Inline elements
Inline elements are elements used within text. Bold ( <strong> ), italic ( <em> ), and links ( <a> ) are all inline elements.
Inline elements are sometimes called “span-level” elements. There is also a generic span-level element, simply called a span ( <span> ). This doesnt do a whole lot by itself, but can be used to create customized types of text-display, through the use of elements.
<span class="special-text">This text is special.</span>(See the section on CSS for information on how to make class="special-text" display in a special format.)
Sometime it doesnt make sense
Images ( <img> ) feel like block-level elements — they are rectangular, have definite dimensions, and are usually displayed outside of the flow of text.
However they are actually inline elements. The reason for this is mostly a hold-over from a less-sophisticated period of web design, but were stuck with it now. The weird implications of this can be avoided easily, but its good to know. (See the section on images and also the one on CSS.)
There are other weird issues like this, and they will be covered later in this guide when they come up.
More about attributes
Almost every element tag can include attributes. Many elements have a specific set of attributes they support (like <img> and the src= attribute), but there are several elements which are globally supported by all element types.
Two important attribute types are class and id.
<a href="http://example.com" class="example-link" id="link27">This anchor tag has three attributes.</a>Class attributes
Class attributes are used to mark one or more elements as belonging to a specific “class” or group — this can be used for displaying them all the same way.
For example, it is common to use an unordered list ( <ul>) as a menu, and to make the list item ( <li> ) which points to the current page look different than all the other links in the same list.
<ul class="menu">
 <li class="menu-item">
   <a href="/home">Home</a>
 </li>
 <li class="current-item">
   <a href="/about">About</a>
 </li>
 <li class="menu-item">
   <a href="/contact">Contact</a>
 </li>
</ul>
An element can have more than one class. Multiple classes are separated by spaces inside the class element.
<p class="first drop-cap">
  This is the first paragraph, and it is also part of the drop-cap class.
</p>
Because classes are separated by a space, classes may not include spaces in their names.
In CSS, JavaScript, and other languages, the class of an element is notated with a dot before the name.
/*CSS*/
.first {
    color: green;
}
The above CSS code means that within any element that has a class of first, the text color should display as green.
ID attribute
The ID attribute works similarly to the Class attribute, but is conceptually different. Rather than signifying the elements membership in a group, it uniquely identifies that element. For this reason, there can be only one element with any specific ID on any given page.
<h1 id="page-title">This is the title of the page</h1>IDs are less often used for affecting display, and more often used for functional purposes.
IDs can be used for internal linking of a document, such as the Table of Contents on a wikipedia article.
<ol>
 <li>
  <a href="#intro">Intro</a>
 </li>
 <li>
  <a href="#history_of_topic">History of Topic</a>
 </li>
</ol>
<h2 id="intro" class="section-header">Introduction</h2>
<p>
Text of introductory section.
</p>
<h2 id="history_of_topic" class="section-header">
<p>
Some history on this topic.
</p>
Notice that the links to the sections include the name of the tag, prefixed with the hash or pound sign ( # ). This is the standard way to reference the id of an element:
/*CSS*/
#intro {
    font-size: 14px;
}
Other attributes
Each HTML tag has its own set of available attributes relating to their specific purpose. For example, the <a> tag, which defines a hyperlink, includes the href (hyper-reference) attribute, which specifies a URL being linked to.
These attributes will be covered in more detail as we look at each tag individually in later sections.
There are also a number of “global” attributes — attributes any element can have. These will also be covered in more detail later on, as their uses become more relevant.
Comment Tags
The last point to cover in basic HTML tags is the comment. Comments begin with an angle bracket, followed by an exclamation point and two dashes. They end with two dashes and a closing angle-bracket.
<!-- This is a comment. -->Comments may be multi-line.
<!--
This is a comment.
It has two lines.
-->
Comments may not be nested:
<!--
If I try to nest a comment inside another comment.
  <!-- Like this -->
Then this the part after the first closing tag will fall outside the comment.
-->
You need to watch our for nesting of comments if you ever try to comment-out a large section of existing HTML — inline comments in the original section will mess up your commenting.
Anything inside the comments will not be displayed to the user inside the browser. However, HTML comments can be viewed by the site visitors if they choose to view the page source. Therefore, do not use comments for anything you wish to hide from the public.
What Tags Are Really All About
HTML is essentially text content with tags that are used to specify the meaning of that content within the document and the relationship of each piece of content to the others.
Tags are short snippets of letters inside angle-brackets. They typically consist of a matching pair — an opening and a closing tag. The opening tag is just the tag name, while the closing tag is prefixed with a slash.
Attributes may be added to any element. Attributes are specified inside the opening tag, as name-value pairs joined by an equal sign. The value must be inside single or double quotes (double quptes is standard).
The two most common attributes are the class and id attribute, which are used both for styling and functional purposes.
Textual HTML
This section covers all the most common elements that are used for typographical styling and semantic meaning within the text of a typical HTML document. Elements covered include headlines, paragraphs, lists, and links — and several others.
Headlines
HTML provides six levels of headline elements, <h1> through <h6>.
<h1>The most important title on a page</h1>
<h2>Title of a major section</h2>
<h3>Sub-section heading.</h3>
<!-- etc. -->
When to use <h1> and <h2>
The <h1> tag is considered by Search Engines to be the most important headline on a page, and look to it for a clue as to what the page is about. It should therefore match the content of the <title> tag inside the <head> if at all possible, and their should be only one <h1> element on any page.
On your home page and blog index page, it is best to put your site title in the <h1> tag, and the titles of articles in a blog index inside <h2> tags.
However, on a single-article page, the title of the post or article itself should be inside the <h1> tag, with the title of the website in an <h2> or even <h3> tag.
Similarly on a category-based or tag-based archive page, it is usually best to put the category or tag name inside an <h1> tag.
Hierarchical organization
It is (mildly) good for SEO, and very good for readers, to break articles into logical sections and use appropriate heading tags within the content of an article. Heading tags should be used in a hierarchical fashion — if an <h4> follows an <h3> tag, it should be the header for a subordinate section.
Subtitles
A title with a subtitle should not used two different header tags:
<!-- Do NOT do this:->
 <h1>The Main Title of this Article:</h1>
 <h2>The Subtitle of that same article</h2>
<!-- Really. Please don't. -->
Instead, put the entire title and subtitle into a single headline tag and use another tag to define the relationship:
<h1>The Main Title of this Article:<br/>
<small>The Subtitle of that same article</small></h1>
<!-- OR -->
<h1>The Main Title of this Article:
<span class="subtitle">The Subtitle of that same article</span></h1>
<!-- This option requires some additional CSS to display in a sensible manner. -->
Headlines on Widgets
Sidebar sections, or widgets, need titles, but these are not generally relevant from a content (SEO) standpoint. Most well-informed designers use <h4> tags for this purpose, reserving <h1>, <h2>, and <h3> for keyword-relevant content.
<aside> <!-- sidebar -->
 <h4>Recent Posts</h4>
 <ul>
  <li><a href="#">Post title</a></li>
  <li><a href="#">Post title</a></li>
  <li><a href="#">Post title</a></li>
 </ul>
 <h4>Archive</h4>
  <ul>
     <li><a href="#">June 2015</a></li>
     <li><a href="#">May 2015</a></li>
     <li><a href="#">April 2015</a></li>
  </ul>
</aside>
However, if you regularly have so many sub-sections in your page content that you need to use <h4> headlines in your main text, theres nothing really bad about using <h5> or even <h6> in your sidebar titles.
Headlines as link targets
In a particularly long document, it might be a good idea to make it possible to link not just to the page as a whole, but to a specific section.
In the past, only anchor tags ( <a> ) could be used as the target of a link, but that is no longer the case — any element can become the target of a page-location specific link.
The natural candidate for such links are headline tags, because they are used to identify the beginning of sections.
All that is needed to make this work is to add a unique id attribute to the header element. Links to that section are simply the page URL, appended with the hash sign ( # ) and the ID.
<!--
Imagine the following is a headline on the page
http://example.com/page
-->
<h3 id="some-headline">Some headline halfway through the page</h3>
<!--
Then a link to that section of the page would look like:
-->
<a href="http://example.com/page#some-headline">Click here to go there.</a>
<!--
If this doesn't make sense, read the section below about hyperlinks.
-->
<!--
Links on the page itself, such as for a table of contents, do not need the full URL, and can simply begin with the # sign.
-->
<a href="#some-headline">Click here to scroll there.</a>
<!--
A great example of this usage in an on-page table of contents is Wikipedia. Every article uses this type of in-document linking.
-->
Paragraphs
The paragraph tag — <p> — should surround every paragraph of text in your main content.
Multiple line breaks in your source code (without the <br> line-break tag) will not display as line breaks on-page. In order to get proper display spacing between paragraphs of text, you should use the <p> tag.
<article>
 <h2>The importance of paragraph tags</h2>
 <p>Every paragraph of your content should be within a paragraph element. The paragraph element is defined by the p-tag</p>
 <p>Using the paragraph tag properly ensures that your line spacing between paragraphs will display properly. It also helps with assistive technologies like text-to-voice readers (it helps with proper pausing).</p>
</article>
Some people prefer to put the opening and closing tags on individual lines. This may help with reading source code, but it makes no difference to how a page ultimately looks to a user.
<article>
 <h2>Putting p-tags on individual lines</h2>
 <p>
  Some people like to put the opening and closing paragraph tags on individual lines.
 </p>
 <p>
  There is no real benefit or drawback to doing it this way.
 </p>
</article>
Many CMSes, like WordPress, insert <p> tags into your post content automatically, so you dont have to worry about it if you are using one of these systems.
Lists
There are three types of lists available in HTML:
<ul>— Unordered list. — Bulleted lists (like this one), called “unordered” because they are not numbered.<ol>— Ordered list. — Numbered lists, which can use regular numerals (1, 2, 3), roman numerals (I, II, II or i, ii, iii), or letters (A, B, C or a, b, c).<dl>— Definition list. — A list with individual terms and then descriptions for each term. (This list could have been a definition list, but it isnt.)
Unordered List — <ul>
The unordered list is a way to present a list of bullet-pointed items. The list itself is wrapped in the <ul> tag, and each item in the list is wrapped in the <li> (list item) tag.
<ul>
 <li>Apples.</li>
 <li>Oranges.</li>
 <li>Typewriters.</li>
</ul>- Apples.
- Oranges.
- Typewriters.
In the past, you could specify what kind of bullet you wanted (disc, square, circle) in the type attribute. But as of HTML5, this is not supported. If you want to change the bullets, youll have to use CSS.
<ul type="square"> <!-- DON'T DO THIS -->
 <li>It's bad.</li>
 <li>It's wrong.</li>
 <li>It's unsupported.</li>
</ul>
Ordered List
Ordered lists are lists which are numbered or lettered. The outside element is <ol>, and the <li> tag is used again for each item.
<ol>
 <li>Collect underpants.</li>
 <li>???</li>
 <li>Profit.</li>
</ol>- Collect underpants.
- ???
- Profit.
The <ol> element supports several attributes which change how the the list is numbered.
The type attribute can be used to change the default Arabic numerals (1, 2, 3) to letters or Roman numerals (capitals or lower-case).
<ol type="i">
 <li>Lowercase Roman numeral 1.</li>
 <li>Lowercase Roman numeral 2.</li>
 <li>Lowercase Roman numeral 3.</li>
</ol>- Lowercase Roman numeral 1.
- Lowercase Roman numeral 2.
- Lowercase Roman numeral 3.
Options for type are:
1— Arabic numerals (1, 2, 3) — This is the default.A— Capital letters (A, B, C)a— Lower-case letters (a, b, c)I— Capital Roman numerals (I, II, III)i— Lower-case Roman numerals (i, ii, iii)
The start attribute can be used to begin the list numbering on a number other than 1. This can be used for numbers or for other types.
<ol start="10">
 <li>Chocolate</li>
 <li>Vanilla</li>
 <li>Motor Oil</li>
</ol>
<ol type="I" start="8">
 <li>Telesphorus</li>
 <li>Hyginus</li>
 <li>Pius</li>
 <li>Anicetus</li>
</ol>- Chocolate
- Vanilla
- Motor Oil
- Telesphorus
- Hyginus
- Pius
- Anicetus
Finally the reversed attribute can be used to number the list items in reverse order. This can be combined with either of the other attributes (or both).
<h3> Out of the starting gate!</h3>
<ol start="-3">
 <li>Wait for it.</li>
 <li>Wait for it.</li>
 <li>Wait for it.</li>
 <li>GO!</li>
</ol>
<h3>Top Ten Reasons</h3>
<ol start="10" reversed>
 <li>Because.</li>
 <li>And so therefore.</li>
 <li>QED</li>
 <li>etc.</li>
</ol>
Out of the starting gate!
- Wait for it.
- Wait for it.
- Wait for it.
- GO!
Top Ten Reasons
- Because.
- And so therefore.
- QED
- etc.
Things to notice about these two examples:
- The
startattribute can be negative. - Even if the list is
reversed, thestartvalue is the first number for the list. - The
reversedattribute doesnt need to specify a value. This is because it has only two possible values: true (present) or false (absent). - A top-ten (or similar countdown) list doesnt need to specify a
startattribute if it ends with 1, which will always be the last number in a reversed list unless otherwise specified. The example above didnt actually contain ten items, so it was necessary to specify. - The default behavior is to increase the number for each succeeding list item. Therefore, if you want to “countdown” from a negative number, you should not include the
reverseattribute.
Description / Definition Lists
Description lists (or “Definition” lists, as they are more comonly called) are a bit different than ordered and unordered lists. They are used to provide a list of terms with descriptions, such as in a glossary.
The whole list is wrapped in the <dl> tag. Each term in the list is marked with a <dt> tag (“definition term”), and each term is followed by one or more <dd> elements (“definition description”).
<h3>Types of Lists</h3>
<dl>
 <dt>Ordered List</dt>
 <dd>A numbered list of items.</dd>
 <dt>Unordered List</dt>
 <dd>A list of bulleted items.</dd>
 <dt>Definition List</dt>
 <dd>A list of terms with associated definitions.</dd>
 <dd>Each term can have one or more definition descriptions.</dd>
</dl>
Types of Lists
- Ordered List
- A numbered list of items.
- Unordered List
- A list of bulleted items.
- Definition List
- A list of terms with associated definitions.
- Each term can have one or more definition descriptions.
The obvious use for a description list is a glossary or dictionary, but that isnt the only standard use.
List of names : with contact information in the description. List of audio track titles : with detailed track information in the description. List of product offerings : with information about the products in the description. List of stats : with the stat name as the term and the stat value in the description
Anytime you have a list of items which each require more detail, the description list is a good idea.
Definition lists are even more powerful than you might already realize because the <dd> tag — the description — can hold any other elements: paragraphs, images, other lists. This means that a description list can be a very content-rich markup scheme whenever you have individual items which each need additional details of any kind.
There is also one off-the-wall use for description lists, which is somewhat controversial. It was included as an example in the HTML4 specification, but removed for HTML5: script-like dialogue.
<dl>
 <dt>Reader</dt>
 <dd>What is your favorite HTML entity?</dd>
 <dt>Author</dt>
 <dd>Funny you should ask! It's the description list.</dd>
 <dt>Reader</dt>
 <dd>Really? What's so great about it?</dd>
 <dt>Author</dt>
 <dd>It's so oddly flexible.</dd>
</dl>
<!--
The HTML5 specification removed this type of usage as an example.
However, some people (including this author) still think it is the best solution for this type of thing.
- Reader
- What is your favorite HTML entity?
- Author
- Funny you should ask! Its the description list.
- Reader
- Really? Whats so great about it?
- Author
- Its so oddly flexible.
Definition lists are underused, but they are actually a really great way to present all sorts of content.
Nesting lists
All three styles of list can be nested to form an outline-style hierarchical list.
<ul>
 <li>Item One</li>
 <li>Item Two
  <ul>
   <li>Sub-item A.</li>
   <li>Sub-item B.
    <ul>
     <li>Sub-sub-item i.</li>
     <li>Sub-sub-item ii.</li>
     <li>Sub-sub-item iii.</li>
    </ul>
   </li>
   <li>Sub-item C.</li>
  </ul>
 </li>
 <li>Item Three</li>
</ul>- Item One
- Item Two
- Sub-item A
- Sub-item B
- Sub-sub-item i
- Sub-sub-item ii
- Sub-sub-item iii
- Sub-item C
- Item Three
Notice that the bullets automatically change with each nesting. This is the default rendering style for most browsers.
Unfortunately the same thing does not happen with ordered lists. If you want the school-notes outline style with different types of numbering at each level, you have to do it yourself.
<h3>This is going to look bad</h3>
<ol>
 <li>Item One</li>
 <li>Item Two
  <ol>
   <li>Sub-item A.</li>
   <li>Sub-item B.
    <ol>
     <li>Sub-sub-item i.</li>
     <li>Sub-sub-item ii.</li>
     <li>Sub-sub-item iii.</li>
    </ol>
   </li>
   <li>Sub-item C.</li>
  </ol>
 </li>
 <li>Item Three</li>
</ol>
<h3>Here's how you have to do it</h3>
<ol type="I">
 <li>Item One</li>
 <li>Item Two
  <ol type="A">
   <li>Sub-item A.</li>
   <li>Sub-item B.
    <ol type="1">
     <li>Sub-sub-item i.</li>
     <li>Sub-sub-item ii.
      <ol type="a">
       <li>Way down in the hierarchy.</li>
       <li>Does anyone need this many list levels?
        <ol type="i">
         <li>This is getting ridiculous.</li>
        </ol>
       </li>
      </ol>
     </li>
     <li>Sub-sub-item iii.</li>
    </ol>
   </li>
   <li>Sub-item C.</li>
  </ol>
 </li>
 <li>Item Three</li>
</ol>
<!-- If this is the sort of thing you need to do a lot, it would be better to specify numbering type in the CSS. This is covered in the CSS section. -->
This is going to look bad
- Item One
- Item Two
- Sub-item A.
- Sub-item B.
- Sub-sub-item i.
- Sub-sub-item ii.
- Sub-sub-item iii.
- Sub-item C.
- Item Three
Heres how you have to do it
- Item One
- Item Two
- Sub-item A.
- Sub-item B.
- Sub-sub-item i.
- Sub-sub-item ii.
- Way down in the hierarchy.
- Does anyone need this many list levels?
- This is getting ridiculous.
- Sub-sub-item iii.
- Sub-item C.
- Item Three
Nested lists can mix list types.
<dl>
 <dt>This is an ordered list:</dt>
 <dd>
  <ol>
   <li>Cakes.</li>
   <li>Pies.</li>
   <li>The cake is a lie.</li>
  </ol>
 </dd>
 <dt>This is an unordered list, listing types of lists:</dt>
 <dd>
  <ul>
   <li>Ordered lists</li>
   <li>Unordered lists</li>
   <li>Description lists</li>
  </ul>
 </dd>
 <dt>This is an unordered list nested inside of an ordered list, which is inside of this description list:</dt>
 <dd>
  <ol>
   <li>The first item.</li>
   <li>The second item.</li>
   <li>The third item, which is the nested list.
    <ul>
     <li>Knife</li>
     <li>Fork</li>
     <li>Spoon</li>
     <li>Spork</li>
     <li>Chopsticks</li>
    </ul>
   </li>
   <li>This fourth item is here just to frame the nested list better.</li>
  </ol>
 </dd>
</dl>- This is an ordered list:
- Cakes.
- Pies.
- The cake is a lie.
- This is an unordered list, listing types of lists:
- Ordered lists
- Unordered lists
- Description lists
- This is an unordered list nested inside of an ordered list, which is inside of this description list:
- The first item.
- The second item.
- The third item, which is the nested list.
- Knife
- Fork
- Spoon
- Spork
- Chopsticks
- This fourth item is here just to frame the nested list better.
It should be noted that lists can not be nested inside of paragraph elements ( <p> ). This is because all lists are block-level elements, and paragraphs (which are blocks also) can only contain span-level elements.
This can occasionally be annoying because in normal written text there are sometimes perfectly good reasons for wanting to include a list inside of a paragraph. However it simply does not work.
Block quotes and inline quotes
If you are quoting someone or something, use one of the two HTML quote elements.
Blockquotes
The blockquote is much more common. This is because of normal typographical convention:
- blockquotes (multi-line quotes or excerpts) are displayed a special way (usually indented and sometimes italicized),
- whereas inline quotes are simply marked with puncutation.
<blockquote>
To be or not to be, that is the question.
</blockquote>
To be or not to be, that is the question.
Blockquotes can be used for large blocks of quoted material, whether that material is an excerpt from a literary work, song, another blog post, or an e-mail message that you are responding to.
If you want to cite the source of the quote, there are two ways to do that. The <blockquote> element can be given a cite attribute, or a byline can be added with a <cite> tag surrounding the source title. You can also do both.
<blockquote cite="http://www.gutenberg.org/ebooks/2265">
To be or not to be, that is the question.<br>
— <cite>Hamlet</cite>, William Shakespeare
</blockquote>
<!-- Either use of "cite" is fine by itself. -->
To be or not to be, that is the question.
— Hamlet, William Shakespeare
It should be noted that that the <cite> tag should include the title of the original work being quoted, and may optionally include the name of the author and other information (such as page number or act and scene number).
The citation at the end of the quote could be better identified if it was placed inside of a <footer> element, and if the citation itself linked to the source material. Doing this would make the cite attribute within the <blockquote> tag redundant, so well remove it. Finally, well add a paragraph tag and remove the em-dash (—), so that only the information — and not display details — are included.
<blockquote cite="http://www.gutenberg.org/ebooks/2265">
<p>To be or not to be, that is the question.</p>
<footer>
 <cite><a href="http://www.gutenberg.org/ebooks/2265">Hamlet</a>, William Shakespeare</cite>
</footer>
</blockquote>
A blockquote could include a <header> as well, which might be used to introduce the quote itself, or to quote original header information.
Inline Quote
The less-commonly used quoting element is the inline quote, <q>.
<p>
My favorite line in <cite>Hamlet</cite> is when he says, <q cite="http://www.gutenberg.org/ebooks/2265"> To be or not to be, that is the question.</q>
</p>
My favorite line in Hamlet is when he says, To be or not to be, that is the question.
This is not often used because there is already a perfectly good way to show that you quoted something — by using quotation marks.
However, using the <q> tag instead of simple quotation marks has a few advantages.
- The display of the quotation marks can be changed via CSS, which is helpful for internationalization, since not all countries use the same symbols for quotation marks.
- The fact that the text is a quotation from another source is semantically clear, whereas quotation marks could be used for other reasons:
- rhetorical “scare quotes”
- mentioning a word or phrasing
- reporting a real conversation that has no source text
- The opportunity to include a
citeattribution linking to the original source of the quote.
Hyperlinks
One of the most important tags in HTML is the anchor tag ( <a> ), which defines a hyperlink. The ability to link documents into a network of connections is the essence of the web, and the definition of “hypertext.”
The element is called an “anchor” because it is used to anchor a linked URL to some specific text on a page. (This is in contrast to the <link> tag, which connects the entire document, not a specific section of text.)
The text inside the element is called the “anchor text,” and the linked URL is specified in the href attribute.
<a href="http://example.com">This is a link to example.com</a>Along with the href, the <a> tag has several important attributes.
targetspecifies what window (or browser tab) to open the link in. The default is the same window. If you want to open a new tab settarget="_blank".titlesets the tooltip or hover-text of a link. This displays in a small popup when the user mouses over the anchor text. It is useful for providing some additional information about what the user is about to click on.relreports on a relationship between the linked document and the current document. It has several possible values:alternate— The linked document has the same content as the current document, but in an alternate format. Used most often to link to RSS feeds.author— The linked document is the homepage of profile of the author of the current document or article.bookmark— A link to a specific point in the document (such as when creating an on-page table of contents).help— The linked document provides help documentation to the current document.license— The linked document is the license text for the current document.next— The linked document is the next part in a paginated series. Some browsers will pre-fetch the contents of the linked document in order to speed up rendering when the user finally clicks on it.nofollow— The linked document is not endorsed by the author of the current document. Used to prevent giving SEO benefit to the linked page. Comment systems often add this to user-entered links by default.noreferrer— Used to prevent sending referer information in the HTTP request header when the user clicks on the link. Typically, the HTTP request will specify where the user is coming from (the current page). This requests that the browser client omit that information.prefetch— Similar tonext, but without implying an actual sequential relationship. This requests that the browser fetch the contents of the linked page before the user clicks on it, so that navigation to the next page seems instantaneous.prev— The inverse ofnext, this value specifies that the linked document is the previous page in a paginated series. Some browsers may prefetch the contents.search— The linked page provides an interface specifically for searching the current document and related documents.tag— The linked document provides context as to the topic of the current page.
The rel attribute is underused by non-technical website creators, and it is a great way to bring rich, semantic information into the markup in a way that search engines, aggregators, and screen readers can understand.
For example: Google uses the rel="author" link (if linked to a Google+ profile) to display links to other content by the same author in search results. – Google image search includes the ability to search by license, to find Creative Commons licensed content for re-use. That feature depends, in part, on the rel="license" attribute being used in links to Creative Commons and other open licenses. Several search engines and news aggregation sites use the anchor text and referenced page of a rel="tag" link to determine the topic of a given page.
The rel tag can also be used in Microformats, which are simple ways of including additional semantic information within existing HTML attributes (usually rel and class).
For example, the XFN Microformat suggests using the rel attribute when linking to the home or profile pages of people with whom you have a relationship.
<p>Next month I'll be spending a whole weekend at a conference with <a href="http://example.com/kami-profile" rel="co-worker">Kami</a>. The conference is near my home town, so I'm hoping to be able to have lunch with <a href="http://example.com/dave-profile" rel="parent">my dad.</a></p>There are several additional Microformats that use the rel tag, as well as other ways to include this kind of semantic information in the markup of your website. These will be covered in the section on Semantic HTML.
Text decoration
There are a number of simple tags which are used for basic text markup within a paragraph or other element.
Bold
There are two tags that can be used for making text bold.
<strong>is recommended for use to mark “important” text. It causes the wrapped text to display as bold but also carries semantic meaning (that the text itself is somehow important).<b>simply bolds the text without suggesting any particular semantic meaning.
Italic
Like bold, there are two ways to make text display in italics.
<em>suggests that the wrapped text is “emphasized” somehow.<i>is simply italicized, with no specific semantic meaning attached.
Underline
Although it has become less popular recently, the standard text display for hyperlinks ( <a>) is to underline them. Therefore, non-link underlining does not get used very often. There are, though, markup tags for it.
<u>is the generic tag for underlining text. The use-case presented by the specifications is underlining misspelled words. The HTML5 spec also wants you to know that other elements are usually more appropriate, and dont use this if it could be mistaken for a link.<ins>means text that has been inserted, and is usually used in conjuction with the<del>tag, to show the changes made to a text.
<p>The show will begin at <del>7:00pm</del> <ins>8:00pm</ins>.</p>The show will begin at 7:00pm 8:00pm
Line-Through
There are two elements which mark text to be lined through. Each has a slightly different meaning.
<del>is for text which is to be understood as deleted or changed, and it used with the<ins>tag as noted above.<s>is used for text which is no longer correct or no longer relevant.
There is also a <strike> tag which was available in HTML4.
While the specifications description of <del> and <s> are slightly different in theory, experts have not come to any agreement on the practical details of the difference, or what situations would specifically call for one rather than the other.
Source code and unprocessed text
There are two elements used for displaying text or code which you do not want to be rendered by the browser, but simply displayed “raw” to the used.
<pre>— Is used for blocks of code or unprocessed text.<code>— Is used when you need to include a short word or phrase of code inline with your text.
They both display in a monospace font (usually Courier) by default, preserve whitespace, and do not render any tags.
This guide makes heavy use of both the <code> and the <pre> elements for displaying source code examples and discussing elements tag names.
Text sizing
You can make text arbitrarily larger or smaller with two elements that otherwise have no specific meaning:
<big><small>
The most common use of sizing elements is placing the subtitle of a page or article into a <small> element nested inside the <h*> headline tag.
The generic <span> element
If you need to markup specific length of text for semantic or styling purposes, but none of the existing tags makes sense, you can use the generic <span> element, along with a class attribute (and some CSS) to create the desired effect.
<p>I'm not sure why there isn't a sarcasm tag. Maybe it just isn't needed because <span class="sarcasm">tone is so easy to read on the internet.</span></p>/* CSS */
.sarcasm {
color: purple;
font-style: italic;
}.sarcasm {
color: purple;
font-style: italic;
}
Im not sure why there isnt a sarcasm tag. Maybe it just isnt needed because tone is so easy to read on the internet.
Separators
HTML provides two tags for adding in separation within text.
<br>inserts a line break<hr>inserts a horizontal line
Neither of these elements requires a closing tag, because they do not enclose any text. If it helps you read your source code better, you may include the self-closing end slash: <br/> and <hr/>.
Line breaks are especially useful when you need to have hard linebreaks but other solutions — like multiple <p> tags dont make sense. Two good examples are poetry or song lyrics and addresses.
<p>
Roses are red<br>
Violets are blue<br>
Rhyming is hard<br>
HTML5 is awesome.
</p>
<hr>
<p>
123 Main St.<br>
Fort Worth, TX 76148
</p>
Roses are red
Violets are blue
Rhyming is hard
HTML5 is awesome.
123 Main St.
Fort Worth, TX 76148
This Easier Than It Seems
All this may seem complicated, but it really isnt. Most of the tags you need on a regular basis are easy to remember: headlines, paragraphs, unordered list. You dont need to memorize all the different options or meanings behind each one. Just try to keep in mind that any normal typographical item (like a headline, a list, a paragraph, or a link) probably has an existing HTML tag to accomplish it. If you keep that in mind, you can just write without focusing on these things and then look up the specific items you cant remember.
Try not to get bogged down with options, either. The important thing is that your markup is as meaningful as possible, without being overly complicated. If you cant decide which of two or more options is the best, ask which one is more meaningful. If you cant figure that out, ask which one is simpler. If you still cant decide, just pick one — if they seem that similar, then there probably isnt going to be a huge difference in how it works out.
Structural HTML
This section explains the overall structure of an HTML document, including what types of information are contained in the <head> and <body>. It also explains how to organize the various sections of a typical web page. There will be more information in the HTML5 section below.
Basic HTML Document Structure
HTML documents (web pages) need to follow a few basic structural rules in order to work properly and be read accurately by web browsers.
The document must begin by declaring a DOCTYPE. There are several different HTML (and related) standards that have been in use over the years, and so therefore it is important to specify which type of document (which HTML standard) your document is using.
Mostly, today, the correct DOCTYPE is simply html. So an HTML document should begin with:
<!DOCTYPE html>This isnt exactly an HTML tag in the proper sense, but rather it tells the browser how to interpret all the other tags that follow.
After the DOCTYPE declaration, the opening tag is the <html> tag. The closing of the <html> tag will be the last line of the document.
Inside the HTML tag, you can specify the language of the document (in this case, English).
<!DOCTYPE html>
<html lang="en">
.
.
.
<!-- entire contents of page -->
.
.
</html>
Nested inside the <html> tag are two sections, the <head> and the <body>. The body contains all the visible content, while the head contains information about the document itself. Nothing is outside of these two sections.
<!DOCTYPE html>
<html lang="en">
 <head>
  .
  <!-- Info about document here. -->
  .
 </head>
 <body>
  .
  .
  <!-- Contents of document here. -->
  .
  .
 </body>
</html>
This is the basic structure of every HTML document. Everything is basically extra.
Contents of <head>
The <head> element of an html document usually contains all the information needed by a browser to properly render the document, plus additional information describing the contents (for the benefit of aggregators and bots).
Metadata
The <meta> tag is used several times in the <head> to specify various metadata (data about the document).
Metatags are empty tags, requiring no closing tag. You may end them with the self-closing slash ( />), but this is not required (and some people even specifically discourage it).
Character Encoding
There are several different common ways to encode characters (letters, numbers, and punctuation) in computer memory. If you dont specify which one you are using, the web browser may mess up and display some of the wrong characters.
Most of the the time, these days, you want to specify the UTF-8 character set.
(The other common encoding — ASCII — doesnt have all the extended characters like em-dashes and curly-quotes. If youve ever seen weird type glitches where quotation marks or apostrophes have been replaced with seemingly random characters, its because the document was written in UTF-8 but displayed using ASCII — which means someone didnt specify the correct character set in the document.)
<meta charset="utf-8">Description, Author, and Keywords
Basic information about the document — who wrote it and what it is about — are also conveyed through <meta> tags. These each have two attributes: the name of the tag, and the content of the tag.
<meta name="description" content="A page about HTML.">
<meta name="keywords" content="HTML, tags, metadata">
<meta name="author" content="Adam Michael Wood">
This kind of information used to be especially important for SEO purposes. It is no longer the case that this plays a huge role in SEO, however it does affect it. More importantly, having correct and detailed information in these elements contributes to a semantic web, where all content is easily findable and parsable by machines.
(If you use a Content Management System, the tags and post descriptions you write in the editor screen will usually be displayed in these meta tags.)
Title
The <title> tag appears in the head, and usually does not have any attributes. It encloses the title.
<title>
 This is the title of the page.
</title>
The title should be accurate and, if possible, match the on-page visible title (usually in an <h1> or <h2> headline tag) in the body. The contents of the title are typically displayed in the tab at the top of the browser window.
It is not a good idea to nest any other tags in the title (like <b> or <i>) because they will usually not display properly.
An HTML document can only specify one title.
CSS Links
Style Sheets, written in the CSS (Cascading Style Sheet) language, are separate documents which provide information about how to display a page in a browser. Information about sizes, colors, placement, and fonts are all contained in the style sheet. Keeping these details separate from the main HTML document makes it easier to change them without affecting the content of the document itself.
CSS style sheets are linked to within the <head> of the HTML document, using the <link> tag. The href attribute specifies the URL of the style sheet file, and the rel attribute specifies that the link is a stylesheet link (there are other types of links).
<link href="/css/style.css" rel="stylesheet">RSS Information
RSS — Rich Site Summary, or Really Simple Syndication — is a way of providing a feed of site updates (like new blog posts) to subscribers, so that they are informed of new content as it is posted and can read that content from an RSS reader without having to visit your site.
If you are using a Content Management System, it will generally create an RSS feed for you, which is an XML document available at its own URL. That URL should be linked to from the <head> of your blogs main index page, so that RSS readers and web browsers can find it easily.
<link rel="alternate" type="application/rss+xml" title="RSS" href="/feed.xml" />The rel="alternate" attribute means that the linked URL contains the same content (a list of blog posts), but in an alternative format. The type attribute specifies the type of format (RSS).
Other info
A lot of additional details about a document frequently appear in the <head>. These will be covered in more detail later, in the relevant sections.
Javascript Links
It is possible to link to JS files from within the head, and this is a common practice. However, it is generally better to place these at the end of the document if possible.
Example of HTML document with <head> element completed
<!DOCTYPE html>
<html lang="en">
 <head>
  <meta charset="utf-8">
  <meta name="description" content="A page about HTML.">
  <meta name="keywords" content="HTML, tags, metadata">
  <meta name="author" content="Adam Michael Wood">
  <link href="/css/style.css" rel="stylesheet">
  <title>Guide to HTML</title>
  <link rel="alternate" type="application/rss+xml" title="RSS" href="/feed.xml" />
 </head>
 <body>
  .
  .
  <!-- Contents of document here. -->
  .
  .
 </body>
</html>
Contents of <body>
The <body> tag is the main portion of the HML document, and may contain all sorts of things.
Typically, the structure of an HTML body can be divided into several sections, each possibly having one or more subsections:
- header
- logo / branding / site title
- main navigation
- search bar
- main content
- one or more articles
- article title
- article content
- article metadata (author, tags, date posted)
- sidebar(s)
- widgets
- secondary navigation (archives by date, category, or tag)
- footer
- copyright / license info
- tertiary navigation
- contact info
- address / phone
- social links
Not all of these sections will be included in every page, or appear the same way. However this provides a good starting point for an example of how these different pieces would be put together into the <body> of a document.
The <div> element
The most generic block-level element for structuring a webpage is the <div> element. This was once used for every section and subsection of the page contents.
This resulted in a lot of nested <div> tags.
<body>
 <div class="header">
  <div class="logo">
    <!-- logo here -->
  </div>
  <div class="main-nav">
    <!-- main navigation menu here -->
  </div>
  <div class="search-bar">
    <!-- Search bar form here -->
  </div>
 </div>
 <div class="page-content">
  <div class="main">
   <div class="article">
    <div class="article-header">
     <h1>Title of Article</h1>
     <div class="article-meta">
      <!-- Date, Author -->
     </div>
    </div>
    <div class="article-content">
     <p>Article.</p>
     <p>Content.</p>
    </div>
    <div class="article-footer">
     <!-- Tags, Categories, etc. -->
    </div>
    <div class="comments">
     <!-- Article comments and commenting form. -->
    </div>
   </div>
  </div>
  <div class="sidebar">
   <!-- Sidebar content, widgets, etc. -->
  </div>
 </div>
 <div class="footer">
  <div class="license">
   <!-- Copyright info -->
  </div>
  <div class="contact-info">
   <!-- Contact information -->
  </div>
 </div>
</body>
Thanks to an extended set of structural tags in the latest HTML standard (HTML5), this can be made easier to read more meaningful to search engines and other systems that extract information from your page (like screen readers for the blind).
HTML Tables
This section covers HTML tables, including everything you need to know about how to markup various use cases. All the major table elements and attributes are covered, including table headers, footer, body, and columns. This section provides concrete suggestions for dealing with some of the difficulties built in to the table markup and touches on real world practices.
What are tables?
A table in HTML is a way to present “tabular data” — information that can be represented in a spread-sheet. Tables in HTML are two dimensional tables with rows and columns.
| First Name | Last Name | Age |
|---|---|---|
| John | Smith | 31 |
| Jane | White | 32 |
| Terry | Jones | 41 |
Tabular data comes in many forms. The easiest way to tell if something should be in a table, as opposed to a different syntax like definition list, is to ask yourself, “Would this make sense as a spreadsheet?”
If data would make sense as a spreadsheet, it is a good candidate for a table.
Table Syntax
Basic Syntax
All tables use the <table> element, the table row ( <tr> ) element, and the table cell ( <td> ) element.
These three elements alone are enough for a simple table. A table is built one row ( <tr> ) at a time.
<table>
<tr>
 <td>John</td>
 <td>Smith</td>
 <td>31</td>
</tr>
<tr>
 <td>Jane</td>
 <td>White</td>
 <td>32</td>
</tr>
<tr>
 <td>Terry</td>
 <td>Jones</td>
 <td>41</td>
</tr>
</table>| John | Smith | 31 |
| Jane | White | 32 |
| Terry | Jones | 41 |
Table Headers: Option 1
It is often desirable to put headers at the top of a table. One way of doing this is to replace normal table cells ( <td> ) with table header cells ( <th> ).
<table>
<tr>
 <th>First Name</th>
 <th>Last Name</th>
 <th>Age</th>
</tr>
<tr>
 <td>John</td>
 <td>Smith</td>
 <td>31</td>
</tr>
<tr>
 <td>Jane</td>
 <td>White</td>
 <td>32</td>
</tr>
<tr>
 <td>Terry</td>
 <td>Jones</td>
 <td>41</td>
</tr>
</table>| First Name | Last Name | Age |
|---|---|---|
| John | Smith | 31 |
| Jane | White | 32 |
| Terry | Jones | 41 |
The benefit of this approach is that it doesnt affect the entire row, only those cells which are designated as headers. That is — its a benefit if thats what you want to happen.
Table Headers (and Body): Option 2
The other way to make table headers is to wrap the entire first row (or several rows, even) in a table-head ( <thead> ) element.
When this is done, the rest of the content is usually wrapped in a table-body ( <tbody> ) element.
<table>
<thead>
 <tr>
  <th>First Name</th>
  <th>Last Name</th>
  <th>Age</th>
 </tr>
</thead>
<tbody>
 <tr>
  <td>John</td>
  <td>Smith</td>
  <td>31</td>
 </tr>
 <tr>
  <td>Jane</td>
  <td>White</td>
  <td>32</td>
 </tr>
 <tr>
  <td>Terry</td>
  <td>Jones</td>
  <td>41</td>
 </tr>
</tbody>
</table>
Doing this allows the entire header row to be styled.
thead {
 background-color: black;
 color: white;
 font-weight: bold;
}
#thead-example thead {
background-color: black;
color: white;
font-weight: bold;
}
| First Name | Last Name | Age |
|---|---|---|
| John | Smith | 31 |
| Jane | White | 32 |
| Terry | Jones | 41 |
Perhaps more interestingly, this also allows the body of the table to be styled without affecting the head.
tbody tr:nth-child(odd) {
    background-color: #eee;
}
tbody tr:nth-child(even) {
   background-color:#fff;
}
#tbody-example thead {
background-color: black;
color: white;
font-weight: bold;
}
#tbody-example tbody tr:nth-child(odd) {
background-color: #eee;
}
#tbody-example tbody tr:nth-child(even) {
background-color:#fff;
}
| First Name | Last Name | Age |
|---|---|---|
| John | Smith | 31 |
| Jane | White | 32 |
| Terry | Jones | 41 |
Table Footer
Along with a table head and a table body, you can also define one or more rows as belonging to a table footer ( <tfoot> ). This is useful if you need to style the last row differently than the other rows. Most commonly, this might be used if the last row is a summation or calculation based on the rows above it.
<style>
thead {
 background-color: black;
 color: white;
 font-weight: bold;
}
tbody tr:nth-child(odd) {
 background-color: #eee;
}
tbody tr:nth-child(even) {
 background-color:#fff;
}
tfoot {
 background-color: #222222;
 color: white;
 font-style: italic;
}
</style>
<table>
<thead>
 <tr>
  <th>First Name</th>
  <th>Last Name</th>
  <th>Age</th>
 </tr>
</thead>
<tbody>
 <tr>
  <td>John</td>
  <td>Smith</td>
  <td>31</td>
 </tr>
 <tr>
  <td>Jane</td>
  <td>White</td>
  <td>32</td>
 </tr>
 <tr>
  <td>Terry</td>
  <td>Jones</td>
  <td>41</td>
 </tr>
</tbody>
<tfoot>
 <tr>
  <td></td>
  <td>Average Age</td>
  <td>34.67</td>
 </tr>
</tfoot>
</table>
#tfoot-example thead {
background-color: black;
color: white;
font-weight: bold;
}
#tfoot-example tbody tr:nth-child(odd) {
background-color: #eee;
}
#tfoot-example tbody tr:nth-child(even) {
background-color:#fff;
}
#tfoot-example tfoot {
background-color: #222222;
color: white;
font-style: italic;
}
| First Name | Last Name | Age |
|---|---|---|
| John | Smith | 31 |
| Jane | White | 32 |
| Terry | Jones | 41 |
| Average Age | 34.67 |
Table Columns
Sometimes you need to style a table column. This can be achieved (to some extent) by using column markup.
Columns work a little strangely in HTML. Since tables are written as a series of rows, columns are define as a secondary overlay on the table.
At the top of the table, the <colgroup> element defines how columns will be laid over the table. Inside the <colgroup> are individual column definitions, using the <col> element. Each <col> spans one or more columns and defines a stylable entity.
<table>
<colgroup>
 <col style="background-color: cyan;">
 <col style="background-color:yellow;">
 <col style="background-color:red;">
</colgroup><thead>
 <tr>
  <th>First Name</th>
  <th>Last Name</th>
  <th>Age</th>
 </tr>
</thead>
<tbody>
 <tr>
  <td>John</td>
  <td>Smith</td>
  <td>31</td>
 </tr>
 <tr>
  <td>Jane</td>
  <td>White</td>
  <td>32</td>
 </tr>
 <tr>
  <td>Terry</td>
  <td>Jones</td>
  <td>41</td>
 </tr>
</tbody>
<tfoot>
 <tr>
  <td></td>
  <td>Average Age</td>
  <td>34.67</td>
 </tr>
</tfoot>
</table>| First Name | Last Name | Age |
|---|---|---|
| John | Smith | 31 |
| Jane | White | 32 |
| Terry | Jones | 41 |
| Average Age | 34.67 |
Each <col> in the example above spans one column of table cells. If we wanted to apply styles to the two name columns as a single unit, we could make the <col> span two cell columns.
<table>
<colgroup>
 <col span="2" style="background-color: cyan;">
 <col style="background-color:yellow;">
</colgroup>
<thead>
 <tr>
  <th>First Name</th>
  <th>Last Name</th>
  <th>Age</th>
 </tr>
</thead>
<tbody>
 <tr>
  <td>John</td>
  <td>Smith</td>
  <td>31</td>
 </tr>
 <tr>
  <td>Jane</td>
  <td>White</td>
  <td>32</td>
 </tr>
 <tr>
  <td>Terry</td>
  <td>Jones</td>
  <td>41</td>
 </tr>
</tbody>
<tfoot>
 <tr>
  <td></td>
  <td>Average Age</td>
  <td>34.67</td>
 </tr>
</tfoot>
</table>| First Name | Last Name | Age |
|---|---|---|
| John | Smith | 31 |
| Jane | White | 32 |
| Terry | Jones | 41 |
| Average Age | 34.67 |
There are problems with using the <colgroup> markup, unfortunately:
<col>only supports styles related to background, width, border, and visibility. This means you cannot, for example, style the first column of a table in bold.- Because
<col>is neither a parent nor a child element of any table sections (head, body, footer), you cannot target a specific column within a section. - Moreover, the table sections and table rows are more specific than the
<col>element, so styles applied to the sections will override any style applied to the
Because of these issues, <col> has limited usefulness for table styling.
There are two common solutions to this: class attributes and nth-child selectors.
To use class attributes, simply apply the column-specific class to each <td> (and/or <th>) element.
<table>
<thead>
 <tr>
  <th class="col1">First Name</th>
  <th class="col2">Last Name</th>
  <th class="col3">Age</th>
 </tr>
</thead>
<tbody>
 <tr>
  <td class="col1">John</td>
  <td class="col2">Smith</td>
  <td class="col3">31</td>
 </tr>
 <tr>
  <td class="col1">Jane</td>
  <td class="col2">White</td>
  <td class="col3">32</td>
 </tr>
 <tr>
  <td class="col1">Terry</td>
  <td class="col2">Jones</td>
  <td class="col3">41</td>
 </tr>
</tbody>
<tfoot>
 <tr>
  <td class="col1"></td>
  <td class="col2">Average Age</td>
  <td class="col3">34.67</td>
 </tr>
</tfoot>
</table>
Of course, this adds a lot of markup which isnt strictly required. A better way would be to use the :first-child, :nth-child, and :last-child CSS selectors.
For example, what if we wanted the First Name column to be bold, and the ages to display in a red,monospace font — along with the other header and footer styles defined earlier?
<style>
thead {
 background-color: black;
 color: white;
 font-weight: bold;
}
tbody tr:nth-child(odd) {
 background-color: #eee;
}
tbody tr:nth-child(even) {
 background-color:#fff;
}
tfoot {
 background-color: #222222;
 color: white;
 font-style: italic;
}
td:first-child {
 font-weight: bold;
}
td:last-child {
 font-family: monospace;
 color: red;
</style>
<table>
<thead>
 <tr>
  <th>First Name</th>
  <th>Last Name</th>
  <th>Age</th>
 </tr>
</thead>
<tbody>
 <tr>
  <td>John</td>
  <td>Smith</td>
  <td>31</td>
 </tr>
 <tr>
  <td>Jane</td>
  <td>White</td>
  <td>32</td>
 </tr>
 <tr>
  <td>Terry</td>
  <td>Jones</td>
  <td>41</td>
 </tr>
</tbody>
<tfoot>
 <tr>
  <td></td>
  <td>Average Age</td>
  <td>34.67</td>
 </tr>
</tfoot>
</table>
#pseudocolumns-example thead {
background-color: black;
color: white;
font-weight: bold;
}
#pseudocolumns-example tbody tr:nth-child(odd) {
background-color: #eee;
}
#pseudocolumns-example tbody tr:nth-child(even) {
background-color:#fff;
}
#pseudocolumns-example tfoot {
background-color: #222222;
color: white;
font-style: italic;
}
#pseudocolumns-example td:first-child {
font-weight: bold;
}
#pseudocolumns-example td:last-child {
font-family: monospace;
color: #a20000;
}
#pseudocolumns-example tfoot td:last-child {
color: #ff3e3e;
}
| First Name | Last Name | Age |
|---|---|---|
| John | Smith | 31 |
| Jane | White | 32 |
| Terry | Jones | 41 |
| Average Age | 34.67 |
Breaking the Grid: rowspan and colspan
Sometimes your tabular data doesnt fit neatly into the grid created by a table. If you need a table cell to span two or more columns, use the colspan attribute. If you need to span more than one row, use rowspan.
For example, our table of ages has a footer row with a label for “Average Age.” This doesnt need to be squashed into the second column. It would look better if the label span the first two cells in the last column.
<tfoot>
 <tr>
  <td colspan="2">
   Average Age:
  </td>
  <td>
   34.67
  </td>
 </tr>
</tfoot>
#colspan-example thead {
background-color: black;
color: white;
font-weight: bold;
}
#colspan-example tbody tr:nth-child(odd) {
background-color: #eee;
}
#colspan-example tbody tr:nth-child(even) {
background-color:#fff;
}
#colspan-example tfoot {
background-color: #222222;
color: white;
font-style: italic;
}
| First Name | Last Name | Age |
|---|---|---|
| John | Smith | 31 |
| Jane | White | 32 |
| Terry | Jones | 41 |
| Average Age | 34.67 | |
A similar syntax can be used to span two rows. (Well have to add a column for this, since we dont have any good candidates for cell-merging.)
<table>
<thead>
 <tr>
  <th>First Name</th>
  <th>Last Name</th>
  <th>Age</th>
  <th>Cohort</th>
 </tr>
</thead>
<tbody>
 <tr>
  <td>John</td>
  <td>Smith</td>
  <td>31</td>
  <td rowspan="2">Oregon Trail Generation</td>
 </tr>
 <tr>
  <td>Jane</td>
  <td>White</td>
  <td>32</td>
 </tr>
 <tr>
  <td>Terry</td>
  <td>Jones</td>
  <td>41</td>
  <td>Generation X</td>
 </tr>
</tbody>
<tfoot>
 <tr>
  <td colspan="2">Average Age</td>
  <td>34.67</td>
  <td>
 </tr>
</tfoot>
</table>
#rowspan-example thead {
background-color: black;
color: white;
font-weight: bold;
}
#rowspan-example tbody tr:nth-child(odd) {
background-color: #eee;
}
#rowspan-example tbody tr:nth-child(even) {
background-color:#fff;
}
#rowspan-example tfoot {
background-color: #222222;
color: white;
font-style: italic;
}
| First Name | Last Name | Age | Cohort |
|---|---|---|---|
| John | Smith | 31 | Oregon Trail Generation |
| Jane | White | 32 | |
| Terry | Jones | 41 | Generation X |
| Average Age | 34.67 | ||
What are tables not?
It shouldnt really have to be said, but:
Tables are not for layout. Tables should not be used as a convenient way to make columns and headers at the level of a whole document.
This is sometimes still an issue today because before the era of standards-based web browsers and semantic markup, many people used tables (with a lot of complex style rules) to layout HTML documents.
This was a bad idea for a number of reasons, even then: it made the source document almost unreadable, it broke semantics completely, it made it nearly impossible to restyle a page without recoding all of it.
Today there is a new reason to avoid this — a reason that trumps all the others: it doesnt work on mobile. Table-based layout is definitively not responsive, incapable of gracefully scaling to fit various screen sizes.
Besides all of that — compared to the right way of doing things, table-based layout is much more difficult. Just dont do it.
Table Edge Case — side-by-side translations
One non-data use for tables that is fairly common is side by side translation. Consider the following excerpt from Dantes The Divine Comedy.
#inferno-opening {
border: none;
border-spacing: 10px;
}
| Nel mezzo del cammin di nostra vita mi ritrovai per una selva oscura, ché la diritta via era smarrita. | Midway upon the journey of our life I found myself within a forest dark, For the straightforward pathway had been lost. |
| Ahi quanto a dir qual era è cosa dura esta selva selvaggia e aspra e forte che nel pensier rinova la paura! | Ah me! how hard a thing it is to say What was this forest savage, rough, and stern, Which in the very thought renews the fear. |
| Tant è amara che poco è più morte; ma per trattar del ben chi vi trovai, dirò de laltre cose chi vho scorte. | So bitter is it, death is little more; But of the good to treat, which there I found, Speak will I of the other things I saw there. |
This is, of course, merely a table with a little styling:
<style>
#inferno-opening {
border: none;
border-spacing: 10px;
}
</style>
<table id="inferno-opening">
<tr>
<td>
Nel mezzo del cammin di nostra vita <br>
mi ritrovai per una selva oscura, <br>
ché la diritta via era smarrita. <br>
</td><td>
Midway upon the journey of our life <br>
I found myself within a forest dark, <br>
For the straightforward pathway had been lost. <br>
</td>
</tr>
<tr>
<td>
Ahi quanto a dir qual era è cosa dura <br>
esta selva selvaggia e aspra e forte <br>
che nel pensier rinova la paura! <br>
</td>
<td>
Ah me! how hard a thing it is to say <br>
What was this forest savage, rough, and stern, <br>
Which in the very thought renews the fear. <br>
</td>
</tr>
<tr>
<td>
Tant è amara che poco è più morte;<br>
ma per trattar del ben chi vi trovai,<br>
dirò de laltre cose chi vho scorte.<br>
</td>
<td>
So bitter is it, death is little more;<br>
But of the good to treat, which there I found,<br>
Speak will I of the other things I saw there.<br>
</td>
</tr>
</table>
The benefit of using tables in this example is that each row automatically adjusts its height based on the content in all the cells in the row. This keeps translated content next to its source, even if one language is more verbose than the other.
Many developers use this pattern for translated text, and it is perfectly fine. However, there may be a better way.
Consider the following HTML:
<div id="canto-1">
 <div class="italian">
  <p id="it-1" class="p1">
  Nel mezzo del cammin di nostra vita <br>
  mi ritrovai per una selva oscura, <br>
  ché la diritta via era smarrita. <br>
  </p>
  <p id="it-2" class="p2">
  Ahi quanto a dir qual era è cosa dura <br>
  esta selva selvaggia e aspra e forte <br>
  che nel pensier rinova la paura! <br>
  </p>
  <p id="it-3" class="p3">
  Tant è amara che poco è più morte; <br>
  ma per trattar del ben chi vi trovai, <br>
  dirò de laltre cose chi vho scorte. <br>
  </p>
 </div>
 <div class="english">
  <p id="en-1" class="p1">
  Midway upon the journey of our life <br>
  I found myself within a forest dark, <br>
  For the straightforward pathway had been lost. <br>
  </p>
  <p id="en-2" class="p2">
  Ah me! how hard a thing it is to say <br>
  What was this forest savage, rough, and stern, <br>
  Which in the very thought renews the fear. <br>
  </p>
  <p id="en-3" class="p3">
  So bitter is it, death is little more; <br>
  But of the good to treat, which there I found, <br>
  Speak will I of the other things I saw there. <br>
  </p>
 </div>
</div>
Using CSS to float the two languages next to each other, and JS to ensure that each pair of paragraphs (en-1 and it-2, etc.) is the the same height, the same effect can be created without recourse to table-based layout.
Advantages:
- Some screens may not be wide enough to fit both text-columns side-by-side. Using this approach, one or the other can be viewed individually.
- This allows multiple paragraphs of one text to be selected for copy-and-paste. With the table-based version, this is not possible.
Disadvantages:
- Requires JavaScript
- Each paragraph must be IDed in the markup.
Tables in the Real World
The default styles for tables are really quite unattractive, and therefore seldom used. Most front-end UI frameworks (like Bootstrap and Skeleton) provide highly improved default table styling.
Even if you arent using a front-end UI framework, it may be a good idea to pull in the styles for tables from one of the light-weight, modular frameworks. Tables have a lot of weird styling edge cases that you probably wont cover if you try to fix the styling yourself from scratch.
Tables Are Powerful
Tables are probably the most complicated markup structure in HTML, and they have been abused in the past in order to serve as containers for layout. However, when tabular data needs to be displayed on a page, tables are the way to go.
HTML Forms
This section covers HTML forms in detail. Every variety of form element and user-input interface is covered, along with tips for organizing and styling forms.
Form Basics
An HTML form is a set of UI elements that allow a user to provide data, along with a mechanism for submitting that data to the server.
A very basic example might look like:
Even in this simple form, we can see there is an opportunity for the user to input data (first and last name) and the send that data to a server.
Forms can become very complicated, and there are many interesting input types now available thanks to HTML5, but no matter how complicated they get, the heart of an HTML form is the same: a series of user input elements together with a way to submit the input to the server.
How a Form Works
Before diving in to all the different user interface elements, it would be a good idea to get a clear grasp on how a form functions when sending user data to a server.
A form creates an HTTP request — the same type of request that your browser sends when loading a page. The contents of that request are determined by the values inputted into the form. The response from the server is essentially the same as the type of response received from a page load — and the browser responds the same way, by loading the response as a new page.
In other words: a form submission is essentially the same as a request for a new page, except the request carries with it user-defined data provided through form inputs.
What happens with the requested data is a subject for server-side scripting (PHP, Ruby, etc.), so we wont worry about that.
HTTP Requests and Form Methods
Forms can send two different types of requests:
POSTGET
These two request types have different meanings, which cause them to behave differently and so they should be used in different situations.
__The Semantic Difference Between POST and GET
A GET is the default HTTP request, and is the same type of request used by your browser when you type an address into the address bar. It is a request to “get” something.
A POST is not a request to get something, but rather a request to send or submit something. You can think about posting a letter, posting bail, or posting a sign.
The Technical Difference
When using a GET request, the input parameters are included into the URL.
http://example.com/search?term=thing+i+am+searaching+for
With a POST request, the input parameters are not included in the URL, but are rather sent in the body of the request.
The difference here makes sense based on the meaning of each type of request:
- A
GETrequest is asking for a specific resource, defined by the URL. Therefore, the details of that request should be included in the URL, because those details define what resource the request is actually asking for. - A
POSTrequest is sending a message to a particular address. The address is defined in the URL, and the message is defined in the body of the request.
When to use POST and GET in Forms
If a form is being used to request data and information — such as a search form — and isnt primarily intended to add or edit content, it is probably best to use a GETrequest.
Other indications GET is the right choice:
- Two different users submitting the same details into the form should get identical responses.
- The response from the form is something one might want to link to directly.
- Other than logging the traffic and activity, your database is the same after the form submission as it was before.
- The form is a search form.
- The user is using the form in order to get some information from your site, not to provide information to you.
If a form is being used to submit information, a POST is most likely the right choice.
Other indications that POST is the right choice:
- It is highly unlikely that two different users would submit identical information.
- It is highly unlikely that a single user would submit the exact same information more than once.
- The form is used to submit information to the site, not to retrieve information from it.
- Linking to the response page directly would be meaningless.
- Your database is different after the form is submitted than it was before.
Additionally, there are two reasons why a POST should be used, even if a GET request makes more sense for other reasons:
- For security reasons, it is preferable not to put the input parameters into the URL.
- The length of the URL using a
GETrequest would exceed 2000 characters.
Where to Define POST or GET
Every form submits information to the server using either the GET or the POST request type. This is defined with the method attribute in the <form> element.
<form method="GET">
<!-- form here -->
</form>
<form method="POST">
<!-- form here -->
</form>
The default method is GET, which has led to many unfortunate used of GET when POST would have been the right choice. Dont rely on the default — use the correct method for your situation.
Form Action — The Requested URL
A form either gets a resource (defined by a URL) or posts information to a resource (defined by a URL).
The URL of the resource is defined by the action attribute in a form.
<form action="search.php" method="GET">
<!-- form here -->
</form>
<form action="edit-post.php" method="POST">
<!-- form here -->
</form>
As with href and src attributes, the URL can be relative (action="search.php") or absolute (action="http://example.com/search.php").
If the action attribute is omitted, the default URL is the current page. (This will still trigger a reload of the page, under normal circumstances.
Other attributes of <form>
The following attributes apply to the <form> element:
accept-charset— Defines the character set used for submitting form data. The default is the same as the documents character set, so this is usually not needed.action— The target URL for form submission. Explained above.autocomplete— Enables autocomplete in supported browsers. Values areonoroff. The default value ison. It is possible to override this setting on individual form elements.enctype— Specifies how form data should be encoded. This applies toPOSTforms only. Values are:application/x-www-form-urlencoded— All characters are encoded before sent. Spaces are converted to+symbols, and special characters are converted to ASCII HEX values. This is the default.multipart/form-data— Characters are not encoded. This is required if you are using a file uploader in your form.text/plain— Spaces are converted to+symbols, but special characters are not encoded.
method—GETorPOSTname— The name of the form. It is usually a good idea to include one, and theres no reason it couldnt be the same as theid.novalidate— Specifies that the form data should not automatically be validated when it is submitted. This attribute accepts no value. (Be careful with this.)target— Equivalent to thetargetattribute on anchor links (<a>), this attribute specifies where the response from the form should be displayed._self— Opens response in same window. This is the default._blank— Opens the response in a new window or tab._parent— Opens the response in the forms parent window or frame._top— Opens the response in the full body of the window.- framename — You can also specify the name of a frame to open the response into, if you have previously opened and named frames in the page.
Using Form Elements
Element Names
When a form is submitted to the server, the request — whether it is a POST or a GET — contains the data entered into the form by the user. This data is sent in the form of a series of key-value pairs.
The value for each form element is the data entered by the user. The key for each element is the name attribute for that element. For this reason it is critical that every data-entry element in your form have a unique name attribute.
<form action="" method="post">
<label for="firstName">First Name</label>
<input type="text" name="firstName" id="firstName">
<label for="firstName">Last Name</label>
<input type="text" name="lastName" id="lastName">
<input type="submit">
</form>
Element Labels
The <label> element is very important, as it defines the label for any form element.
Some designers do not like to use form labels because they prefer to place the labels text into the input element.
<!-- Don't do this -->
<form action="" method="post">
<input type="text" name="firstName" placeholder="First Name">
<input type="text" name="lastName" placeholder="Last Name">
<input type="submit">
</form>
While this might look better for your design, theres are two serious usability problems:
- The labels are used by screen readers to tell blind users what the fields are for.
- Not all browsers support the “placeholder” attribute.
Without proper labeling, you risk some users being unable to complete your form.
It is also unfortunately too common for people to include the <label> element, but not use it correctly.
For a label element to work properly, the for attribute should contain the value of the id property on the input element.
<label for="firstName">First Name</label>
<input type="text" name="firstName" id="firstname">
This serves two purposes:
- Making sure that the markup specifies which element the label applies to helps screen readers connect labels to input elements, so that blind users can better navigate your form.
- Clicking on the label will act like clicking on the input element. This improves usability greatly, especially on click-to-toggle elements like checkboxes and radio-buttons.
In addition to using the for attribute, a label can be bound to an input by including the input inside the <label> element.
<form>
 <label><input type="radio" name="color" value="red"> Red</label>
 <label><input type="radio" name="color" value="blue"> Blue</label>
 <label><input type="radio" name="color" value="green"> Green</label>
</form>Setting Default Values
The value attribute corresponds with current value of a form input element. By including a value for value, you can set a default (starting) state for any form element.
<form action="" method="post">
<label for="firstName">First Name</label>
<input type="text" name="firstName" id="firstName"value="John">
<label for="lastName">Last Name</label>
<input type="text" name="lastName" id="lastName" value="Smith">
<input type="submit">
</form>
Some developers are tempted to use the value attribute as a way to provide placeholder or user-hint text. This is usually a bad idea, because if the value is not replaced, the placeholder text will be sent to the server, which almost never the desired action.
In the example above (a persons name), it would be a bad idea to use the “John Smith” values just as a placeholder or hint to the user — the user might submit this to the server. However, if this was (for example) a profile page, where users can update their own information or leave it the same, then using value this way makes sense.
If the user changes the input data on the form element, the value attribute changes as well. If you were to use JavaScript to get the elements value, you would find it to be the updated value, not the original value in the document source.
Disabling Elements
Most elements can be disabled by adding the disabled attribute to them. Disabled elements cannot be clicked on or edited.
<form action="" method="post">
<label for="firstName">First Name</label>
<input type="text" name="firstName" value="John" id="firstName">
<label for="lastName">Last Name</label>
<input type="text" name="lastName" value="Smith" id="lastName" disabled>
<input type="submit">
</form>
A disabled elements send no value when the form is submitted, so be careful about using this to display (for example) profile data you dont want the user to change.
The <input> element
The most important and versatile form element is <input>. Unlike most other form elements which have one function, the <input> element is used for a wide variety of functions, from simple text to complex interaction to buttons (the submission button on a form is usually an <input> element).
The different types of input controls are specified by the type attribute on the <input> element.
Type: Text
The most basic (and default) input type is text. This defines a single-line text input as would be used for a username in a log-in form or to enter a query in a search form.
<form>
 <input type="text">
</form>
The list attribute can be used to specify a list of predefined values for an input.
<form>
 <input type="text" list="options">
 <datalist id="options">
  <option value="red">
  <option value="green">
  <option value="blue">
 </datalist>
</form>
Type: Submit
The second most basic input type is the submit input, which defines the forms submit button.
<input type="submit">The default text on the submit button is “Submit”. This can be changed with the value attribute.
<form>
<input name="search">
<input type="submit" value="Search">
</form>
Another input type creates a similar GUI as the submit type — the button type. However, do not use the button for generic form submission. (It wont work.) And dont use the submit button for generic buttons within a form — itll work the wrong way.
Type: Password
If you want to obscure the characters entered into a text input, use the password type.
<form>
<label for="userName">User Name</label><br>
<input name="userName" type="text" id="userName"><br>
<br>
<label for="password">Password</label><br>
<input type="password" name="password" id="password"><br>
<br>
<input type="submit" value="Log In">
</form>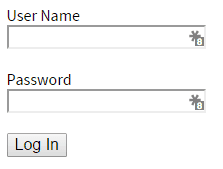
Text Input Types with Validation
Several input types create the same GUI — a box to type text into — but create different conditions for validating input.
For example, the email type checks to make sure that the data entered conforms to standard email address format (some text, followed by the @ sign, followed by text that encompasses at least one dot).
These types are:
emailnumber— Field accepts numbers only.tel— A telephone number. (Validation for telepone numbers is not widely supported in browsers.)url— Accepts only well-formed URLs.
These values are validated when the form is submitted, unless the novalidate attribute is specified on the form, or the formnovalidate attribute is specified on the individual elements.
Types with Date or Time Selectors
Several input types create pop-up UI elements for selecting a date and/or a time from a calendar. These UI elements are browser based, and not universally supported.
These types are:
datedatetimedatetime-localmonthtimeweek
<form>
<label for="date">Example of Date Input</label> <br>
<input type="date" name="date" id="date"> <br>
<br>
<label for="datetime">Example of Datetime Input</label> <br>
<input type="datetime" name="datetime" id="datetime"> <br>
<br>
<label for="datetime-local"> Example of Datetime Local</label> <br>
<input type="datetime-local" name="datetime-local" id="datetime-local"> <br>
<br>
<label for="month">Example of Month Input</label> <br>
<input type="month" name="month" id="month"> <br>
<br>
<label for="time">Example of Time Input</label> <br>
<input type="time" name="time" id="time"> <br>
<br>
<label for="week">Example of Week Input</label> <br>
<input type="week" name="week" id="week">
</form>
<!-- These input controls will look different in different browsers. -->Type: Radio
Radio buttons are a type of form input where only one item in a set can be chosen.
Each button in a set of radio buttons is its own <input> button, and there is no requirement that they be bound together as children of a containing element.
The attribute that binds several radio buttons into a set is the name attribute.
<form>
<input type="radio" name="shape" value="square"> Square<br>
<input type="radio" name="shape" value="circle"> Circle<br>
<input type="radio" name="shape" value="triangle"> Triangle<br>
<input type="radio" name="color" value="red"> Red<br>
<input type="radio" name="color" value="blue"> Blue<br>
<input type="radio" name="color" value="Green"> Green
</form>The value submitted to the server for each name is the contents of the value attribute of the selected radio button for each pair. Any labeling is for the user only, and has no effect on the value passed to the server.
The best way to label the inputs in a set of radion buttons is to wrap the <input> element and the label text into a <label> element. This makes the label text clickable, which is easier to use.
<form>
 <label>
  <input type="radio" name="shape" value="square">
  Square
 </label>
 <br>
 <label>
  <input type="radio" name="shape" value="circle">
  Circle
 </label>
 <br>
 <label>
  <input type="radio" name="shape" value="triangle">
  Triangle
 </label>
 <br>
 <label>
  <input type="radio" name="color" value="red">
  Red
 </label>
 <br>
 <label>
  <input type="radio" name="color" value="blue">
  Blue
 </label>
 <br>
 <label>
  <input type="radio" name="color" value="Green">
  Green
 </label>
</form>Notice that since the <label> element wraps the <input> element, the for and id attributes are not needed.
Type: Checkbox
The checkbox input type can be used to define one of two types of input controls (that both look like checkboxes).
The first type is a single key which may have several value (sometimes called multi-select). The second type is a boolean (TRUE/FALSE) key.
To create an array of values which may be assigned to the same key, simply create a group of checkbox inputs with the same name attribute.
<b>Colors I like</b><br>
<form>
<label>
 <input type="checkbox" name="color" value="blue">
 Blue
</label>
<br>
<label>
 <input type="checkbox" name="color" value="green">
 Green
</label>
<br>
<label>
 <input type="checkbox" name="color" value="yellow">
 Yellow
</label>
<br>
<label>
 <input type="checkbox" name="color" value="red">
 Red
</label>
</form>
Colors I like
In this example, multiple color selections can be made. They will each be sent to the server as individual parameters in the request. For example, if all of them were selected in a GET form, the requested URL would look like:
http://example.com?color=blue&color=green&color=yellow&color=redYou can also use checkboxes individually to represent boolean (TRUE/FALSE) values.
<form>
<label>
 <input type="checkbox" name="tos" value="TRUE">
 By clicking here you certify that you agree to our Terms of Service.
</label>
</form>
By clicking here you certify that you agree to our Terms of Service.
Of course, any value would work, as long as the server-side code knows how to interpret the presence of the attribute.
In either case, if no boxes are checked, the name key is not sent in the request.
For example, in the colors example above, if none of the options were checked, the submitted data would not include any reference to the color input key. (Not even an empty set.)
Type: Button
A button can be created in a form using the input type of button. Unlike other input types, this carries no specific meaning within a form, and is usually used only to trigger some JavaScript action.
<input type="button" value="Button Label" onclick="alert('I am a button!')">Type: Color
New in HTML5 — and only supported in some browsers — is a color-picking input type.
In browsers that support it, clicking on this element brings up a GUI for selecting a color. The value submitted to the server is an HTML/CSS hex-color value (ex. white = #ffffff).
<form>
<label for="favorite-color">What is your favorite color?</label><br>
<input type="color" name="favorite-color" id="favorite-color">
</form>
<!-- This will look different in different browsers, and may not be supported at all. -->Type: Range
Also new in HTML5, and also dependent on browser support, is the range input. This input appears as a slider, which the user can move horizontally.
The input element needs to define the highest and lowest value in the range. The value set by the user will be submitted with the form.
<form>
<label for="form-understanding">How well do you understand forms?</label><br><br>
<i>Not at all.</i>
<input type="range" name="form-understanding" id="form-understanding" min="0" max="100">
<i>Very well.</i>
</form>Not at all.
Very well.
Type: Image
The image input replaces a submit button, allowing you to use an image as the button.
In addition to simply changing the way the button works, the submission request also includes the X and Y coordinates of the users click within the image. This allows the submission form to acts as a server-side image map.
<form>
<input type="image" src="example.jpg">
</form>
Type: File
A form can include a file-upload input with the file type. The exact display and functionality of the file-upload GUI is controlled by the browser. File handling (where the file will be saved) also has to be specified on the server-side.
<form>
<input type="file" name="file-upload">
</form>
You can limit the files accepted by the file input by using the accept attribute, which allows you to specify either a list of extensions or a list of MIME types.
<!-- Specify a list of file extensions. -->
<form>
<input type="file" name="extension-limited-uploader" accept=".png, .gif, .jpg, .jpeg">
</form>
<!-- Specify a list of MIME types. -->
<form>
<input type="file" name="mime-limited-uploader" accept="image, image/png, image/gif, image/jpg, image/jpeg">
</form>
Browser support for file-extension is not universal, so the MIME-type list is probably the better way to go. (See this list of MIME types for details.)
Even if you use the accept attribute to limit the file extensions which can be uploaded through the form, it is important to verify both the file type and the file contents on the server. For at least two reasons:
- A malicious (or careless) user can misname a file with the wrong extension. The
acceptlimitation on a file uploader only looks at the extension, not the actual file format, so there is no guarantee that a file is of the right type. - It is possible to bypass the form and submit a request directly to the server. (This is why ALL inputs should be validated on the server.)
Type: Hidden
You can designate a non-visible input element, whose value will be included when the form is submitted, by using the type of hidden.
<input type="hidden" name="hidden-value" value="">The most common use for a hidden input is as a holder for a value generated elsewhere on the page, usually through JavaScript. User interaction on the page causes a value to be assigned to the hidden input, which is then included in the form submission.
Attributes of <input>
The <input> element has a large number of attributes. Some of them are only applicable to particular input types, and others can be used with any input.
accept— Defines a list of file types, either by extension or by MIME type. Only used withtype="file".alt— Defines an alt text. Only used withtype="image".autocomplete— Specifies whether the input field should autocomplete. Values areonoroff. Overrides the form-levelautocompleteattribute. Only applicable to text-based inputs.autofocus— Specifies that the<input>should be in focus when the page loads. No value required. Should only be used once in a document.checked— Sets aradioorcheckboxinput to the checked state.disabled— Disables an<input>element. Disabled elements do not send their value when the form is submitted. No value is required.form— Specifies a<form>to which the<input>belongs, for use when the<input>element is outside the<form>element. Value is theidof the target form. This attribute is not universally supported.formaction— Specifies a URL to submit the form to. Overrides theactionattribute of the<form>itself, or replaces it. This is only used on thesubmitorimagetypes. The only reason to use this instead of the formsactionattribute is if a form requires multiple submission buttons with different actions.formenctype— Specifies the character encoding of the submitted data. Overrides theenctypeattribute of the<form>element. This is only used on thesubmitandimagetypes. Values:application/x-www-form-urlencodedmultipart/form-datatext/plain
formmethod— Specifies the method (getorpost) of the form submission. Overrides themethodattribute of the<form>element. This is only used on thesubmitandimagetypes.formnovalidate— Specifies that the form data should not be validated before submission. Overrides thenovalidateattribute of the<form>element. This is only used on thesubmitandimagetypes. This attribute requires no value.formtarget— Specifies the browser context in which the response is to be displayed. Overrides thetargetattribute of the<form>element. This is only used on thesubmitandimagetypes. Values:_blank_self_parent_top- framename
height— Specifies the height, in pixels, of animageinput. It would be better to use CSS to specify this.list— Specifies theidof a<datalist>element containing pre-defined options. Only used with text-based inputs.max— Specifies the maximum value for a number or date-based input.maxlength— Specifies the maximum number of characters in a text-based input.min— Specifies the minimum value for a number or date-based input.multiple— Specifies that the user can enter more than one value. Used withemailandfileinput types. This attribute requires no value.name— Specifies the name of the input. Used as the key in a key-value pair representing the input when the form is submitted. A uniquenameshould be provided for all form elements.pattern— Defines a regular expression to be used for validating the value of a text-based input.placeholder— Defines placeholder or “helper” text for a text-based input.readonly— Specifies that an input cannot be edited by the user. Similar in behavior to thedisabledattribute, except readonly inputs do send their value to the server when the form is submitted. Often used with JavaScript to ensure a user cannot edit a value until certain conditions are met, or cannot a value after certain conditions are met. This attribute requires no value.required— Specifies that the<input>must have a value, or the form will not be submitted. This attribute requires no value.size— Specifies the width, in characters, of a text-based input element. Using CSS is typically a better way to accomplish this.src— Specifies the URL of an image for animageinput.step— Defines the interval between valid inputs in a number-based input.type— Specifies the type of the<input>element. Default istext. Not all possible values are supported in all browsers. Values:buttoncheckboxcolordatedatetimedatetime-localemailfilehiddenimagemonthnumberpasswordradiorangeresetsearchsubmitteltexttimeurlweek
value— Specifies the starting value of an input.width— Specifies the width, in pixels, of animageinput. Using CSS is typically a better way to accomplish this.
Text Area
If you want a short, single line of text for input, use the <input type="text"> element. But if you need a larger area for a longer message, use the <textarea> tag.
<style>
textarea {
 height: 6em;
 width: 50em;
}
</style>
<form>
<label for="msg">Your message:</label><br/>
<textarea name="msg" id="msg"></textarea>
</form>
#textarea-example textarea {
height: 6em;
width: 30em;
}
Any text inside the element will be displayed in the text area.
<form>
<label for="msg">Your message:</label><br/>
<textarea name="msg" id="msg">This text is inside the textarea element. It will be seen by the user. If the user doesn't change it, it will be submitted with the form.</textarea>
</form>
#textarea-text-example textarea {
height: 6em;
width: 30em;
}
Attributes for <textarea> are:
autofocus— Specifies that the<textarea>should be in focus when the page loads. Should only be used once on a document. This attribute requires no value.cols— Specifies the width, in characters, of the text area. This is better accomplished with CSS.disabled— Disables the<textarea>. Disabled form elements do not send their value to the server when the form is submitted. This attribute requires no value.form— Specifies theidof a<form>to which the<textarea>belongs, for use the<textarea>is not contained within the<form>element. Not supported in all browsers.maxlength— Specifies the maximum number of characters allowed in the<textarea>.name— Defines the name of the<textarea>, and serves as the key for the key-value pair representing the<textarea>in the form submission request. All form elements should include a uniquename.placeholder— Defines placeholder or helper text to be displayed inside the<textarea>before the user types into it.readonly— Specifies that an input cannot be edited by the user. Similar in behavior to thedisabledattribute, except readonly elements do send their value to the server when the form is submitted. Often used with JavaScript to ensure a user cannot edit a value until certain conditions are met, or cannot a value after certain conditions are met. This attribute requires no value.required— Specifies that the<textarea>must have a value, or the form will not be submitted. This attribute requires no value.rows— Specifies the height, in lines of text, of the<textarea>. In some cases this is preferable to using CSS (such as when the actual number of lines is relevant), but for simply defining the height, CSS is usually a better choice.wrap— Specifies whether the input should hard wrap (insert a line break character at every line break) or soft wrap (insert a line break character only where the user defines a line break). Values aresoftorhard.
Select (Drop down)
To define a drop-down selector, use the <select> element with <option> child elements.
<form>
 <label for="favorite-color">What is your favorite color?</label><br>
 <select name="favorite-color" id="favorite-color">
  <option value="red">Red</option>
  <option value="blue">Blue</option>
  <option value="green">Green</option>
  <option value="yellow">Yellow</option>
 </select>
</form>
Red
Blue
Green
Yellow
Options can be grouped together and given group-level labels with the <optgroup> element.
<form>
 <label for="favorite-color">What is your favorite color?</label><br>
 <select name="favorite-color" id="favorite-color">
  <optgroup label="Primary Colors">
   <option value="red">Red</option>
   <option value="blue">Blue</option>
   <option value="yellow">Yellow</option>
  </optgroup>
  <optgroup label="Secondary Colors">
   <option value="green">Green</option>
   <option value="orange">Orange</option>
   <option value="purple">Purple</option>
  </optgroup>
  <optgroup label="Not Actually Colors">
   <option value="black">Black</option>
   <option value="white">White</option>
   <option value="gray">Gray</option>
  </optgroup>
 </select>
</form>
Red
Blue
Yellow
Green
Orange
Purple
Black
White
Gray
The content inside the <option> element provides a user-facing label, but the value sent to the server is defined by the value attribute, not by the content of the element.
Attributes of the <select> element:
autofocus— Specifies that the<select>element should be in focus when the page loads. Should only be used once on a document. This attribute requires no value.disabled— Disables the element. Disabled elements do not send the value to the server when the form is submitted. This attribute requires no value.form— Specifies theidof the<form>to which this<select>element belongs, for use then the<select>element is not contained within the<form>. Not supported in all browsers.multiple— Specifies that the user may select more than one<option>. Multiple selections are sent as multiple key-value pairs. This attribute requires no value.name— The name of the element, which serves as the key in a key-value pair representing the<select>element when the form is submitted to the server.required— Specifies that the element must have a selected value, or else the form will not be submitted. This attribute requires no value.size— Specifies the number of visible options. The default is 1.
Attribute for the <option> elements are:
disabled— Specifies that the<option>can not be selected.label— Specifies the label for the<option>, which replaces the contents of the element in the drop-down display.selected— Specifies that the<option>should be pre-selected on page-load.value— Defines the value sent to the server.
Organizing a Form
A large or complex form can be made easier to style and use by grouping form elements into <fieldset> containers. Each <fieldset> can be titled with a <legend> element.
<form>
 <fieldset>
  <legend>Personal Information</legend>
  <label for="firstName">First Name</label> <br>
  <input name="firstName" id="firstName"> <br>
  <br>
  <label for="lastName">Last Name</label> <br>
  <input name="lastName" id="lastName"> <br>
  <br>
  <label for="birthDate">Birth Date</label> <br>
  <input name="birthDate" id="birthDate"> <br>
 </fieldset>
 <fieldset>
  <legend>Favorite Things</legend>
  <label for="favoriteColor">Favorite Color</label>
  <select name="favoriteColor" id="favoriteColor">
   <optgroup label="Primary Colors">
    <option value="red">Red</option>
    <option value="blue">Blue</option>
    <option value="yellow">Yellow</option>
   </optgroup>
   <optgroup label="Secondary Colors">
    <option value="green">Green</option>
    <option value="orange">Orange</option>
    <option value="purple">Purple</option>
   </optgroup>
   <optgroup label="Not Actually Colors">
    <option value="black">Black</option>
    <option value="white">White</option>
    <option value="gray">Gray</option>
   </optgroup>
  </select>
  <label for="favoriteShape">Favorite Shape</label>
  <select name="favoriteShape">
   <option value="triangle">Triangle</option>
   <option value="square">Square</option>
   <option value="circle">Circle</option>
  </select>
 </fieldset>
 <input type="submit">
</form>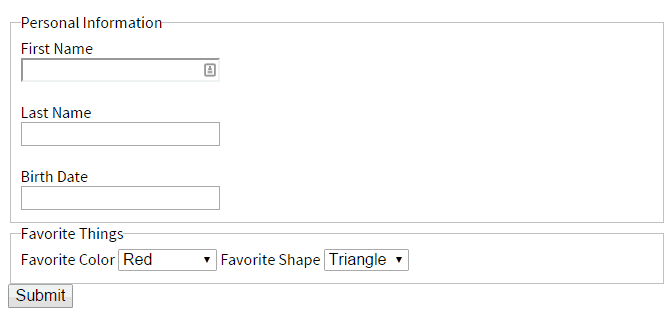
Styling Forms
The default display of form elements in most browsers is extremely unattractive. Besides the general “battleship gray” of buttons and drop-down UI, there are typically serious problems with alignment, line height, and spacing.
This causes two problems:
- Many of the form elements look bad individually.
- For example — Radio Buttons and Check Boxes do not usually align properly with their own labels.
- Form elements do not look good together.
- For example — an
<input type="text">element and a<select>drop-down on the same line will not line up with each other properly.
- For example — an
This can be very frustrating.
Some of the problems — like vertical height and spacing, are dealt with in some of the more popular CSS Resets, but not all of them.
If you are going to build a CSS Style Sheet for your project from scratch, be sure to create several detailed example forms, using all of the form elements in a variety of combination. Be especially mindful of multi-column forms.
Because of the difficulties of form styling, it is often a good idea to use the form styles from a popular front end framework.
HTML and CSS — A Brief Introduction
This section introduces the webs styling language — CSS — and explains how it interacts with HTML. Though this is not a complete guide to the subject, it provides a fairly in-depth conceptual look at site design. Topics covered include structural CSS, the “box model,” text styling, typography, animations, responsive design, and the use of front-end frameworks.
What is CSS?
CSS stands for Cascading Style Sheets. It is a language used to define how an HTML document should be displayed on a page.
It is called a “style sheet,” in reference to the idea that a document should contain all the content, and only the content, and that a separate document or sheet should contain information about styles.
It is called “cascading” because styles related to text display “cascade” from parent to child elements. For example, if the CSS for a paragraph ( <p> ) sets the text color to blue, then a span of bold ( <strong> ) or italic ( <em> ) text inside that paragraph would also be blue, unless a new style declaration changes it.
How CSS works — Basic overview
How to Include CSS in a document
CSS can be included inside a <style> element in a document, or in separate .css files (called “style sheets”), which are linked to from the HTML document, inside the head.
<head>
 <link rel="stylesheet" type="text/css" href="theme.css">
 <style>
  p {
    font-family: Georgia, "Times New Roman", serif;
  }
 </style>
You can link to multiple stylesheets in a single document, and include more than one <style> tag.
It is almost always a better practice to include CSS via a linked stylesheet than to embed a <style> element on page. There are specific instances where embedded styles make sense (email, for example) but the general rule of thumb is — if you can link to a stylesheet, you should.
Style declarations
A stylesheet takes the form of a series of style declarations. These are notated as follows:
[selector] {
    [attribute]: [value];
    [attribute]: [value];
}
/* comments here */
That is:
- A selector, or element identifier, specifying what is being styled. These include the following (there are more):
- The name of a type of element:
a,p,dl, etc. This applies styles to all elements of that type. - A class identifier — the name of a class, prefixed with a dot (
.). - An ID identifier — the name of an ID, prefixed with the hash sign (
#). - One of the above, plus some other specialty selector, such as a pseudoclass like
:hover.
- The name of a type of element:
- An opening curly brace, signifying the beginning of style rules regarding the given element.
- Style rules expressed as attribute-value pairs linked with colons and terminated with semi-colons.
- A closing curly-brace denoting the end of the style rules for that element.
For example:
html {
    color: #222222; /* text color - very dark grey */
    font-family: Georgia, "Times New Roman", Garamond, serif;
    font-size: 14px;
    line-height: 22px;
}
/* This is a comment. */
#logo {   /* Style by element ID */
    color: #B20000;
    font-family: "Helvetica Neue", Helvetica, Arial, sans-serif;
}
.widget {  /* Style by element class. */
    width: 100%;
    border: solid 2px black;
    padding: 22px 11px;
}
a {
    color: #008AE6;
}
a:hover {
    color: #006EB8;
    text-decoration: underline;
}
The Document Tree
Many people simply think of an HTML document as a linear structure: first the <head>, then the <body>, then the <menu>, then the <main>.
However, an HTML document is really a tree:
- HTML
- Head
- Title
- Meta
- Body
- Header
- H1
- nav
- Main
- p
- a
- a
- strong
- ol
- li
- li
- li
- a
- p
- Aside
- section
- section
- section
- Footer
Each element is nested inside another element.
In CSS, some style declarations affect the size or shape of the element itself. This has no effect on the elements inside it.
But other styles affect the contents of the element — styles like text color, background color, font size, spacing. These styles are said to “cascade” down the document tree. All the contents, including other elements, are affected unless a different style declaration overrides it at a more specific point.
Consider the following example:
<h1><a href="">Anchor inside a headline</a></h1>
<a href=""><h1>`Headline inside an anchor</h1></a>
a {
    color: blue;
}
h1 {
    color: green;
}
Which will be blue and which will be green?
In this case, the first line (anchor inside a headline) will be blue, while the other will be green.
Why?
In the first example, the <h1> style is green, so everything inside it should be green. But then, inside of that, is an anchor that styles text blue. The anchor is more specific — closer to the text being styled — so its blue styling prevails.
The opposite is the case in the second example. The <a> element should have blue contents, but that style is overridden by the headline, which turns its contents green.
CSS Selectors
Every CSS declaration begins with a selector. This can be a type of element, a class, and ID, or a number of other things.
There is way to target just about any element in a document — not just by class and ID, but by location in a document, context, other attributes.
Selector declarations can also be combined. For example:
#container div {
}
This selects all <div> elements which are inside of the #container element.
Here are some of the more important selectors and selector formats.
*— Selects all elements.element-name— Selects all elements of a particular type..class-name— Selects elements by class name.#id— Selects elements by ID.element-name.class-name— Selects elements of a particular type that match the class name.selector1, selector2— Selectors separated by commas match all elements indicated by either selector1 or selector2.selector1 selector2— One selector following another selector, with only a space, selects all elements matchingselector2, which are inside of an element matchingselector1.selector1>selector2— Selects all elements matchingselector2which are immediate children ofselector1.[attribute]— An attribute name inside square brackets selects all elements which have that attribute, whatever its value.[attribute=value]— Selects elements which have the specific attribute-value pair.[attribute~=string]— Selects elements in which the specified attributes value contains the indicated string.selector:first-child— Selects elements which are the first child of their parent elements. This can be used asmain p:first-child(for example) to style the opening paragraph on a page.selector::first-letter— Selects the first letter of the matching element. Can be used to creat drop-cap effects.selector::first-line— Selects the first line of text in the matching element.input:focus— Styles a form input when it had focus.a:hover,a:active,a:visited— Styles anchor links at various points in their interaction cycle.
There are many more in addition to these.
CSS and Page Structure — The Box Model
The CSS Box Model is an explanation of the way CSS displays and positions block-level elements.
What are Block elements?
Block-level elements are HTML elements which have width and height and (by default) a line break before and after. They represents blocks of content. (This is in contrast to inline elements, which represent spans of text and do not create new lines by default.)
There are a number of elements which are block-level by default:
<address>— Contact information.<article>— Article content.<aside>— Aside content.<audio>— Audio player.<blockquote>— Long (“block”) quotation.<canvas>— Drawing canvas.<dd>— Definition description.<div>— Document division.<dl>— Definition list.<fieldset>— Field set label.<figcaption>— Figure caption.<figure>— Media (usually an image) with a caption.<footer>— Section or page footer.<form>— Input form.<h1>,<h2>,<h3>,<h4>,<h5>,<h6>— Headlines.<header>— Section or page header.<hr>— Horizontal rule (dividing line).<main>— Contains the central content unique to this document.<nav>— Contains navigation links.<noscript>— Content to use if scripting is not supported or turned off.<ol>— Ordered list.<output>— Form output.<p>— Paragraph.<pre>— Preformatted text.<section>— Section of a web page.<table>— Table.<tfoot>— Table footer.<ul>— Unordered list.<video>— Video player.
You can also cause any element to behave like a block-level element by assigning it the style display: block;.
Width and Height
By default, the width of a block-level element is 100% of its containing block-level element, inclusive of any margins, border, or padding. (That is, the entire elements, including margin, border, and padding, will fit inside its container.)
The default height of a block-level element is the height of all its content, plus any margins, border, or padding.
Most of the time, in designing a page layout, you want to specify the width of elements, but not their height. This is because the width of a display window is a fixed size on any given display, but the page can scroll up and down along any height.
The weird thing about specifying width (and height, but you dont do it as often) is that the width you specify will not be the total width of the element.
Margins, border, and padding
In addition to the content of an element, the total width and total height are determined by three other attributes:
- margin — The area around an element.
- border — A line around the perimeter of the element.
- padding — Space just inside the perimeter of the element.
Any background declarations (such as background, background-color, or background-image) cover the content area, the padding, and the border. The margin does not display the background.
<style>
.field {
    width: 100%;
    background-color: #66FF33; /* Lime green*/
}
.inside {
    width: 100px;
    margin: 25px;
    border: dashed 15px black;
    padding: 25px;
    background-color: #90acff;
    color: #002346;
    font-weight: bold;
}
</style>
<div class="field">
 <div class="inside">
  This is some text inside the inside. Notice that it is set away from the inside edge. That is caused by the padding.
 </div>
</div>
#margin-padding-border .field {
width: 100%;
background-color: #66FF33; /* Lime green*/
}
#margin-padding-border .inside {
width: 100px;
margin: 25px;
border: dashed 15px black;
padding: 25px;
background-color: #90acff;
color: #002346;
font-weight: bold;
}
This is some text inside the inside. Notice that it is set away from the inside edge. That is caused by the padding.
Notice: Margin, border, and padding are added to the width declared by the CSS. – The height is determined by the content. – The margin of inside pushes it away from the left side of field, but the same is not true for the top and bottom. This is a quirk of CSS. To push the inside element away from the top of its container you would add padding to the containing element. – Margin on the left and right of an element affect its relationship with its parent element AND with sibling elements. – Margin on the top and bottom of an element affects only its relationship with sibling elements. – The background color fills the area of the content, the padding, and the border, but not the margin.
Because the total width includes the declared width and also the width of any margins, border, and padding, the following declaration does not work:
div {
    width: 100%;
    margin: 5px;
    padding: 15px;
}
If you do something like this, youll find that the <div> expands past the right side of its containing element by 40px.
In this example, because the idea seems to be to cause the <div> to fill the full width of its container, the right thing to do would be to simply omit the width declaration. This will cause the element to simply fill the width of its container automatically, with no overflow.
div {
    margin: 5px;
    padding: 15px;
}
However, if you want to have an element that only takes up half of the available width, in order to have side-by-side columns, youll have to do thing a little differently.
Floating Elements
The default behavior of block level elements is for them to fill the full width of their container and create a line break before and after themselves. IF you place several block level elements in a series, they will simply appear straight down the page, each one below the previous one:
<style>
#container {
    width: 400px;
    background-color: #eeeeee;
    padding: 20px;
}
#container div {  /* Targets all divs that are children elements of #container. */
    height: 50px;
}
#red {
    background-color: red;
}
#blue {
    background-color: blue;
}
#green {
    background-color: green;
}
</style>
<div id="container">
<div id="red"></div>
<div id="blue"></div>
<div id="green"></div>
</div>
#div-stack .container {
width: 400px;
background-color: #eeeeee;
padding: 20px;
}
#div-stack .container div {
height: 50px;
}
#div-stack .red {
background-color: red;
}
#div-stack .blue {
background-color: blue;
}
#div-stack .green {
background-color: green;
}
Even if we were to make each of the inner <div> small enough that they could sit next to each other in a row, the line break will still be there.
<style>
#container {
    width: 400px;
    background-color: #eeeeee;
    padding: 20px;
}
#container div {
    height: 50px;
    width: 50px;
}
#red {
    background-color: red;
}
#blue {
    background-color: blue;
}
#green {
    background-color: green;
}
</style>
<div id="container">
<div id="red"></div>
<div id="blue"></div>
<div id="green"></div>
</div>
#div-stack-skinny .container {
width: 400px;
background-color: #eeeeee;
padding: 20px;
}
#div-stack-skinny .container div { /* Targets all divs that are children elements of #container. */
height: 50px;
}
#div-stack-skinny .red {
background-color: red;
}
#div-stack-skinny .blue {
background-color: blue;
}
#div-stack-skinny .green {
background-color: green;
}
In order to make allow them to sit next to each, they must be allowed to “float.” In CSS, “float” means to allow other elements of the document to flow around the floating element. A block element can be floated to the left, right or center (center is unusual). If multiple sibling elements are set to float, they will line up next to each other, separated by their margins.
To make these three colored boxed site next to each other, we just need to add float: left or float: right to all three of them.
<style>
#container {
    width: 400px;
    background-color: #eeeeee;
    padding: 20px;
}
#container div {
    height: 50px;
    width: 50px;
    float: left;
}
#red {
    background-color: red;
}
#blue {
    background-color: blue;
}
#green {
    background-color: green;
}
</style>
<div id="container">
<div id="red"></div>
<div id="blue"></div>
<div id="green"></div>
</div>
#div-float .container {
width: 400px;
background-color: #eeeeee;
padding: 20px;
}
#div-float .container div { /* Targets all divs that are children elements of #container. */
height: 50px;
}
#div-float .red {
background-color: red;
}
#div-float .blue {
background-color: blue;
}
#div-float .green {
background-color: green;
}
Notice:
- The first colored block (
#red) is at the left side of the container, followed by#blueand#green. - They have no margin, so they are directly next to each other.
- The padding on the inside of the
#containeris pushing the blocks down and away from the upper left hand corner.
But – oh no — what is going on with the #container element? Why are the colored blocks hanging out of it?
Heres the problem with floats: a floated element, by default, does not contribute to the height of its container. So the height of the container is determined by the sum of:
- its height declaration if it has one (this one doesnt) OR its non-floated content if it doesnt have a declared height (in this case, it also doesnt have any)
- vertical padding (top and bottom)
- vertical borders (top and bottom)
- vertical margin (top and bottom)
The inner height of the #container element in this case is zero, and the total height is only 2x the size of its padding.
This is a very annoying, and very common, problem. The solution (a bit of a hack) is called the clearfix solution. There are several options for how to acocmplish this, but for our examples we are going to use the simplest one, adding overflow: auto to the #container. This does not work in all browsers or in all contexts, but it will work well enough on most browsers that it is fine for our examples here.
Here is the result of adding the clearfix.
<style>
#container {
    width: 400px;
    background-color: #eeeeee;
    padding: 20px;
    overflow: auto;
}
#container div {
    height: 50px;
    width: 50px;
    float: left;
}
#red {
    background-color: red;
}
#blue {
    background-color: blue;
}
#green {
    background-color: green;
}
</style>
<div id="container">
<div id="red"></div>
<div id="blue"></div>
<div id="green"></div>
</div>
#div-float-fix .container {
width: 400px;
background-color: #eeeeee;
padding: 20px;
}
#div-float-fix .container div { /* Targets all divs that are children elements of #container. */
height: 50px;
}
#div-float-fix .red {
background-color: red;
}
#div-float-fix .blue {
background-color: blue;
}
#div-float-fix .green {
background-color: green;
}
Now, if we add some margins, padding, content, and less garish colors, you can see how this basic idea can be turned into a standard content+sidebar layout.
<style>
#container {
    background-color: #eeeeee;
    overflow: auto;
    padding: 20px;
    width: 600px;
}
main {
    float: left;
    background-color: #efefef;
    width: 300px;
    padding: 15px;
    margin-right: 20px;
}
aside {
    float: left;
    background-color: #dedede;
    padding: 15px;
    width: 220px;
}
</style>
<div id="container">
 <main>
  <h2>Lorem Ipsum</h2>
  <p>Lorem ipsum dolor sit amet, consectetur adipiscing elit. Curabitur pretium, mi eu elementum ullamcorper, dui justo egestas turpis, sed auctor turpis tellus eget augue. Quisque vel malesuada erat. Vestibulum non felis et turpis iaculis iaculis.</p>
  <p>In arcu metus, finibus id dolor a, interdum lacinia lectus. Vestibulum vulputate neque eget ante tincidunt sodales. Quisque efficitur a turpis nec scelerisque. Donec commodo, diam id consequat sodales, justo quam posuere libero, non fringilla ante dui id tortor. Sed efficitur in ipsum nec pellentesque. </p>
 </main>
 <aside>
  <h3>Archives</h3>
  <ul>
   <li>May 2015</li>
   <li>April 2015</li>
   <li>March 2015</li>
   <li>February 2015</li>
   <li>January 2015</li>
  </ul>
 </aside>
</div>#### __Extra
s__
In a perfect world, every element in an HTML document would be semantically significant, related only to the content of the document, and never added solely to support presentational styles.
The real world is far from perfect, unfortunately. Things have gotten a lot better over the last decade, but there are still times when you need to add an extraneous <div> element for no reason except it makes the page display the right way.
Most blogs — probably most websites — follow a typical pattern:
- Header section that spans the width of the page
- Central content area divided into two columns:
- 2/3 of the width for primary content
- 1/3 of the width for a widget sidebar
- Footer section spanning the width of the page.
The ideal markup for this document structure would be:
<header>
 <!-- Logo and menu here -->
</header>
<main>
 <!-- Primary content here -->
</main>
<aside>
 <!-- Sidebar content here -->
</aside>
<footer>
 <!-- Footer content here -->
</footer>
Unfortunately, theres almost no way to cause the <main> and <aside> elements to sit next to each other properly unless they can float inside of a containing element.
Therefore, the most common markup structure for a typical blog layout actually looks like this:
<header>
 <!-- Logo and menu here -->
</header>
<div id="container">
 <main>
  <!-- Primary content here -->
 </main>
 <aside>
  <!-- Sidebar content here -->
 </aside>
</div>
<footer>
 <!-- Footer content here -->
</footer>
It will often be the case that similar container elements are needed in order to get a page to display correctly. Dont worry about it — the web is as much a visual medium as it is a collection of text-based documents.
CSS for Text Styling
CSS is used for all aspects of document presentation, including both page structure and text styling. There could be a whole book on CSS and typography, but a short introduction to key concepts will do for this guide.
The Cascade
When thinking about text styling in CSS, it is especially important to remember the cascade part of Cascading Style Sheets.
When you add a style that affects contents (as opposed to element shape, size, or placement), the style cascades down the document tree. So any styles applied to <body> affect all the content, while any style applied to <main> affects all the content inside it, but not outside of it.
The practical implication of this is that you should build your stylesheet from the general to the specific. You should usually set a single base font in the <body>, which covers the majority of your content, and then set any fonts that deviate from that (such as for menus or buttons) at the specific point where they are different.
Any style declaration having to do with typography should be included at the most general (highest in the tree) point that it applies to. This will help avoid duplicating styles.
The Styles
The style declarations most relevant to text styling and typography are:
font-family : Specifies the font(s) to use. : Best practice is to declare a list of font, starting with your preferred font and a series of fallbacks, ending with a a generic font family. : Font names that include spaces must be wrapped in quote marks. : font-family: Garamond, Georgia, "Times New Roman", serif;
font-size : Specifies the size of the text. : Can be a size in pixels ( 14px ), typographical ems based on the parents text size ( 1em ), a percentage based on the parents text size ( 115%), a descriptive size name ( small, medium, large), or a comparative descriptor based on the parents text size ( smaller, larger ). : font-size: 14px;
line-height : Specifies the height of a line of text. : This should usually be larger than the font-size. A line of text is typically centered inside the line-height. : Line height can be specified in pixels, ems, or percentages. It can also be set as a multiplier of the font-size; this is done by omitting a units suffix. : line-height: 1.4;
margin-bottom : The margin below paragraphs, headlines, lists, and other typographical elements contributes to the overall readability. : This attribute has to be set on each affected element, not on the document or section. : Typically, setting the margin-bottom equal to the line-height created the best results. : margin-bottom: 1.4em;
color : The default color of text is black. You may wish to change this to a something less stark. : color: #111111; : Also, links have a set of default colors to denote whether or not they have been visited, and a color denoting their active state. : Typically, the default link color is not particularly desirable. In order to change color for various states of the anchor tag use: a:link (default), a:hover, a:visited, and a:active. : a:hover { color: #3399FF; }
font-weight : Font-weight is the property that controls whether text is bold or normal. : According to the specification, you can use a numeric value to set the weight with great precision. However, this is not well supported by most fonts or browsers, and it it not a common practice. : The most common use of font-weight is to simply specify bold. : strong { font-weight: bold; }
font-style : Font style is used to indicate italic type. : Relevant values are normal and italic. (A third option, oblique, is rarely used. : em { font-style: italic; }
text-decoration : This is used to add a line to a span of text: over (overline — rarely used), through (line-through — used for deleted text), or under (underline — used for links and sometimes for headings). : a { text-decoration: underline; }
text-transform : This property allows you to control the capitalization of text. : Relevant values are: capitalize (Title Case), uppercase (ALL CAPS), and lowercase (all lower case). : h3 { text-transform: uppercase; }
font-variant : This is used to specify small-caps. It sets all the lowercase letters in the content to uppercase letters at a smaller font size. : h1 { font-variant: small-caps; }
@font-face : This is not a property assigned to an element, but acts as a selector in a CSS document. It is used to define a new font family. This allows designers to specify any font they wish, instead of just relying on the system fonts of client computers. : The font-family property defines the name of the new font (to be used in the font-family property of other elements), and the src property specifies a font file. : Not all font file formats are supported on all browsers. The most widely supported formats are TTF, OTF, and WOFF (but not WOFF2). : If variations of a font (bold, italic) require separate font files, multiple @font-face declarations can be set, each one with a different src property, and with additional properties specifying their context ( for example — font-weight: bold;) : @font-face { font-family: myNewFont; src: url(https://cybernewsguide.com/files/resources/mynewfont.woff; }
typography tips
web typography is tricky. the default display of text in most browsers is really unattractive, and getting text to look good, and be readable, is a non-trivial problem.
if you are designing a sites typography, keep the following tips in mind.
- use a text page that includes all possible typographical styles. many web typography designers forget about description lists (
<dl>), blockquotes (<blockquote>), headlines after<h3>(<h4>,<h5>,<h6>), and other rarely-used styles. However, even though they are rarely-used, they do get used. Be sure to include nested lists, images with and without captions, and code samples as well (if you write about technology). - Notice how elements margins interact with each other and with their context. For example, it is common to put a
margin-topon headlines. This might make sense in some contexts, but if its the first element in an<article>, this might not look right. Similarly, a sectional headline after a paragraph might end up duplicating a line-space, creating more of a visual break than desired. - Use the value of
line-heightas a scale rule to keep the pages text in a constant rhythm. Fonts larger than the globalline-height(headlines, for example) should have theirline-heightset to a multiple of the global value. Also use theline-heightvalue for margins below elements and for set-in (indented) sections. - It is common to identify paragraphs with a double line-break (accomplished with a
margin-bottomset to the same value asline-height). It is also common to not indent paragraphs. - Lists tend to look better set in (
margin-left) about the same distance asline-height(or a multiple thereof). - Description lists have really bad default styling. They generally look best with the entire list being set-in, the
<dt>in bold, and the<dd>set-in even further. - It is very common to set the primary font size for a page to 12px, but this is not very readable. Consider 14px or even 16px as a global base font size (depending on your
font-family). - It is very common to leave the font color black (the default), but usually a very dark gray is more attractive and readable.
- Links (
<a>) have been blue by default in almost every browser since the beginning of the internet. Even if you want to change the color of links to fit your branding (and you should), it should probably be a shade of blue. Also, be careful about using blue text in other places, as it may signal to users they should be able to click the text. - Similarly, underlined text is a near-universal signal that something is clickable. Change this convention at your own peril.
- It used to be common advice to avoid serif fonts on the web, and to use sans serif fonts only. This was good advice because serif fonts do not render as well in low-resolution screens. However, this is no longer a concern for most people. Using a serif font (such as Georgia, Times, or Garamond) can make text more readable.
- Generally, you dont want more than three fonts on a page:
- A content font, which can either be serif or sans.
- A menu and navigation font, which should usually be sans serif, and may also be the same as your content font.
- A font for code samples (if you do that sort of thing), which should be a monospace font like Courier or Console.
- The “measure” of a text is the number of characters per line. A measure more than 80 characters long becomes unreadable. Most experts would set the ideal measure at about 65 characters per line. This is a function of the width of your content area and the size of your font.
- If you use
@font-faceto import your own font onto a page, make sure to test how this looks on multiple browsers. Some browsers render certain fonts poorly. Also be sure to include fallback fonts in yourfont-familydeclarations — you cannot always count on@font-faceto work in every situation.
CSS Animation
CSS allows you to animate HTML elements without Javascript. For simple effects, this can be quite convenient. It renders faster than similar effects created in Javascript, and will be supported even in browsers that have Javascript disabled.
Keyframes
An animation is defined with a CSS selector called @keyframes. An @keyframes declaration has a name, and a set of style rules for various points (key frames) in the animation.
@keyframes colorChange {
    from {
        background-color: red;
    }
    to {
        background-color: blue;
    }
}
In the above example, the “colorChange” animation causes an element to change background color from red to blue.
More than color can be animated. Using the @keyframes rules to set positions will cause an affected element to move from one place to another.
@keyframes moveLeft{
    from {
        position: relative;
        left: 100px;
    to {
        position: relative;
        left: 0px;
    }
}
A multi-point animation can also be specified, using percentages.
@keyframes moveAround {
    0% {
        top: 0px;
        left: 0px;
    }
    25% {
        top: 0px;
        left: 50px;
    }
    50% {
        top: 50px;
        left: 50px;
    }
    75% {
        top: 50px;
        left: 0px;
    }
    100% {
        top: 0px;
        left: 0px;
    }
}
This animation would cause an animated element to move over, down, back over, and then back up to its original position.
Assigning animations to elements
Animations are defined separately from the elements they will affect. Animations are defined in @keyframes declarations as shown above, and then applied to elements.
Animations are applied to elements using the @keyframe name and a length of time that the animation should last. Other attributes can affect the animation as well.
@keyframes colorChange {
    from {
        background-color: red;
    }
    to {
        background-color: blue;
    }
}
.color-changing{
    width: 100px;
    height: 100px;
    animation-name: colorChange;
    animation-duration: 5s;
    }
@keyframes colorChange {
from {
background-color: red;
}
to {
background-color: blue;
}
}
@-webkit-keyframes colorChange {
from {
background-color: red;
}
to {
background-color: blue;
}
}
#color-change-demo .color-changing{
width: 100px;
height: 100px;
animation-name: colorChange;
animation-duration: 5s;
-webkit-animation-name: colorChange;
-webkit-animation-duration: 5s;
}
If you dont set the animation-duration, the animation will not run, because the default value is 0.
Several other animation properties can be set as well:
animation-delay— Specifies a delay for the start of an animation. The default is0, which means the animation will play right away. Usually noted in seconds (s), but can also be noted in milliseconds (ms).animation-direction— Specifies whether an animation should run asnormal(the default), inreverse, oralternatebetween forward in reverse. Thealternatevalue only works if theanimation-iteration-countis higher than1.animation-fill-mode— Defines whether, and how, styles from the animation should affect the element when the animation is not running (when it is finished, or when there is a delay).normal— The default. The animation styles do not have an effect on the element when the element is not playing.forwards— The last keyframe style (toor100%if the animation did not run in reverse) is applied to the element.backwards— The first keyframe style (fromor0%if the animation did not run in reverse) is applied to the element.
animation-iteration-count— Specifies the number of times an animation should be played.animation-timing-function— Specifies the speed curve of the animation:ease— The animation begins slowly, speeds up, and then ends slowly.ease-in— The animation begins slowly, speeds up, and ends at full speed.ease-out— The animation begins at full speed, but slows down as it ends.linear— The animation runs at full speed from beginning to end.
Browser Support for Animations
Most major browsers support CSS animations, but theres a weird quirk with browsers that use the WebKit rendering enegine (Safari, Chrome, Opera).
In order to make sure that animations will work on those browsers, you have to duplicate the @keyframes declaration and the animation assignment attributes with a special webkit syntax.
/* This is for non-webkit browsers. */
@keyframes moveLeft{
    from {
        position: relative;
        left: 100px;
    to {
        position: relative;
        left: 0px;
    }
}
/* This is for webkit browsers: Chrome, Safari, and Opera. */
@-webkit-keyframes moveLeft{
    from {
        position: relative;
        left: 100px;
    to {
        position: relative;
        left: 0px;
    }
}
#animationSupportDemo {
    animation-name: moveLeft;
    animation-duration: 4s;
    -webkit-animation-name: moveLeft; /* Chrome, Safari, and Opera. */
    -webkit-animation-duration: 4s; /* Chrome, Safari, and Opera. */
    }
(In the live examples above, these additional styles have been added to the running demo code, but not the code examples, just to make it less complicated.)
This may seem redundant and silly (because it is), but its the only way to get your animations to work in those browsers.
When to use CSS Animations
If you need highly dynamic elements flying around the screen like an arcade game, CSS animations are not really the way to go — thats more appropriate to Javascript.
CSS animations are best used to provide subtle design enhancements to a page. Some examples: filling in the bars of a chart – pulling down a tab on hover – flying-in elements as a user scrolls down a page – slow and subtle changes of background color – “bouncing” buttons to encourage clicking
Combining CSS Animation with Javascript
CSS animations either start immediately, or after a specified delay. However, if you want to trigger a CSS animation upon some event occurring, you can set the animation to “paused” in the CSS, and then unpause it with Javascript at a later point. Pausing an animation is done with the attribute animation-play-state.
.pausedAnimation {
    animation-name: example;
    animation-duration: 5s;
    animation-play-state: paused;
    -webkit-animation-name: example;
    -webkit-animation-duration: 5s;
    -webkit-animation-play-state: paused;
}
The value for animation-play-state when unpaused is running. This can be manipulated in Javascript:
[element].style.animationPlayState = "running"CSS in the Real World
In the real world of web development and design, very few developers sit down with an HTML document and a blank CSS file and start specifying styles from scratch. (Though doing so can certainly be fun.)
There are a number of typical “best practices” that CSS designers usually follow to make their work easier and more consistent.
CSS Resets
All HTML elements have default styles set by their browser. Each browser has slightly different default styles. This means that a single document with a single stylesheet may look different in different browsers. (Aside from issues of support and compatibility.)
A “CSS reset” is a set of styles that can be placed in a CSS stylesheet before any other styles are declared. The CSS resent provides a common base for adding styles across all browsers.
CSS resets are also used to set default display styles for HTML5 elements that might not have default displays in older browsers — elements like <article> and <main>.
There are several common CSS reset templates. The most well known is the one created by Eric Meyer.
/* http://meyerweb.com/eric/tools/css/reset/
   v2.0 | 20110126
   License: none (public domain)
*/
html, body, div, span, applet, object, iframe,
h1, h2, h3, h4, h5, h6, p, blockquote, pre,
a, abbr, acronym, address, big, cite, code,
del, dfn, em, img, ins, kbd, q, s, samp,
small, strike, strong, sub, sup, tt, var,
b, u, i, center,
dl, dt, dd, ol, ul, li,
fieldset, form, label, legend,
table, caption, tbody, tfoot, thead, tr, th, td,
article, aside, canvas, details, embed,
figure, figcaption, footer, header, hgroup,
menu, nav, output, ruby, section, summary,
time, mark, audio, video {
    margin: 0;
    padding: 0;
    border: 0;
    font-size: 100%;
    font: inherit;
    vertical-align: baseline;
}
/* HTML5 display-role reset for older browsers */
article, aside, details, figcaption, figure,
footer, header, hgroup, menu, nav, section {
    display: block;
}
body {
    line-height: 1;
}
ol, ul {
    list-style: none;
}
blockquote, q {
    quotes: none;
}
blockquote:before, blockquote:after,
q:before, q:after {
    content: '';
    content: none;
}
table {
    border-collapse: collapse;
    border-spacing: 0;
}
CSS Preprocessors
Imagine that you define a set of colors for your website design and want to use them in various places throughout your CSS.
If you apply the same color to your secondary headlines that you do to your copyright notice (and so forth), youll end up duplicating the color declaration in several different places.
What happens when you want to change it?
What about a scale of text size? Youve set your default text size to 12px, and each headline size is a specific multiple of that size to make a unified set of sizes. What happens when you change the default size?
CSS is a declarative language — it requires each individual property and value to be specified, and there are no variables, functions, or calculations to make things easier.
In the same way PHP (and other languages) make it easier to output HTML without having to repeat content on every page, CSS preprocessors allow you to include variables, function, and other programming constructs into stylesheets.
This makes it easier to specify color schemes, size ratios, and other types of repetitive declarations.
The two most popular CSS preprocessors are: Less — Used by Twitter Bootstrap – Sass — Used by Ruby on Rails, Jekyll, and many other Ruby-based development tools.
Generally, developers write their stylesheets in Less or Sass and then compile them into CSS before launching a site. There are also client-side (in-browser) compilers written in Javascript, but these use a lot of resources and are typically only sed in development.
It is highly unusual at this point for a professional web developer to not use Less or Sass.
This guide cannot serve as an introduction to either of these tools, so we simply encourage you to learn more yourself.
Responsive Design
There was a time when you could be pretty sure you knew what type of screen your site’s visitors were going to be viewing your page with: a desktop monitor in one of a handful of default sizes.
Those days are long gone.
Users may be viewing your site on any one of a number of devices and screen sizes: mobile phone, mini tablets, tablets, laptops, desktops, televisions.
It is nearly impossible to individually target all these different screen sizes, and you cant simply ignore them.
You may think that your sites demographic is more likely to view with a desktop, but thats unlikely to be true in any situation. Over 60% of internet traffic is coming from mobile devices. Having a website with a bad mobile experience is going to be bad for your business.
Whats more, Google has begun to alter its search results based on whether sites are optimized for mobile devices or not. Increasingly, if you dont look good in mobile, no one will see you anyway.
The solution to this problem is Responsive Design.
Responsive design is an approach to site design — a philosophy — not a tool or a program. It is a way of structuring page markup and CSS so that the pages elements will reconfigure appropriately in different size windows.
The three pillars of responsive web design are:
Fluid Grids: Fluid grids involves dividing page grids based on percentages, rather than absolute pixels. For example, you might have a main content column that spans 70% of a screen and a sidebar column that spans 30%. As the screen increases or decreases in size, the grid also expands or shrinks.
Fluid Images: Images should never be wider than the screen they are being displayed on, which means they should never be wider than the grid element containing them. The easiest solution to this is to set the max-width on images to be 100%. img { max-width: 100%; }
Media Queries: Media queries are a bit more complicated. They allow CSS to target specific screen types and sizes, declaring rules that only apply in particular circumstances. Using media queries, you can make your main content and sidebar appear side-by-side on larger screens, and make them stack on top of each other vertically on smaller screens. Media queries can also be used to hide or display certain elements which would be more or less useful in different contexts, as well as change things like font sizes or even swap out different images.
Responsive web design is built on simple concepts but the actual implementation of it — attempting to get it right in so many different contexts, with different screen sizes, device types, and browsers — is actually very complicated and difficult.
For this reason, and other reasons, many designers working today do not try to solve these problems themselves but choose to use a front end framework.
Front End Frameworks
There are a lot of things to think about when coding the CSS for a site design, and this short introduction only touched on a bit of it.
- Getting a responsive grid structure to work in every browser and device.
- Designing appropriate media queries and determining optimum screen-width breakpoints.
- Typography that is beautiful and easy to read.
- Making forms look even moderately decent, let alone beautiful and user-friendly.
- Styling tables to look like they arent from 1997.
- Graceful degradation for older browsers.
- Remembering to use duplicate styling rules for certain
-webkitfeatures (and making sure you type the same rule the same way each time). - Getting CSS and Javascript to interact the right way.
Many of these issues are simple “boilerplate” coding tasks that take time away from coding new designs and features, and many are just too complicated to risk “hand-coding” on every project. No one wants to spend 50% or more of development time debugging foundational code — developers want to develop.
For these reasons, and following the similar trend in application code development, more and more developers are turning to front-end frameworks.
A front-end framework provides one or more HTML document structures and a complete CSS stylesheet that handles some or all the basic needs listed above. This frees the developers to focus on actual design decisions, instead of trying to get the media-queries to work properly.
As with application development frameworks, there are a wide range of possibilities. Some frameworks specify a lot of design elements, including colors and button shapes. Others simply provide a minimal responsive grid. Some frameworks are highly customizable, and others provide a one-size-fits-or-not approach. Some include Javascript interactivity, and some do not.
Some of the more popular front-end design framework currently in use are:
- Bootstrap — From the development team at Twitter, Bootstrap was designed to speed up the prototyping and development of web applications. It provides excellent form and interactivity UI and a bold, distinctive design. Many people complain that it creates bloated markup (it does), because inexperienced users are encouraged to add styling classes into the HTML. Even so, it provides a great tool for rapid prototyping of any form-based web app.
- Pure.css — A modular toolkit of CSS framework pieces which can be used individually or as a whole.
- Foundation — Billing itself as “the most advanced responsive front-end framework in the world,” Foundation is thought by many to be like Bootstrap for people who care about good markup.
- Skeleton — Skeleton is a “dead simple” CSS frameowrk that provides a responsive grid, clean typography, and just generally minimal design. It is intended to be “a starting point, not a framework.”
There are many more besides these, and new ones being developed all the time. Additionally, there are individual pieces — CSS snippets — that can be assembled into a bespoke framework. For example, you could combine a simple fluid-grid tool with a typographical library, and use a third tool kit for forms.
CSS Frameworks — like software development frameworks — are the way forward for complex web design and development. Theres just no sense in reinventing the wheel, or recoding the same solution, with every new project.
Still — to get the most out of a CSS framework, you have to understand how CSS works and how it interacts with HTML.
CSS Is an Essential Part of HTML
CSS — Cascading Style Sheets — is the language of design and visual presentation on the web. An HTML document is just a collection of content nodes, but CSS tells a browser how to present that content to the user.
As with HTML, there are both structural aspects of CSS and text-level aspects. CSS can also be used to create dynamic animations and responsive layouts.
Because of the great complexity of modern site design — which is largely due to the variety of browsing devices and screen sizes — site design must be responsive. That is, it must work on any size or type of device — the page must respond to its environment.
The difficulty and tedium of making sure that a site design can work in so many different settings, and that the large number of competing interests are dealt with, has led most developers to adopt CSS frameworks.
Like application development framework, CSS (or “front-end”) frameworks provide a starting point for the development of a new site design. They provide structure, guidance, and an opinion about how a page should be laid out.
CSS Frameworks can make it possible for nearly anyone to create responsive, functioning websites, but only someone with their own depth of understanding of CSS and HTML will be able to get the most use out of one.
JavaScript and HTML
This section introduces Javascript, the scripting language built into most modern web browsers. The focus is on how Javascript works with HTML and the browser, along with some practical tips for getting started using JavaScript as a developer. Topics covered include the Document Object Model, JavaScript Libraries, and JavaScript application frameworks. This section is not a JavaScript tutorial.
What is JavaScript
JavaScript is a scripting language built into (almost) every web browser. It is used to add dynamic interactivity and scripting to web pages. (It can also be used server-side, along with tools such as Node.js, but that is not the focus here.)
JavaScript is a fully-featured programming language, so anything is possible. It is geared, however, specifically to the needs of interacting with and manipulating HTML documents.
ECMAScript
If you work with JavaScript at all, you will run across the very weird name “ECMAScript.” This is the “official” name of JavaScriipt.
The standard specification for the language is maintained by an organization named Ecma, which used to be the European Computer Manufacturers Association. They have since changed their name to simply “Ecma,” which is no longer an acronym for anything.
Each web browser implements the ECMAScript standard a little differently (and Microsoft goes so far as to call their implementation JScript instead of Javascript). So some people will use “ECMAscript” to refer specifically to the standard form of the language, not to any dialects or derivations built into web browsers.
JavaScript and Java
Just so there isnt any confusion — JavaScript has no real relationship to Java. Java was the new and trendy language when JavaScript was first being developed, and the original idea was that JavaScript would be based on Java — hence the name. However, JavaScript did not come to be based on Java at all, and there are really very few similarities between the two languages apart from the name.
Document Object Model
One of the key things to understand if you want to have a good handle on Javascript is the Document Object Model.
The Document Object Model is conceptually very similar to the document tree structure described in previous sections — in fact, it essentially refers to the same thing.
The DOM is the API (Application Programming Interface) by which Javascript code interacts with the HTML document. When a document is rendered by a browser, the browser isnt just showing you the source code with some additional style rules attached. The browser has read the source code and generated a view based it. Each element in the document has been turned into an object (in the programming sense) with attributes and methods accessible by Javascript.
The attributes of a DOM object include the declared (and declarable) attributes of the HTML element (such as class, id, and name), the CSS style of the element, and the content of the element itself. Methods associated with each DOM object include functions to change any of these attributes.
A rendered web page in a browser is a live view of the Document Object Model. This means that if the DOM changes in anyway (for example — the attributes of any element are changed) the view will change as well. This allows JavaScript to update or change the content of a web page without having to refresh or reload the page.
JavaScript also has APIs to most browser functions, so it can (for example) read the current state of a document, trigger refreshes, get the width of the browser window, and resize the browser window.
Using Javascript
This is not a JavaScript tutorial. This section is only trying to provide some helpful context for HTML developers dealing with JavaScript.
Including JavaScript in a page
Much like CSS, JavaScript can be included into a web page two ways — embedded scripts and linked resources.
To embed a script, simply include JavaScript code between to <script> tags.
<script>
 function changeColor (toChange, newColor) {
  document.getElementbyId(toChange).style.backgroundColor = newColor;
    }
</script>
To include a separate JavaScript file into an HTML document, link to it with the <script> element.
<script type="text/javascript" src="app.js"></script>The URL (relative or fully specified) of the JavaScript file is placed in the src attribute. The type attribute is not strictly needed in HTML5, but it is a good thing to include for both backward and (potentially) forward compatibility. Additionally, if there are multiple <script> elements on a page, it isnt a bad idea to give them each unique id attributes.
It is generally considered better to include JavaScript as a separate file, rather than embedded on the page. This keeps functionality (JS) separate from content (HTML). However, there are practical exceptions to this general policy. For example, it is typical practice to include tracking code (such as the snippet of JS provided by Google Analytics) directly on page.
Where to put JavaScript
There are two common places for including JavaScript on a page, in the <head> and below the <footer>.
Placing links to a JavaScript file in the <head> of a document makes good semantic sense — it is a script that has an impact on the page as a whole, so it belong with other similar elements in the document <head>.
However, because the loading of the page is suspended while the JavaScript files are fetched and parsed, placing the <script> tags into the <head> has traditionally been frowned upon. The typical advice is to place them as the last element inside the <body>, just after the <footer>.
This is still good advice. However, theres now a twist to the odl advice: there is now a way to place <script> elements into the document <head> without causing the page rendering to slow down. As of HTML5, the <script> tag include an attribute labeled async. If you add the async attribute to your script tag, the page will not stop rendering, and the JS will be parsed and executed asynchronously (that is, in a separate thread).
<script type="text/javascript" src="app.js" async></script>This should speed up the loading and rendering of the page as a whole. However, asynchronous loading and parsing may still cause some problems. If the data connection is slow or if the clients computer is especially low-powered, it may still slow down the rendering of the page.
If you are especially concerned with squeezing out any inefficiency in slow connections and low-powered devices, it might still make sense to place your <script> tags at the bottom of the document.
JSON
A subset of JavaScript, which was touched on in the sections on Semantic HTML, is JSON — JavaScript Object Notation.
JavaScript is an object oriented language, which means (among other things) that individual objects (in the real-world sense of the word) can be coded into data objects (in the programming sense of the word). For example, a blog post (a “real world” object) could be encoded as a JavaScript object:
{
    "title" : "Lorem Ipsum and All That Jazz",
    "author" : "Adam Wood",
    "content" :
      'Lorem ipsum dolor sit amet, consectetur adipiscing elit. Sed mauris metus, euismod non sodales eu, molestie congue nibh. Nunc eu dignissim est. Donec non est a sapien rutrum imperdiet. Nunc vitae libero nec velit porta pulvinar vitae ut sapien. Aliquam consequat orci eget libero blandit semper. Aenean malesuada risus nec volutpat dapibus. Aliquam sit amet bibendum enim. Suspendisse at faucibus erat. Proin quis facilisis nisl. Vivamus sit amet enim elit. Aliquam nisl sapien, sagittis vitae nisi nec, vulputate efficitur urna.',
}
As we saw with Semantic Markup, JSON can be used to encode data about the content of a page, for consumption as a Semantic Markup API. This is helpful for Googles indexing.
Theres also another important use for JSON — AJAX.
AJAX
AJAX is a design pattern (not a specific technology) in which asynchronous HTTP requests are made by JavaScript, allowing fresh data to be populated onto a web page without the page needing to be reloaded.
AJAX originally stood for “Asynchronous JavaScript and XML,” because originally the most common data transfer language for this type of design was XML. However, JSON has become the most common language because it is lighter, flexible, native to JavaScript, and easier to read. (Unfortunately, “AJAJ” isnt very catchy, so the old name has stuck.)
The AJAX pattern doesnt make any sense on most pages, but on web apps (like email, for example), it can make all the difference in the world.
AJAX is called “asynchronous JavaScript” because the JS code is making calls to the server at times other than on page load (which is when a browser usually makes calls to the server). Based on user actions or elapsed time, an AJAX-style web application will send a request to the server without reloading the page. The data from that response is then used to update the DOM (and thus, the view to the user) without reloading.
This type of design can be used in (for example) an email or chat application to send and fetch new messages. Social Networking sites use it to add new posts, and even some blogs use it to add newly-published content onto a page.
JSON is an ideal data format for this type of use case because it is native to JavaScript. Unlike XML, which has to be parsed into JavaScript for a browser to “understand” it, JSON is already in the target language.
Additionally, because JSON can be the sole contents of a JavaScript file (which can have any domain has its src URL), JSON can be used to avoid the difficulties of the cross-origin lockout. Typically, web browsers prevent web sites from making requests to and receiving data from domains other than the domain of the primary document. However, JavaScript (like CSS and images) is treated as a separate resource, which can come from anywhere. With a JSON implementation of the AJAX pattern, the cross-origin request can be “disguised” as a resource inclusion.
JavaScript in the real world
JQuery
The syntax of JavaScript can be a bit verbose (and obtuse) at times, and a number of very common operations require an abundance of “boilerplate” code.
For this reason, almost all JS developers use a JavaScript library called JQuery. JQuery provides concise APIs for a number of common use-cases, like document-traversal, DOM manipulation, and AJAX.
Most programming languages have a “standard library,” a core set of language extensions that automate or abstract the most common things programmers need to do in the language. JavaScript does not have an official standard library. Though there are other competing projects, with devoted developer bases (like Closure and Prototype), JQuery is — for many people — the JavaScript standard library.
Here is a very short example of how JQuery speeds up development. Suppose you want to change an attribute of an element.
// The "pure" JavaScript way.
document.getElementById("toChange").setAttribute("title","New Title Text");
// The JQuery way.
$.("#toChange").attr("title","New Title Text");
In this case it is only 28 characters being saved, but sometimes it is a lot more than that. And even the little savings add up over a big project.
JavaScript Front End Libraries
A lot of decent web designers, who have a good understanding of HTML and CSS, use JavaScript GUI enhancements without becoming JavaScript programmers.
This is possible because there are a number of JavaScript UI libraries (like JQuery UI) and front end frameworks (like Bootstrap) that provide a relatively easy HTML API.
An API (as mentioned above) in an Application Programming Interface. That is, a way to access the functionality of a piece of software from outside that software. In the context of and HTML API to JavaScript features, this means an easy way to include JavaScript features into HTML simply by adding things to the markup (usually special classes).
Exploring the feature set of JavaScript UI libraries can provide beginning developers (and not-so-beginning ones) with a lot of easy ideas for improving the interactivity of a site, and the tools to implement those ideas. (Just remember to pick one and stick with it for a project — try not to mix-and-match different UI libraries. The results are visual chaos and design confusion.)
JavaScript Front-End Application Frameworks
Separate from the front-end design frameworks (like Bootstrap) discussed in the previous section on CSS, a front-end application framework is a skeleton software app, which serves as a starting point not for the visual design but for the actual functionality of the web app.
JavaScript application frameworks like Backbone.js and Angular provide a structured template for a web app, automating a number of common tasks and providing a design architecture.
Most JS app frameworks implement the MVC, or Model View Controller, design pattern. This pattern works like this:
- The Model handles the data
- The View displays the data
- The Controller connects the data in the model with the view, and handles application logic
Each JS framework implements this patten differently, but almost all of them do some version of this.
If you are going to attempt to build a JavaScript application, trying to build from scratch is almost always a terrible idea. Using a framework ensures that your app is built on a solid architectural foundation, and saves countless hours that otherwise would be spent coding low-level, generic functionality.
As has become the case with most software development, being a good JavaScript developer isnt just about knowing how to code JavaScript — it’s about knowing what libraries and frameworks are best suited to various types of applications, and being able to use them with some degree of fluency.
JavaScript Is More Powerful and Useful Than Ever
JavaScript began life as a low-powered language used for silly effects and minor enhancements on web pages. But in the last decade or more a new generation of standards-compliant web browsers, along with advanced JavaScript libraries and frameworks, have turned the language into a serious platform for full-scale in-browser applications.
HTML vs. Everything
This section wraps up our HTML coverage by looking at alternatives to HTML in several contexts, and showing that HTML has become the dominant language for content across the modern technology landscape.
HTML as an alternative
HTML is the default language of the web, but it is also being used as a platform for other types of design and content.
E-books
The most popular Open Source standard for e-books, the .epub format — which is usable on almost all e-readers except the Amazon Kindle — is actually just an HTML based format. Individual sections, and sections like Tables of Contents and Indexes, are individual HTML files. All the content files, along with assets like images and CSS files, are simply zipped into a single file and given a .epub file extension. In many ways, an .epub book is analogous to a website with many pages in it.
Amazon Kindle has always preferred a proprietary file format. The first generation of Kindles used .mobi, and after that a related format called .azw. These were more complex than the .epub format, and were not based on HTML.
However, the latest generation of Kindles uses the new .azw3 format, which is based on HTML5. While it was always possible to create Kindle e-books from HTML via a conversion software, HTML is now a primary authoring language for e-book content.
Mobile Apps
The two most popular mobile platforms — Android and iPhone — use completely different programming languages for app development. Android app development is typically done in Java, while iOS uses Objective C and the new language Swift.
This means that if you wanted to build and release an app for both platforms, you would typically need to build the entire thing twice in two different languages. This is fine for large software companies like Facebook, but it can put a serious strain on smaller development houses.
A few different solutions to this problem have been created, but the most intriguing is the use of HTML (along with JavaScript and CSS).
Tools like PhoneGap allow developers to build an app once in browser based languages (HTML, JS, CSS) and then package them into apps for different operating systems. The PhoneGap software wraps the browser-based application into a “chromeless browser” — a browser-style rendering frame that only views files within the apps directory and provides no user-facing navigation. This can be done for any supported operating system, allowing apps to be built once and deployed everywhere.
HTML has become the universal language.
Alternatives to HTML
Even though HTML is the native language of the web, and a powerful platform for interoperability, there are some alternative technologies that refuse to go away.
Flash
Flash is a multimedia software platform that can run in most web browsers with a plugin.
In the late 1990s, there was nothing cooler than a Flash-based website. They were highly interactive, animated, and boasted better graphics than simple HTML-based sites. You could even have them play music and video.
These sites quickly became tedious and annoying, but the technology hung on out of habit (people write what they are used to writing) and out of fear that sites and applications written in HTML5 and JavaScript wouldnt be supported in all browsers. Internet Explorer 6 remained in heavy use for years after the advent of better, standards-compliant browsers, so people kept pushing out Flash-based sites.
For the most part, this trend has died down. Flash has now mostly used for desktop and mobile video games, and its use on the web has been mostly curtailed among the smart crowd.
Unfortunately, small non-tech businesses (especially churches and community non-profits) are perpetually several years behind in technology trends, and many of them still want to include Flash elements (like a “Flash Intro”) into their website. This is almost always a mistake.
- The most common use of Flash on non-interactive websites is the “Flash Intro,” which is incredibly annoying to users. No one wants to wait and watch your entertaining pre-show before finding the things they were looking for on your site. Never, ever do this.
- Some people think it is a good idea to place content and menus into a Flash app, so that they can create cool effects like light-up menu items or rolling tabs. This is a bad idea:
- People care about your content, not your special effects. Make your content easy to read and easy to navigate. No one is going to stay on your site longer or recommend it to their friends because they liked the way your content unfurled like a scroll when they clicked the flying menu button.
- Placing content into Flash, instead of HTML, hides it from Search Engines, making your site effectively invisible to Google.
- Placing content into Flash means that any particular view of your content is actually a specific state in a running app, not a shareable URL. This makes it very difficult for users to bookmark or share your content.
- Content and navigation in a Flash app is not accessible to screen readers, making your site unavailable to people with visual disabilities.
- Most of the effects you might want to create in Flash can be created more easily in JavaScript and CSS, without creating any of these problems.
PDF — Portable Document Format — is a great cross-platform format for print-focused documents.
With PDF, you create a single view of your content. A PDF has specific page dimensions, a particular layout and document flow, a particular font, a particular text-size. PDFs can embed information for printers (like ink colors).
All the things that make PDFs a good choice for things like sheet music and print books make it a terrible choice for online content.
And yet, many people and organizations (especially small non-tech businesses and non-profits) continue to publish PDFs to the web. A pervasive pattern of behavior is the creation of print-focused brochures which are then made available on a website, while no one ever actually receives a printed copy.
Anyone who wants to see the information in your brochure does not want to see a PDF. They want your content, and you should provide in the format appropriate to the medium — in the case of browsers, that medium is HTML.
One particularly egregious use of PDFs where HTML would be a better choice is fillable forms. Many organizations create PDF forms which can be filled out inside a PDF reader and then emailed back. One imagines some overworked secretary copying these forms into a whatever database system the office uses internally.
A more sensible solution would be an online HTML form, which posts the data directly into the database application. This would save labor and reduce errors. With HTTPS, it would be even more secure than emailing PDF forms around.
HTML wins
HTML has become the universal language of the web, as well as related technologies like e-books and mobile apps.
In some cases HTML is one choice among several, providing a set of benefits and drawbacks just like any other technology choice. In other cases, HTML is not just the clear winner, but the only sensible choice.

XHTML
XHTML stands for eXtensible Hypertext Markup Language. It is basically an XML application of HTML. When it was first developed, HTML (version 4) was loosely structured. XHTML made HTML highly structured. It was long seen as the future of markup for the web. But HTML5 has largely bypassed it. Still, it is widely used.
It developed as a means of combating bad code found on many web pages that used HTML such as missing closing tags, improper nesting of tags, and similar loose coding practices. XHTML combats these errors by setting rules such as all tags must be closed and must be in the right order.
History
In 1998, the W3C published a Working Draft entitled Reformulating HTML in XML. This new language was based on HTML 4, but adhered to the stricter syntax rules of XML. In February of 1999 the name of the specification changed to XHTML 1.0: The eXtensible HyperText Markup Language. Finally, in January 2000, XHTML became the official W3C recommendation.
The next version of XHTML, XHTML 1.1 was published in May 2001, which was still based on strict rules but allowed for customizations and minor changes. XHTML 2.0 started out as a working draft but was abandoned in 2009 in favor of HTML5 and XHTML5.
XHTML Basic Principles
While XHTML is almost identical to HTML, it introduced a new set of rules that were supposed to ensure all code is valid and correct. These rules were:
- All elements and attribute names must be in lowercase.
- All empty elements must be written using XML’s special empty-element tag.
- All end tags must be present and there are no optional end tags.
- The HTML elements must contain a single head element, followed by a single body element or a single frameset element.
- Every head must contain a single title.
Along with the rules mentioned above, XHTML initially introduced three formal Document Type Definitions (DTDs) which corresponded to the three different versions of HTML 4.01:
- XHTML 1.0 Strict is the XML equivalent to strict HTML 4.01, and includes elements and attributes that have not been marked deprecated in the HTML 4.01 specification. As of November 2015, XHTML 1.0 Strict is the document type used for the homepage of the website of the World Wide Web Consortium.
- XHTML 1.0 Transitional is the XML equivalent of HTML 4.01 Transitional, and includes the presentational elements (such as center, font, and strike) excluded from the strict version.
- XHTML 1.0 Frameset is the XML equivalent of HTML 4.01 Frameset, and allows for the definition of frameset documents — a common web feature in the late 1990s.
Example
The early versions of HTML were loosely structured and it was pretty common to find web pages with bad coding practices. The proper web page in XHTML looks like this:
<!DOCTYPE html PUBLIC "-//W3C//DTD XHTML 1.0 Strict//EN" "http://www.w3.org/TR/xhtml1/DTD/xhtml1-strict.dtd">
<html>
<head>
<title>My First Webpage</title>
</head>
<body>
<h1>Hello World!</h1>
<p>I am a very simple but fully functional web page with valid XHTML code!</p>
</body>
</html>
Online Resources
Even though XHTML seems to be overtaken by HTML5, there are still plenty of resources online that can help you get a better grasp on XHTML. From basic specification to cheatsheets to validators to tutorials, the links listed below will help you with any questions regarding XHTML.
Reference
- XHTML Official Specification: official website that explains the decision to develop XHTML and provides further resources on its development.
- XHTML 1.0: the second revised edition of the working draft to reformulate HTML 4 in XML 1.0
- XHTML Basic Specification: provides an XHTML document type that can be shared across devices such as desktop, TV, and mobile phones.
- XHTML: The Clean Code Solution: provides a detailed XHTML overview focused on differences between HTML and new standards.
- Why Switch to XHTML: provides a compelling argument to switch to XHTML in order to adjust the workflow and produce cleaner code.
Tools
These tools will help you check the validity of your code and make it look good.
- HTML/XHTML Validator Service: the W3C’s validator checks both HTML and XHTML documents for conformance to the official specifications.
- HTML Tidy: helps you automatically clean up HTML files and conform them to standard specifications. It was originally developed by Dave Ragget of the W3C and now it’s an open-source project at SourceForge.
Tutorials
If you want to really dive into XHTML development, these tutorials should get you going.
- XHTML Explained: gives an overview of how XHTML came to be and explains all the changes that happened, followed by code examples, DTD overview, and best coding practices.
- XHTML Web Design for Beginners : explores the advanced building blocks of XHTML, including comments, text, and more.
- XHTML Tutorial: a very brief tutorial covering the basic concepts of XHTML in a concise manner.
- Accessible HTML/XHTML Forms: a beginner-level tutorial that covers just what you need to know.
- Beginning HTML (XHTML): a video tutorial suitable for beginners to learn the basics of XHTML.
- Software Testing Methodologies: an introduction to the methods and tools of software testing that is of general interest to HTML developers.
Books
Since XHTML is connected with HTML, many books discuss these two languages together. You’ll find books aimed at complete beginners as well as books aimed at those who already have some coding experience and want to expand their knowledge.
- HTML, XHTML, and CSS: Visual QuickStart Guide (2006) by Elizabeth Castro: explains all the HTML and XHTML essentials in a language suitable for beginners. The book has a lot of visual examples and includes a companion website with extra material, examples, updates, and more.
- HTML, XHTML and CSS For Dummies (2011) by Tittel and Noble: an introductory reference to HTML, XHTML, and CSS that teaches you how to create XHTML documents, apply those principles to popular CMS such as WordPress and Drupal, and design for mobile devices.
- Beginning Web Programming with HTML, XHTML, and CSS (2011) by Jon Duckett: teaches you how to write web pages using HTML, XHTML, and CSS. It follows standards-based principles, but also teaches readers ways around problems they are likely to face using (X)HTML.
XHTML Today
XHTML as it was first created is no longer actively developed and maintained. The main reason for its fall from grace was the very strict error handling which caused web pages to stop rendering when an error was encountered. This led to the creation of the Web Hypertext Application Technology Group (WHATWG) which started working on HTML5. They contributed to the eventual disbanding of the XHTML 2.0 working group.
Today, all work by W3C is focused on HTML5 and an XHTML syntax, known as XHTML5.1, which is being defined alongside HTML5 in the HTML5 draft.
Even though XHTML has been bypassed by HTML5, knowing the history behind it as well as the relevant coding practices sets a strong foundation for the future. The resources above will set you on the right path to learning valid code.

HTML5
HTML5 is the current version of the HTML standard. It is the markup language used for web documents and applications. HTML5 includes a number of major additions and changes to the language. We will discuss those and a bit more.
History and Introduction
We went over the history of HTML as it went from versions 1 to 4. But the history of HTML5 is even more interesting and important.
The Road to HTML 5
During the early years of the public adoption of the web, the major browser providers developed their own proprietary HTML elements and their own approach to rendering.
HTML documents created for one browser were nearly unusable in others, especially if the HTML pages contained interactive elements such as form controls.
As HTML 4.0 and XHTML stabilized, the Web Standards movement pushed the browser makers to adopt open standards, so that web pages would be compatible with any browser.
This work was largely successful, but two trends pushed the boundaries of HTML, threatening the whole principles of openness and interoperability.
The first was the collective bad habits of “quirks mode” browser-targeting. After so many years of having to tweak designs for specific browsers, many designers continued to code this way.
The second was an increasing desire for rich, interactive content that wasn’t supported in HTML. This led to widespread use of Flash.
In 2004, Mozilla and Opera presented W3C a position paper advocating for what would later become HTML5. The new iteration of the language would support new interactive functionality and rich media, while being backwards compatible with standards-compliant web browsers.
This last point was crucial — the new version had to degrade gracefully and contain valid HTML 4.0 as a subset; otherwise, it would become just another confusing variant of an already crowded ecosystem.
WHATWG began working on HTML5 almost immediately, and the first public draft was published in 2008. Browser makers began to experimentally implement portions of the standard, which continued to evolve.
A stable “Candidate Recommendation” was released in 2012, and the fully stable W3C Recommendation was released in 2014. By that time, all major browsers were supporting the most critical parts of the standard.
The HTML5 standard now has two parallel development tracks. W3C has a stable release cycle with incremental version numbers — a series of “snapshots.” WHATWG maintains an evolving “living standard” with new features added continuously.
What’s New in HTML5?
There’s a lot new in HTML5, including the nature of the specification itself. HTML 4.0 was, in essence, an inventory of available markup tags. HTML5 includes that, but that is just one piece of a modular ecosystem of browser-based technologies defined in the standard.
Markup
The changes in the markup for HTML5 fall generally into a few categories.
Semantics
Semantic markup means markup that carries meaning. For example, the only major page-layout element in HTML 4.0 was <div>. A <div> could be anything: a header, a footer, a column, a sidebar, a menu. In HTML5, a number of semantic page-layout elements have been added:
<header><footer><main><article><aside><nav><section>.
Other semantic elements added in HTML5 include:
<figure>and<figcaption>, which are used for illustrations and diagrams;<mark>which defines highlighted or marked text;<time>which defines a datetime.
HTML5 also makes explicit that <strong> and <em> should be preferred over <b> and <i>.
Multimedia
New elements were added to HTML5 to support media:
<video><audio><canvas>.
The <audio> and <video> elements allow native playback of media without JavaScript, Flash, or embedding of any kind — it is as simple as including an image. The <canvas> element works with JavaScript to create on-page graphics programatically.
HTML5 also has explicit support for Scalable Vector Graphics (SVG).
Interactivity
HTML5 has a number of new form elements and input types which help support the language as an application platform. These include:
<datalist><keygen><output>.
Input types now include: color, date, datetime, datetime-local, email, month, number, range, search, tel, time, url, and week.
Along with new form controls, HTML5 introduced <meter> and <progress>, which provide visual feedback and can be used outside of forms. Additionally, several new global attributes enable interactive features:
contenteditablecontextmenudata-*draggabledropzonespellcheck.
Lexing and Parsing Rules
Aside from changes to the catalog of available elements, HTML5 markup is subject to a much stricter and better-defined set of lexing and parsing rules. It is no longer a version of XML or SGML, but a fully-specified markup language in its own right.
Syntax errors or poorly-formed markup are expected to fail consistently, providing similar behavior across compliant browsers.
Browser and DOM APIs
HTML5 specifies a number of JavaScript APIs for interacting with the DOM (Document Object Model — the on-page content) and with the browser. These include:
- Canvas, mentioned above, for in-page graphics rendering.
- Timed Media Playback, for use with
<video>and<audio>. - Online/Offline status checks.
- MIME type and protocol handler registration, which allows a browser to select a website as the default way to handle a particular filetype or communications protocol. For example, allowing a webmail application to handle
mailto:links. - Microdata, which allows nesting of semantic metadata as attributes.
- Cross-document Messaging, which allows two pages from two different domain sources, open in two different browser contexts, to communicate with each other.
- Web Storage, a persistent key-value pair data store similar to cookies, but easier to use and with a larger storage capacity.
The Success of HTML5
The success of HTML5 can be judged on two counts:
- how well the specification accomplishes its goals
- how widespread its adoption is.
On both counts, HTML5 has been highly successful.
The goals of HTML5 were:
- browser interoperability
- reduced or eliminated need for plugins
- backwards compatibility with existing standards.
These have largely been achieved. Rendering engines and JavaScript implementations in the major browsers have all converged to the point that visiting a web page will produce a consistent experience across all browsers.
Support for multimedia, browser storage, and other application-focused features has eliminated the need for Flash and given rise to an explosion in native HTML5 web applications.
Documents created in HTML5 render well in legacy browsers, even if more advanced web applications don’t work.
Adoption has been swift, starting even before the standard was made official. As of this writing, the majority of the top 10 million websites uses HTML5. What’s more, the majority of new web content is being produced in HTML5.
Even more exciting has been the use of HTML5 outside of the browser. Platforms like Electron for desktop and Phonegap for mobile have turned HTML5 (with CSS3 and JavaScript) into a native application language.
General HTML5 Resources
- The HTML5 W3C Recommendation and the WHATWG HTML Living Standard are the two official sources defining HTML5.
- The W3C offers a series of training course on HTML5:
- Mozilla Developer Network offers a comprehensive HTML5 reference.
HTML5 Is the Future
HTML5 is the present and future of the web. If you work with web technologies or publish web content, you need to be familiar with the standard. If you learned web design before 2010, and haven’t kept up with changes, there’s a lot of great stuff in HTML5 that is worth checking out.
Audio and Video Resource
Before HTML5 came along, embedding audio and video in web pages was not straightforward. Different technologies and MIME types required different plugins.
Also, media sometimes had to be embedded using iframes. This is not ideal because it’s a technique which hackers also use to embed malicious code.
HTML5 introduces new tags that make media management easier, primarily because they introduce standards that can be used on practically any site. As with all HTML5 tags, some caution is required, since the tags may not be compatible with older browsers.
To embed audio or video, you can use the new <audio> and <video> elements in HTML5. Here’s an example:
<audio autoplay>
  <source src="madeleine-brel.ogg" type="audio/ogg">
  <source src="madeleine-brel.mp3" type="audio/mpeg">
  Please upgrade your browser.
</audio>
Below, we’ve broken down each element with its attributes.
Embedding Video
HTML5 introduces a new element, <video>, which does away with the need for browser plugins.
Between the opening and closing tags of the element, you can specify alternate text. This is only displayed if the browser does not support the <video> element.
The <video> Element Attributes
Within the element, you can specify various attributes:
width, height
These attributes set the dimensions of the video on screen. While they are optional, it’s best to include them so that the rest of the page renders correctly while it is loading.
The width and height of a video must be specified in pixels.
controls
The controls attribute tells the browser to display a play/ pause button and a volume control slider. To display the video without controls, omit the attribute.
autoplay
Autoplay will force the video to start playing on desktop devices, without any intervention from the user. To display without autoplay, simply omit the attribute.
On mobile devices, the autoplay attribute is ignored.
Embedding Audio
To embed audio, use the <audio> element. It’s very similar to the <video> element.
Between the opening and closing tags of the element, you can specify alternate text. This is displayed only if the browser doesn’t support the <audio> element.
The <audio> Element Attributes
Within the element, you can specify various attributes:
loop
The loop attribute tells the browser to restart the audio track from the beginning once it has finished playing.
controls
The controls attribute tells the browser to display the same play/pause button and volume control slider as with the video tag. Simply omit the attribute to display the audio without controls.
autoplay
The autoplay attribute will force the audio to start playing automatically. To embed the audio without autoplay, simply omit the attribute.
muted
The muted attribute will mute the volume when the audio loads.
preload
The preload attribute allows you to load the audio before the page content. Acceptable values are auto, metadata, or none.
The <source> Element
The <source> element defines the file and MIME type, and must be used within the <video> or <audio> element. There must be at least one <source> element. You may add additional <source> elements if you want to specify alternate versions of a file.
For example:
<video autoplay controls>
  <source src="madeleine-brel.mp3" type="video/mpeg">
  <source src="madeleine-brel.ogg" type="video/ogg">
  Your browser does not support the video tag.
</video>
The <source> Element Attributes
The <source> has the following attributes:
src
The src attribute specifies source path and filename for the video or audio file.
type
The MIME type of the file.
For video, acceptable values are video/mp4, video/webm, and video/ogg. For audio, acceptable values are audio/mpeg, audio/wav, and audio/ogg.
While modern browsers theoretically support the element itself, some may struggle with certain MIME types.
For the best chance of cross-browser compatibility, the video/mp4 MIME type is recommended for video, and the audio/mpeg MIME type is the best for audio. You can specify multiple <source> elements if you want to provide an ogg and an mp4 version of the same video, for example.
The <track> Element
The <track> element allows you to specify a text resource that is served along with your audio or video. The most common use for <track> is to specify a subtitle file, or captions.
You can specify more than one track for each video or audio element. For example, you might want to add <track> elements for different languages:
<video autoplay controls>
  <source src="madeleine-brel.mp3" type="video/mpeg">
  <source src="madeleine-brel.ogg" type="video/ogg">
  <track srclang="en" label="English" src="madeleine_en.vtt" kind="subtitles" default>
  <track srclang="fr" label="French" src="madeleine_fr.vtt" kind="subtitles">
</video>
The <track> Element Attributes
The <track> element has the following attributes:
src
The source path and filename for the text file.
kind
Similar to the type attribute, the kind attribute specifies the nature of the file. You can use captions, chapters, descriptions, metadata, or subtitles.
srclang
The srclang attribute lets you specify the language of the text file. Use the appropriate language code.
default
Use the default attribute to specify which <track> should be the default choice.
label
Gives the text track a name.
Audio and Video Resources
- Mozilla has developed this excellent guide, Using HTML5 Audio and Video. It will take you from simple to advanced usage.
- Apple has published specific guidance for developers. This is a worthwhile read if you’re developing for iOS or Safari.
- Microsoft has its own guidance for HTML5 audio and video in Internet Explorer.
Application Cache
HTML5 didn’t just change markup syntax. It also defined a number of browser-based technologies, including several related to offline use of web applications.
Application Cache (or “AppCache”) is a feature that allows developers to specify resources to be pre-fetched and stored locally.
These resources are declared in a cache manifest file, linked from the header of a web page. This can be used to design a web application that works offline, or simply to speed up the user experience.
AppCache is a feature with a lot of potential, especially in the context of single-page web apps. Unfortunately, the feature also has a lot of problems, and is in the process of being deprecated and removed from the standard.
That being said, AppCache is still usable and the only way to accomplish certain effects.
To help you deal with this confusion, we’ve pulled together the best tutorials and resources on Application Cache, which explore the topic from a variety of angles.
Application Cache Tutorials
- A Beginner’s Guide to Using the Application Cache is one of the best introductory tutorials on the subject.
- Using the Application Cache is a developer-focused technical tutorial from Mozilla Developer Network.
- Let’s Take This Offline is a detailed, narrative explanation of how to use AppCache.
- Using HTML5 Application Cache in Mobile Web Apps covers general use of AppCache and explores special issues when using it when developing HTML5 web apps for mobile browsers.
- Using HTML 5 Application Cache for Single Page Applications details the use of AppCache in the context of an Ember.js application.
- Tutorial: How to Make an Offline HTML5 Web App uses the example of an RSS reader to explain how to build a web app that works offline. Of particular interest here is the way AppCache is used in concert with several other HTML data stores like cookies, Local Storage, and WebSQL.
- Building a Simple Cross-Browser Offline To-Do List With IndexedDB and WebSQL explores building an offline-first to-do list application that works in multiple browsers with varying support for offline data storage features. Application Cache is used together with IndexedDB and WebSQL.
- Creating Offline Application With HTML5 App Cache details the use of AppCache, including step-by-step instructions on how to create a manifest and details about using .htaccess to serve the manifest file properly on Apache.
- Creating HTML5 Offline Web Applications explores the ins and outs of several local data storage methods, including AppCache.
- Adding HTML5 Application Cache to Speed Up Your Web App in 5 Minutes is a short tutorial that will get you quickly using AppCache. The focus in this tutorial is on using caching to speed up the online website experience, not on providing an offline app experience.
- Running Your Web Applications Offline With HTML5 AppCache covers the cache manifest and also the JavaScript API, detailing cache-related events and actions.
- What Is Application Cache? provides a high-level overview of AppCache.
- Build an HTML5 Offline Application With Application Cache, Web Storage, and ASP.NET MVC provides a detailed look at how AppCache actually functions, with complete coverage on structuring a manifest file properly. After this general explanation, the tutorial goes on to show how to manage this process in an ASP.NET application.
Additional Application Cache Learning Materials
- Best Practices for a Faster Web App With HTML5 only touches on Application Cache in one section, but it is very helpful in understanding how App Cache is used as part of a larger performance strategy.
- Tips when using Application Cache is a list of best practices for dealing with some of the common problems of AppCache.
- Deleting an HTML Application Cache explains how to delete your local Application Cache storage in several browsers. This is especially useful during local development and testing, when your project’s files are changing faster than AppCache is refreshing them.
- Common Pitfalls to Avoid When Using HTML5 Application Cache covers a number of the most common problems of AppCache, and explains how to overcome them.
- Application Cache is a Douchebag is a funny, but all too accurate, rant about the difficulties of working with Application Cache. This essay was an instant classic among front-end developers and is definitely required reading for anyone interested in AppCache.
Application Cache Reference
- Can I Use Application Cache? gives you a quick overview of which browsers support AppCache.
Tools for Working with Application Cache
- Cache Manifest Validator is an online tool for validating your AppCache Manifest files.
- GWT AppCache Support Library is a module for Google Web Toolkit that automates the generation of Appcache manifest files.
- Appcache-Manifest is a Node.js tool for generating Application Cache Manifest files from the command line. The tool includes the MD5 hash of the manifest files, ensuring that updated files automatically change the manifest, causing proper cache invalidation on the client.
- CacheMan is a desktop app that handles Cache Manifest generation.
Moving Forward with Application Cache
Should you learn how to use Application Cache? If you are a front-end developer working on web applications — absolutely yes. But you also need to know what’s coming and how offline browser storage is evolving.
The intended replacement for AppCache is Service Workers. You can already use Service Workers in some browsers, and there are great tools for implementing them easily. On the other hand, some browsers haven’t even decided if or when they will implement the feature.
So what should you be doing in your own web applications?
For now, use AppCache, but prepare for Service Workers.
Games, Graphics, and Animations
Scalable vector graphics (SVG) and the HTML5 canvas element are two powerful tools for creating graphics, animations, and even browser-based games. While both of these technologies can be used for some of the same purposes, they work in fundamentally different ways.
- A canvas element is a bitmap space where you can draw and manipulate rasterized images on a pixel-by-pixel basis.
- An SVG is code that describes a resolution-independent vector graphic.
Both canvas elements and SVGs can be created programmatically with scripting and designed to respond to user input. As a result, SVGs and canvas elements can be used to create static graphics and interactive animations.
SVG vs Canvas
First things first, SVG isn’t part of the HTML5 specification while canvas is. SVG is a language used to describe two-dimensional graphics. It is a standalone web standard that can be embedded in HTML and XML documents.
When embedded in an HTML document, SVG employs a syntax that matches HTML5 syntax, thus leading some to incorrectly assume that SVG is an HTML element.
SVGs and HTML5 canvas elements are rendered quite differently by browsers:
- Canvas elements are rendered “on the fly.” This means that canvas elements are drawn in real time as they are processed by the browser.
- SVG are not drawn immediately. When a browser encounters an SVG it first builds a DOM for the SVG and then renders the DOM.
That might seem like a minor difference, but it isn’t. This means that a browser doesn’t have to build a DOM when it encounters a canvas, but it does have to when an SVG is rendered.
For simple animations, the difference is negligible. However, exceptionally complex canvas animations require dramatically fewer browser resources than SVGs.
On the other hand, if you want to make a small change to an SVG you can traverse the DOM and make the change, while an entire canvas element must be redrawn to make any change.
Another way that canvas elements and SVGs differ is resolution. Canvas elements are resolution-dependent. That means that when you zoom in on a canvas element the resolution degrades. An SVG, on the other hand, is resolution-independent and will look pixel-perfect at any resoultion.
When to Use SVGs and Canvases
All of this invites the question: when should SVGs and canvas elements each be used? While there is some crossover in the application of these tools, in general, follow these guidelines:
- Use SVGs for pixel-perfect animations and graphics that must look sharp on devices of any size.
- Use SVGs if you need to avoid using JavaScript or if accessibility of animation content is critical.
- Use HTML5 canvas to create complex animations and games that incorporate a great deal of user input.
If you want to learn more about using SVGs take a look at our article comparing SVGs and SWFs which includes a list of SVG resources. To learn more about the HTML5 canvas element, read on.
Canvas Resources
Let’s start with the basics:
- Mozilla Developer Network Canvas Tutorial: this tutorial starts with basic usage and moves on to cover drawing shapes, text, using images, creating transformations and animations, pixel manipulation, and more. By the end of this tutorial you will have created advanced animations, a continuously panning panorama, and a color picker app.
- Dev.Opera HTML5 Canvas — the Basics: this thorough introduction to canvas covers drawing techniques, working with images, pixel-based manipulation, as well as text, shadows, and gradients.
- W3Schools Canvas Tutorial: Learn the basics of drawing, working with coordinates, gradients, drawing text, and working with images. Then, apply what you’ve learned by building a canvas clock. Finally, put it all together and create a few different basic HTML5 games.
- Eloquent JavaScript, Chapter 16: Drawing on Canvas: this text is designed to educate JavaScript programmers, not just teach web developers simple tricks. This entire interactive ebook is a goldmine, but if your focus is squarely on learning how to work with the canvas element, chapter 16 will provide a firm grounding in how JavaScript and the HTML canvas element interact.
With a firm grasp of canvas basics, you’ll want to move on to advanced techniques:
- Creative JS 31 Days of Canvas Tutorials: master the canvas element in a month (more or less). Finish this series and you’ll have learned several advanced canvas animation techniques.
- HTML5 Rocks Case Studie: Building Racer: take a look at this case study and you’ll get to see how professional engineers at Google work with JavaScript and canvas.
There’s no better way to learn than to build something. These tutorials will put what you’ve learned to use and show you how to create some simple HTML5 games:
- CSS-Tricks Learning Canvas: Making a Snake Game: CSS-Tricks is known for providing technically-excellent tutorials and articles. Follow along this tutorial and produce a fun snake game while simultaneously learning how to work with canvas from a front-end engineer at Twitter.
- HTML5 Rocks No Tears Guide to HTML5 Games: this tutorial will walk you step-by-step through the process of building a simple space invader game.
- Envato Tuts+ Create an HTML5 Canvas Tile Swapping Puzzle: learn how to use canvas and JavaScript to build a tile swapping puzzle in this tutorial. The result will be a simple app with adjustable difficulty that you can use with any image.
- Dev.Opera Creating Pseudo 3D Games With HTML 5 Canvas and Raycasting: this tutorial will show you how to create a pseudo 3D game map with HTML5 and canvas in the style of the early-90s legendary game Wolfenstein 3D. While this tutorial won’t produce a functional 3D first-person shooter game, you will learn how to produce a navegable 3D map complete with props and guards.
There’s no better way to develop mastery of a topic than to work through one or two in-depth texts. Here are three of the best HTML5 canvas texts available today:
- HTML5 Canvas (2013) by Fulton and Fulton: learn to build interactive multimedia web applications with canvas and JavaScript. This text covers simple 2D drawings, the use of algorithms to develop math-based movement, the use of video and images, making canvas apps responsive, and more.
- Supercharged JavaScript Graphics: with HTML5 canvas, jQuery, and More (2011) by Raffaele Cecco: this advanced text will help you master HTML5 canvas and incorporate advanced techniques such as collision detection, object handling, smooth scrolling, and Google data visualization tools.
- Core HTML5 Canvas: Graphics, Animation, and Game Development (2011) by David Geary: this is not a text for beginners. It is designed to be read by experienced developers who have an intermediate level grasp of JavaScript. While this text does cover canvas basics, it’s focus is on advanced topics such as game development, custom app controls, the application of physics to HTML5 games, and the development of mobile apps.
Interactive Elements
HTML5 has added a few attributes to make creating interactive webpages easier.
Details and Summary Tags
Using HTML5, it is possible to create lists that can be expanded and collapsed through the <details> and <summary> tags. Although bulleted lists can be created just as with previous versions of HTML by using the <ul> and <li> tags, these are static and cannot be collapsed.
<details> Element
To provide a starting point for the list, developers must start with the <details> element. This element works similarly to the <ul> tag. The following example shows a way to start a code segment with this tag:
    <details>
        ...
    </details>
Adding the details tags is not enough to complete the list. Summary tags needed to be added as well.
<summary> Element
The summary tag specifies the label that is applied to the list that can be expanded and collapsed. The items that can get collapsed and expanded are specified by the content right under the summary tag.
The summary tag content can be specified by any HTML element including <p> or <ul>. The following is a simple example of the usage of the <details> and <summary> tags:
    <details>
    <summary>List Label</summary>
    <p>Detail info goes here...</p>
    </details>
It is also possible to nest the <details> and <summary> tags within another set. This will create a collapsible/expandable list within another list.
Here is an example of a list within another list using the <details> and <summary> tags:
    <details>
    <summary>Items List</summary>
    <p>Item 1</p>
    <p>Item 2</p>
        <details>
        <summary>Item 3</summary>
        <p>Item a</p>
        <p>Item b</p>
        </details>
    <p>Item 4</p>
    </details>
The details and summary tags can be used to create an effect of lists that dynamically open and close on a web page. This can be applied to a variety of scenarios including FAQs that feature answers to questions that can be opened or closed.
The summary tag would contain the question while the collapsible content would be populated with the answer.
Menu and Menuitem Tags
While browsing the web, users can access the browser’s menu with a click of the right mouse button. The menu items that come up vary from browser to browser. With some new HTML5 tags, it is possible to customize the menu to add additional actions users can take.
Furthermore, the actions can be tailored to specific sections or locations on the web page itself. For example, different actions or menu items can be shown in the navigation area versus the main body of the web page.
The tags that make this possible are the <menu> and <menuitem> tags. Since these are experimental tags, they are not widely supported. Firefox is the only major browser that currently supports them.
<menu> Element
Anytime a menu item needs to get added, the series of items needs to begin with the <menu> tag. This series is ended with the closing tag, </menu>.
Developers should be careful using these tags as these are context menus and whether or not they show up depends on where the code is placed within the HTML file. This is especially true when developers use <div> elements. Consider the following code:
    <div id="tmpDiv">
        <menu label="menu1" type="context">
        ...
    </menu>
    </div>
In this case, elements of the custom menu will appear when the user right clicks the mouse button within the “tmpDiv.” Like most HTML5 tags, the menu tag also has attributes called label and type.
The label is simply an identifier for the menu while the type can be specified as either context, list, or toolbar. Even though multiple menu types can be specified, only the context menu is supported.
<menuitem> Element
To add items to the menu, developers must specify the names of the items using the <menuitem> tag. The tag has some attributes that affect both the look and behavior of the menu item.
The attributes for the menuitem tag include label, icon, and onclick.
The label specifies the text the user will see for the menu item when the menu is activated from the browser. Developers can specify the icon used for the menu item which will appear to the left of the text. The onclick attribute controls the actions taken when the menu item is activated by the user.
The actions that the onclick attribute takes could execute javascript code. For example, users could see an alert box. Here is an example of how to setup a menuitem tag that will display a popup that says “hello”:
    <div id="tmpDiv">
        <menu label="tmpMenu" type="context">
            <menuitem label="Say Hello", icon="hello.png", onclick="alert('Hello!')">
            </menuitem>
        </menu>
    </div>
The menu and menuitem tags could be used to create specialized menus. This will allow users to take various actions depending on the menu item clicked. However, beware of the limited support for these tags.
Native Drag and Drop
Prior to HTLM5, developers had to use JavaScript libraries such as jQuery UI or Dojo to add drag and drop animations to web sites and apps.
However, HTML5 adds native browser support for drag and drop events, a JavaScript API, and dedicated markup to support these interactions. In this section, we’ll take a look at drag and drop in HTML5 and code a basic implementation of this feature.
Building Blocks
In order to build a drag and drop interaction, your HTML markup will need to include three type of elements:
- A source element: the element to be dragged, designated as such by the HTML5 attribute
draggable="true". - A target element: the element where the dragged element will be dropped, designated as such by the HTML5 attribute
droppable="true". - A payload: the data to be transfered when a dragged element is dropped.
Drag and Drop API Events
The JavaScript API includes six events and one object that you will need to use to create a drag and drop interaction.
- The
dragstartevent fires when a draggable object is selected. - The
dragenterevent fires when the mouse pointer enters a droppable object while a draggable object is selected. - The
dragoverevent fires every time the mouse moves while a draggable object is selected and the mouse pointer is over a droppable object. - The
dragleaveevent fires when a draggable object has been selected and the mouse pointer leaves a droppable object. - The
dragendevent fires when a draggable object is deselected by releasing the mouse button or leaving the browser window. - The
dropevent fires when a draggable object is dropped onto a droppable object. - The
dataTransferobject is used to hold the dragged data.
A Drag and Drop Example
To demonstrate how you can use HTML5 drag and drop features on your website, let’s create a simple widget that allows a website visitor to arrange three elements into the order that matches their preference.
The article that served as inspiration for this example is HTML5 Rocks: Native HTML5 Drag and Drop.
Let’s start with the HTML
    <div id="boxes">
        <span class="heading">Favorite DnD Implementation</span>
        <div class="box" droppable="true" draggable="true"><span class="dnd-tech">HTML5</span><span class="position">1</span></div>
        <div class="box" droppable="true" draggable="true"><span class="dnd-tech">jQuery UI</span><span class="position">2</span></div>
        <div class="box" droppable="true" draggable="true"><span class="dnd-tech">Dojo</span><span class="position">3</span></div>
    </div>
We’ve created three divs, each containing a bit of text relating to a different drag and drop implementation. We’ve also gone ahead and arranged all three in a default order with an assigned preference of 1, 2, and 3.
Each div has been given an attribute of droppable="true" and draggable="true" to reflect the fact that we’re going to make all three swappable with one another.
Lets add some basic styling.
    #boxes {
        text-align: center;
        width: 100%;
        max-width: 658px;
        margin: 0 auto;
        margin: 0 auto;
        font-family: 'Source Sans Pro',FreeSans,Arimo,"Droid Sans",Helvetica,Arial,sans-serif;
        overflow: auto;
    }
    .heading {
        display: block;
        font-size: 1.25em;
        padding: 10px;
    }
    .box {
        background-color: #bcd5e0;
        border: 2px solid #aaa;
        margin: 10px;
        cursor: move;
        overflow: auto;
    }
    .box .dnd-tech {
        font-size: 1em;
        display: inline-block;
        padding: 10px 0;
    }
    .box .position {
        font-size: 1em;
        float: left;
        padding: 10px;
        border-right: 2px solid #aaa;
        color: #fff;
        background-color: #0a5194;
    }
While we won’t go over those styles line-by-line, in essence, what we’ve done is arrange the boxes side-by-side and applied some styling throughout. Here’s what our boxes look like right now:

Let’s create some styles that will be applied to draggable and droppable elements while they’re being dragged and dropped.
    .box.dragged {
        opacity: .5;
    }
    .box.over {
        border: 2px dashed #222;
        opacity: .5;
    }
On to the JavaScript. Let’s start by creating the functions that will handle the addition and removal of the dragged and over classes based on user activity.
    function dragStartHandler(e) {
        this.classList.add( 'dragged' );
    }
    function dragEnterHandler(e) {
        this.classList.add( 'over' );
    }
    function dragLeaveHandler(e) {
        this.classList.remove('over');
    }
    function dragEndHandler(e) {
        [].forEach.call(boxes, function (box) {
            box.classList.remove('over' , 'dragged');
        });
    }
    var boxes = document.querySelectorAll('#boxes .box');
Right now, these functions don’t do anything. Momentarily, we’ll tie each to an appropriate event. For now, let’s see what each one does.
The first function, dragStartHandler, will add the dragged class to the dragged element.
The next two functions will add and remove the over class from droppable elements as a dragged element passes over them.
The final function iterates through all of the boxes and removes the over and dragged classes.
Next, we need to write a function that will perform a little cleanup work to address the dragover event.
    function dragOverHandler(e) {
        if (e.preventDefault) {
            e.preventDefault();
        }
        return false;
    }
Once we tie this function to dragover it will disable default browser behavior that can sometimes get in the way during a drag and drop interaction.
Next we need to add code to two different functions so that we can use the dataTransfer object to select the data that will be moved by the interaction.
    function dragStartHandler(e) {
        this.classList.add( 'dragged' );
        dragData = this;
        e.dataTransfer.setData('text/html', this.firstElementChild.innerHTML);
    }
    function dropHandler(e) {
        if (e.stopPropagation) {
            e.stopPropagation();
        }
        if (dragData != this) {
            dragData.firstElementChild.innerHTML = this.firstElementChild.innerHTML;
            this.firstElementChild.innerHTML = e.dataTransfer.getData('text/html');
        }
        return false;
    }
We’ve already seen the dragStartHandler function, but now we’ve added two lines. The first, assigns the dragged box to the variable dragData.
The second uses the setData method of the dataTransfer object to assign the inner HTML of the first child element of the selected box (the <span class="heading">Name</span> element) to the dataTransfer object.
The dropHandler function first stops the default behavior of the browser. Next, it checks to make sure that the dragged object isn’t also the droppable object. If it isn’t, the next two lines kick in and swap the names of the draggable and droppable boxes.
So, now we have all of our functions in place, and we need to tie them to the six drag and drop DOM events. We can do that with a single forEach function.
    [].forEach.call(boxes, function (box) {
        box.addEventListener('dragstart', dragStartHandler, false);
        box.addEventListener('dragenter', dragEnterHandler, false);
        box.addEventListener('dragover', dragOverHandler, false);
        box.addEventListener('dragleave', dragLeaveHandler, false);
        box.addEventListener('drop', dropHandler, false);
        box.addEventListener('dragend', dragEndHandler, false);
    });
What this code does is listen for all six drag and drop events on each box and then run a function based on any triggered events. Once we put all of that code together, we produce this nice set of draggable and droppable boxes. Give it a try:
#boxes {
text-align: center;
width: 100%;
max-width: 658px;
margin: 0 auto;
font-family: ‘Source Sans Pro’,FreeSans,Arimo,”Droid Sans”,Helvetica,Arial,sans-serif;
overflow: auto;
}
.heading {
display: block;
font-size: 1.25em;
padding: 10px;
}
.box {
background-color: #bcd5e0;
border: 2px solid #aaa;
margin: 10px;
cursor: move;
overflow: auto;
}
.box .dnd-tech {
font-size: 1em;
display: inline-block;
padding: 10px 0;
}
.box .position {
font-size: 1em;
float: left;
padding: 10px;
border-right: 2px solid #aaa;
color: #fff;
background-color: #0a5194;
}
.box.dragged {
opacity: .5;
}
.box.over {
border: 2px dashed #222;
opacity: .5;
}
Favorite DnD Implementation
HTML51
jQuery UI2
Dojo3
function dragStartHandler(e) {
this.classList.add( ‘dragged’ );
dragData = this;
e.dataTransfer.setData(‘text/html’, this.firstElementChild.innerHTML);
}
function dragEnterHandler(e) {
this.classList.add( ‘over’ );
}
function dragLeaveHandler(e) {
this.classList.remove(‘over’);
}
function dragOverHandler(e) {
if (e.preventDefault) {
e.preventDefault();
}
return false;
}
function dropHandler(e) {
if (e.stopPropagation) {
e.stopPropagation();
}
if (dragData != this) {
dragData.firstElementChild.innerHTML = this.firstElementChild.innerHTML;
this.firstElementChild.innerHTML = e.dataTransfer.getData(‘text/html’);
}
return false;
}
function dragEndHandler(e) {
[].forEach.call(boxes, function (box) {
box.classList.remove(‘over’ , ‘dragged’);
});
}
var boxes = document.querySelectorAll(‘#boxes .box’);
[].forEach.call(boxes, function (box) {
box.addEventListener(‘dragstart’, dragStartHandler, false);
box.addEventListener(‘dragenter’, dragEnterHandler, false);
box.addEventListener(‘dragover’, dragOverHandler, false);
box.addEventListener(‘dragleave’, dragLeaveHandler, false);
box.addEventListener(‘drop’, dropHandler, false);
box.addEventListener(‘dragend’, dragEndHandler, false);
});
What Are You Waiting For?
HTML5 adds native browser support for draggable and droppable elements. Implementing drag and drop functionality involves the manipulation of six different drag and drop events and one data object with JavaScript.
Iframe
In essence, an iframe is an HTML element that creates a small browser window nested within a webpage in which you can load any HTML document.
What Are Iframes Used For?
One of the most common uses for iframes on the modern web is to embed streaming media on a webpage. Media streaming websites such as Spotify, Vimeo, and YouTube use iframes to allow their content to be embedded on other websites.
For example, go to YouTube, open up any video, right-click on the video and select Copy embed code. When you do, code that looks something like this will be copied to your clipboard:
<iframe width="560" height="315" src="https://www.youtube-nocookie.com/embed/jNQXAC9IVRw" frameborder="0" allowfullscreen></iframe>Add that bit of code to a webpage and an iframe will be used to load the YouTube video hosted at the URL referenced by the src attribute.
Streaming media isn’t the only thing iframes are good for. Another way that iframes are used is to isolate content from the rest of the webpage. Here are two examples:
- Sites that display lots of code in tutorials may use iframes to render that code without having to fight against the default styles and scripts that apply to their website.
- Sites that display third-party advertisements often use iframes to load these ads, that way the ads can be changed out by replacing the code in the source document without doing a thing to the code on the webpage where the ad is displayed.
The HTML 4.01 Iframe
The iframe element was introduced in HTML 4.01 and includes four primary attributes:
src: specifies the URL of the HTML document to be rendered in the iframe.widthandheight: indicates the size of the iframe in pixels.name: allows the iframe can be targeted bya,form,button, orinputelements.
HTML 4.01 also included a range of additional attributes of secondary importance. However, many of these were deprecated or removed outright in HTML5.
Iframe Attributes Removed by HTML5
The largest group of removed attributes were those that addressed factors that are better addressed with CSS.
- The
alignattribute was deprecated in favor of using thefloat,display, andmarginCSS properties to control iframe layout. - The
frameborderattribute was deprecated in favor of CSS borders. - The
marginheightandmarginwidthattributes were deprecated in favor of CSSpadding. - The
scrollingattribute was deprecated in favor of applyingoverflow: hidden;to hide iframe scrollbars.
One additional attribute, longdesc, has suffered from widespread misuse. As a result, it is now obsolete.
Iframe Attributes Added by HTML5
HTML5 added two new attributes to the iframe element: sandbox and srcdoc.
The sandbox attribute is used to limit the capabilities of iframe content.
For example, simply adding sandbox to an iframe will prevent the embeded content from executing scripts, submitting forms, loading content in the top-level browsing context, and other things. The restrictions applied to the iframe can be reduced by adding a value to the attribute.
For example, sandbox="allow-forms" will allow forms in an iframe to be submitted. Additional values for this attribute include, but aren’t limited to, allow-popups, allow-same-origin, allow-scripts, and allow-top-navigation.
The srcdoc attribute can be used to specify HTML to render in the iframe. For example, the following code would render an image in an iframe:
<iframe srcdoc="<img src='/path/to/image.jpg?x96620'>" width="100px" height="100px"></iframe>Iframe Resources
If you’d like to learn more about iframes, one of the most comprehensive resources is the Mozilla Developer Network Iframe Element Reference Page. Here you’ll find a detailed description of every iframe attribute, including an in-depth discussion of all possible sandbox values.
Microdata
When you visit our hosting reviews you may see something like “752 reviews” and a “4 out 5 stars” host rating. Instinctively, you understand that 752 user reviews have been combined to create an aggregate host rating of 4 out of 5 stars.
However, search engines aren’t quite as smart as you, and that’s where microdata comes in.
Microdata is a set of HTML attributes that were added as part of the HTML5 specification to provide machine-readable labels for certain types of content. Using these tags allows search engines to better understand and index your site’s content and produce better search results.
Microdata Basics
Microdata consists of related name-value pairs grouped together into a single item. Let’s look at a generalized example.
We start with an item, such as a website. Once we know we’re dealing with a website, there are many name-value pairs we could potentially associate with that website, such as a URL, website name, or description.
To create a microdata item we would start by creating a parent element to contain all of the website microdata. Then we would list the microdata in child elements and tag them with appropriate microdata tags.
In the end, a search engine would access the page, identify the website item, and associate all of the appropriate microdata with that item.
If this all sounds a bit abstract right now, seeing actual microdata markup will make this all a lot clearer. But before we can do that, we need to introduce the microdata attributes.
Microdata Markup
There are four microdata attributes that are part of the HTML5 specification:
itemscopeis the attribute that creates a new item.itemtypeis added alongsideitemscopeto define the type of item being created. In most cases, a schema.org item type is used.itempropis added to each element that contains a property of the type.itemrefis added to theitemscopeelement and associates elements that aren’t direct descendants of theitemscopeelement with the item.
Let’s add all of these attributes to a fictional web host rating so you can see them all in action.
<div itemscope itemtype="http://schema.org/Corporation" itemref="review-1">
  <h1 itemprop="name">
    <a href="http://superlinuxhosting.com" itemprop="url" target="_blank" rel="noopener">Super Linux Hosting</a>
  </h1>
  <p itemprop="aggregateRating" itemscope itemtype="http://schema.org/AggregateRating">Rated:
    <span itemprop="ratingValue" min=0 value=4 max=5>4 out of 5 stars</span> by
    <span itemprop="reviewCount">423</span> real user reviews.
  </p>
</div>
<h2>Featured User Review</h2>
<div id="review-1" itemprop="review" itemscope itemtype="http://schema.org/Review">
  <p>
    <span itemprop="description">This is a great host! I love them!</span>
    <span itemprop="ratingValue" min=0 value=5 max=5>5 out of 5 stars!</span>
  </p>
</div>
The code above creates an item that contains a number of name-value pairs:
- First, we created a corporation item.
- The item name is set to Super Linux Hosting.
- The item URL is set to http://superlinuxhosting.com
- The item aggregate review is a nested item that contains two name-value pairs: a rating value of 4 out 5 stars and a review count of 423.
- Finally, by way of the
itemrefattribute added to the very first element, the last name-value pair is a review who’s value includes two name-value pairs: a description and a rating of 5 out 5 stars.
With the presence of the microdata, Google and other search engines would index the information and recognize the Super Linux Hosting corporation and associated aggregate rating and individual review.
Microdata Resources
If you want to learn more about microdata there are two places you should go:
- Getting Started With Schema.org Using Microdata is an easy-to-follow introduction to this topic. In addition, you’ll want to keep this list of all schema.org item types handy.
- HTML: The Living Standard, Section 5 Microdata is a technical look at microdata. If you want to learn to use microdata for custom applications beyond schema.org, this is the resources you’re looking for.
Global Attributes
Attributes can be added to any HTML element to modify the default functionality or behavior of the element. They are added by naming the attribute and then specifying an attribute value within the element’s opening tag, like this:
<tag attribute="value">Content</tag>
Most attributes can only be applied to specific types of elements. However, other attributes, referred to as global attributes, may be used with any HTML element. The HTML5 specification defines the following global attributes:
accesskey: assigns a keyboard shortcut to an element.class: adds a class name to allow targeting of an element with Cascading Style Sheets (CSS) for styling or a JavaScript program.contenteditable: makes an element editable by a website visitor.contextmenu: associates a custom context menu option with an element.data-*: a custom data attribute which can be used to hold page-specific information for use selection within CSS stylsheets or JavaScript programs.dir: assigns directionality to the textual content of an element.draggable: allows an element to be dragged using native HTML5 support for drag and drop events.dropzone: defines the action that should take place when a dragged item is dropped. Options includecopy,link, andmove.hidden: is used to hide an element until it should be displayed. The attribute is removed with JavaScript when appropriate to do so.id: assigns a unique identifier to an element.lang: defines the language of the content in the associated element.spellcheck: determines whether a user input should be checked for spelling.style: allows the attachment of CSS styles directly to an HTML element.tabindex: determines the position in the tab index at which the element should appear.title: adds text which is displayed as a tooltip when a visitor hovers the mouse over the element.translate: is used to prevent browser translation of the textual content of specific HTML elements.
Event Handlers
In addition, there are more than 50 event handlers that may be added as HTML attributes to any HTML element. Each of these events handlers can be used to trigger some associated code to run when the event occurs.
The list below includes all of the event handler attributes followed by a description of the event that triggers the handler.
It’s worth noting that many of these event handlers are only applicable to just a few HTML elements, despite the fact that the HTML specification allows for their application to any HTML element.
onabort: the loading of an element has aborted.onfocusandonblur: an element has received or lost focus.oncancel: the users has dismissed a dialog element.oncanplayandoncanplaythrough: a media element has downloaded enough data to begin playback or to complete playback without buffering.onchange: a the value of a form element, such as an input or textarea element, has changed.onclickandondblclick: an element has been clicked or double clicked.onclose: one of several different close events has occurred.oncontextmenu: the context menu has been opened by right-clicking on the element.oncopy,oncut, andonpaste: the targeted element has been cut, copied, or pasted.oncuechange: a text track associated with a media resource has changed the currently displayed cues.ondrag,ondragend,ondragenter,ondragexit,ondragleave,ondragover,ondragstart,ondrop: a draggable element is manipulated using the HTML5 drag and drop API.ondurationchange: the duration attribute of a media element has changed.onemptied: a media element has become empty.onended: the end of a media element has been reached.onerror: the resource failed to load.oninput: the value of an input or contenteditable element has changed.oninvalid: a submitted element has failed validation.onkeydown,onkeypress, andonkeyup: a keyboard key press event has occurred.onload,onloadeddata,onloadedmetadata,onloadstart: either an entire resource or the specified portion of the resource has completed loading.onmousedown,onmouseenter,onmouseleave,onmousemove,onmouseout,onmouseover, andonmouseup: a mouse-based interaction between the user and element has occurred.onwheel: the wheel button of a mouse has been rotated.onplayandonplaying: a media element has begun playback or has been paused (either intentionally or while waiting for additional data) and is ready to resume playback.onpause: media playback has been paused.onprogress: an operation has begun and is in progress.onratechange: the media playback rate has changed.onreset: a form element has been reset.onresize: the size of the document viewport has changed.onscroll: the viewport or an element has been scrolled.onseekedandonseeking: the seek feature of a media element has been used or is being used.onselect: some of the content of an element has been selected.onshow: the context menu has been launched while the element in focus has a contextmenu attribute.onstalled: media retrieval has been delayed or stalled unexpectedly.onsubmit: a form element has been submitted.onsuspend: loading of a media element has been suspended.ontimeupdate: the currenttime attribute of a media element has been updated.ontoggle: a details element has been opened or closed.onvolumechange: the playback volume of a media element has been changed.onwaiting: playback has stopped while waiting for more data to be downloaded.
DOM Elements
When a browser renders a webpage, it does not simply render the webpage HTML. Instead, the browser first builds a local, interactive model of the HTML content of the page.
This model, built and held locally in the browser memory, is called the Document Object Model (DOM). Within the DOM, every HTML element exists as a single node, and the sum of the nodes constitutes the DOM.
Accessing the DOM
In order for scripting langauges such as JavaScript to interact with the DOM, every node must be callable using standardized language-independent attributes and methods.
These attributes and events are defined using interface definition language (IDL) and these IDL attributes and events expose DOM nodes to scripts written in any programming language, although JavaScript is by far the most common.
The result is a system that takes an HTML element (for example: <p class="body-text" title="example">Some text</p>) and creates a DOM node that contains all of that information (for example: a p node with a value of Some text and the IDL attributes className="body-text" and title="example").
Scripting languages can then be used to manipulate DOM nodes by referencing the node’s IDL attributes.
Fundamental IDL Attributes and Methods
The HTML5 specification defines the HTMLElement interface and lists a number of IDL attributes and methods that apply to all HTML elements.
Each individual DOM node inherits all of these IDL attributes and methods and may optionally expand on the HTMLElement interface by adding additional attributes and methods.
The HTMLElement Interface
The HTMLElement interface applies to all DOM nodes and can be divided into three groups: metadata attributes, user interactions, and global event handlers.
Metadata attributes include:
- The
titleIDL attribute is set by thetitleHTML attribute. - The
langIDL attribute is set by thelangHTML attribute and is used to identify the language of the content nested within a DOM node. If nolangattribute is provided, the language assigned to the nearest parent node is implied. - The
translateattribute is used to prevent client translation of webpage content. The attribute defaults totranslate=yesat the document level and must be manually set totranslate=nofor any nodes that should not be translated. - The
dirattribute determines the directionality of the contained text. The attribute has no default value. datasetIDL attribute is the readonly DOM representation of the custom data attributedata-*. When custom data attributes are added to an HTML element, for exampledata-postId="6057", those data attributes are aggregated into a single dataset IDL attribute and assigned to the resultant DOM node.
User interactions include:
- The
hiddenattribute is a boolean that determines whether or not a DOM node is visisble. - The
click()event simulates a mouse click user interaction. - The
tabIndexattribute determines the order a DOM node will appear in the tab index. - The
focus()event simulates a user interaction in which the targeted DOM node comes into focus. - The
blur()method is used to unfocus the targeted DOM node. - The
accessKeyIDL attribute is set by theaccesskeyHTML element attribute and assigns a keyboard shortcut to the targeted node. - The
accessKeyLabelIDL attribute is a readonly representation of the assigned access key. - The
contentEditableIDL attribute is set by thecontenteditableHTML element attribute and determines whether users may edit the target node. - The
isContentEditableIDL attribute is a readonly boolean value that indicates whether the target node is editable. - The
spellcheckIDL attribute is a boolean value that determines whether the content of an DOM node, typically an input node, should be checked for proper spelling.
The list of global event handlers is fifty entries long. The following ten event handlers are some of the most important and commonly used global event handlers:
onclickonfocusonkeypressonloadonmouseenteronmouseleaveonmouseoveronscrollonselectonsubmit.
Forms
Forms have long been a part of the HTML specification. However, in HTML5 form functionality is significantly expanded with new attributes for the input and form elements, new input types, and even a couple of brand new elements.
HTML Form Basics
When building an HTML form, you should generally start with the form tag:
<form>
  <!--form input fields will be added here-->
</form>
In between these tags you’ll nest a variety of fields to accept and submit data. The most important form elements are:
- The
inputelement, which defaults to a standard text field. However, by using thetypeattribute, input elements may be formatted to accept passwords, reset all form fields, display radio buttons or checkboxes, generate buttons, and submit form contents. - The
textareaelement, which is used to create text input areas for long-form typed answers. - The
selectelement, which is used along with theoptionelement to create drop-down lists. Theselectelement creates the list and eachoption, nested within theselectelement, represents another option available in the list. - The
buttonelement, which is used to create form buttons.
HTML5 Form Enhancements
HTML5 introduced many new types of inputs, input and form attributes, and three new form elements. Let’s cover each in turn.
New input element types:
- The
colorinput type identifies a field that should accept a color and some browsers will generate a color picker when the field is in focus. - HTML5 introduced six new time and date input types, each of which will generate a datepicker in supported browsers:
date: select a date that includes the day, month, and year.datetime: select a date and time along with time zone information.datetime-local: select a date and time, but omit time zone information.time: select a time.week: select a week and year.month: select a month and year.
- The
emailinput type is used to identify a field that should accept an email address. Supported browsers will also perform basic input validation to make sure an email address has been typed. - HTML5 introduced two new number oriented input types:
numberandrange. Number allows the input of any number, subject to optional minimum and maximum value constraints.Rangecreates a slider bar, limited by minimum and maximum values, that allow a user to select a value within the specified range of acceptable values. - The
searchinput type is used to identify a search prompt. - The
telinput type is used to identify a field that should accept a telephone number. Supported browsers will perform basic input validation to confirm that a phone number has been entered. - The
urlinput type identifies a field that should accept a url. Supported browsers will perform basic validation, and supported mobile devices may display a .com typepad button.
New input element attributes:
autocomplete: turns autocomplete on or off for an input element. If turned on, autocomplete values will be pulled from saved form entries.autofocus: specifies an input element that will be automatically in focus when the page loads.form: uses an id assigned to a form to assiocate an input element that is not nested inside of a form with the form.formaction: assigned to a submit field to override default form behavior by providing an alternate URL for form processing.formenctype: added to a submit field to specify the type of encoding to apply to data submitted using the post method.formmethod: added to a submit field to specify the HTTP method, post or get, that should be used for form submission.formnovalidate: used with the submit field to prevent browser validation of form data.formtarget: added to a submit field to tell the browser to display the form response in either the current window or a new window.heightandwidth: used to specify the size of atype="image"form submit button.minandmax: used along with a number, range, or datetime oriented input type to assign a minimum and maximum value that the selected value must fall between.multiple: used along with the file or email input type to allow a user to add multiple values.pattern: used to define a regular expression to use to validate the data entered into an email, password, search, telephone, text, or url field.placeholder: assigns placeholder text to an input element that will be removed when the element comes into focus.required: identifies an element that must be filled prior to form submission.step: used along with the number, range, or a datetime oriented input type to determine the steps at which values may be selected. For example, addingstep="10"to a number input limited to values between a minimum 0 and maximum of 30 would allow 0, 10, 20, or 30 to be submitted.
New form element attributes:
autocomplete: turns autocomplete on or off for an entire form. Autocomplete on a per-input basis can still be controlled by using the same attribute on individual input elements.novalidate: turns off browser validation of a form submission.
New form elements:
The datalist element create a drop-down list of predefined suggestions for an input element. Note that this element does not limit the input field to these values. Instead, they merely act as suggestions.
The list of drop-down items is associated with an input element by the new list attribute. For example:
<input list="hosts">
<datalist id="hosts">
  <option value="SiteGround">
  <option value="iPage">
  <option value="BlueHost">
  <option value="A2 Hosting">
  <option value="InMotion Hosting">
</datalist>
The output element creates a placeholder to display the result of a process, such as a calculation. Note that output doesn’t actually perform any calculations — you will still need to do that with JavaScript or a server-side program — it simply provides a place to display the result. For example:
<form onsubmit="return false">
  <p>Formula: y = mx + b</p>
  <p>Slope (m): <input type="number" id="m" name="m"></p>
  <p>Value of x: <input type="number" id="x" name="x"></p>
  <p>Y intercept (b): <input type="number" id="b" name="b"></p>
  <p>Value of Y: <output id="y" for="m b x"></output></p>
  <input type="submit" onclick="lineformula()">
</form>
If we then write lineformula() in JavaScript to process the calculation and throw in a touch of CSS we can produce the following simple yet functional JavaScript calculator:
function lineformula() {
var y = 0;
var m = document.getElementById(“m”).value;
var x = document.getElementById(“x”).value;
var b = document.getElementById(“b”).value;
y = +m * +x + +b;
document.getElementById(“y”).value = y;
}
#example-form {
width: 100%;
max-width: 400px;
margin: 0 auto;
border: 1px solid #bbb;
background-color: #eee;
}
#example-form p input, #example-form p output {
float: right;
width: 100px;
}
#example-form p {
overflow: auto;
padding: 10px;
margin: 0;
}
#example-form p:not(:last-child) {
border-bottom: 1px solid #bbb;
}
Formula: y = mx + b
Slope (m):
Value of x:
Y intercept (b):
Value of Y:
The keygen element was also added in HTML5 as way to authenticate users. The element was designed to generate a public-private key pair which could be used to ensure that the results of the form submission were only displayed to the proper user. However, the element is now slated for removal from the HTML5 specification and should not be used.
Semantic Elements
Many HTML elements have been designed to add semantic meaning to the content of a webpage. What this means, is that certain HTML elements imply a specific meaning with regard to the contents of the element.
For example, the use of emphasis tags, <em>, is rendered by a browser using an italic font and implies that the contents of the element should be read and understood with greater emphasis than surrounding content.
While not all HTML elements carry semantic meaning, it is important to use HTML tags according to their semantic meaning whenever possible.
Why Semantics Matter
Semantics are important for at least four primary reasons:
- Semantics enhance accessibility. Assistive technologies are better able to convey the meaning of a webpage when the selection of HTML elements provides clues as to the meaning of the page content.
- Semantics make content more discoverable. Search engines are better able to understand and index the content of a webpage when HTML elements are used according to their proper semantic purpose.
- Semantic elements are a boon to internationalization. New semantic elements
rubyandbdiwere introduced in HTML5 to better recognize the fact that less than 15% of the world is made up of native English speakers. - Semantics improve interoperability by making it easier for developers and applications to understand and interact with the contents of a webpage.
As the march towards the Internet of Everything (IOE) continues unabated, semantics grow increasingly important.
The use of proper semantics, in HTML and in other forms of programming for the web, grows more critical as the number and diversity of internet-connected devices proliferates.
Today, you may think you’re creating a webpage to be viewed primarily on laptops and smartphones, but in another 10 years, it’s anyone’s guess what sort of devices will be trying to access and make sense of your website’s content.
Getting the semantics right is the key to ensuring that data remains highly accessible over time.
Semantics in HTML Prior to HTML5
HTML elements have always had semantic meaning. The use of the form or table elements has always implied a certain meaning and purpose to the content of the element.
Lists have identified to the browser as being either ordered or unordered in nature by the use of the ol and ul tags. Likewise, there is an extensive list of pre-HTML5 elements that can be used within text to add semantic meaning:
- The
emandstrongtags imply emphasis and strong emphasis. - The
s,del, andinstags are used to identify information that is no longer applicable or has been replaced with updated information. - The
quoteandcitetags are used to identify quotations and creative works. - The
abbranddfntags are used to associate explanatory comments with a term in need of definition. - The
code,samp,kbd, andvarelements are used to identify specific types of text: programming code, sample computer program output, keyboard input, and formula variables respectively. - The
supandsubelements identify content that should appear either as subscript or superscript text.
While plenty of HTML elements that predate HTML5 carry semantic meaning, there was one major shortcoming in the language that HTML5 addressed: the lack of structural semantic elements.
HTML Document Structure Prior to HTML5
Prior to HTML5, the div element was the primary container used to add structure to a webpage document. It was, and still is, quite common to see webpages built using divs and producing a document structure that looks something like this:
<div class="main">
  <div class="header">
    <div class="nav"></div>
  </div>
  <div class="section">
    <div class="article"></div>
    <div class="aside"></div>
  </div>
  <div class="footer">
    <div class="nav"></div>
  </div>
</div>
This approach to building page structure with the div element — a practice referred to as divitis — does not use the HTML elements themselves to imply any meaning to the structure of the page. Prior to HTML5, developers could be forgiven for this sort of practice.
However, with the availability of new structural semantic elements in HTML5, there’s a better way.
Structural Semantic Elements in HTML5
HTML5 introduced the following elements to be used in place of the div soup shown in the example above. These elements provide structure to a document while simultaneously implying specific meaning to the various portions of the document:
- The
mainelement is designed to hold the primary contents of a webpage. If a website reuses the same header and footer across all pages, those would typically be omitted from the main element while all other webpage content may be properly nested within the main element. - The
headerelement holds introductory contents about an entire webpage or a section of a webpage. It is appropriate to use it to hold the header that appears on every page of a website and also to use it to hold the title and other introductory information at the top an article or page section. - The
footerelement is designed to hold summary information about its parent element. It can be used to contain a webpage footer that appears on every page of a website as well as within an article to hold article summary information, such as authorship, topics, the date of publication, and user comments. - The
sectionelement is used to group together thematically-related content and typically begins with a heading element. For example, on a blog, the primary portion of the page may be one section while the sidebar may occupy a second section. - The
navelement is used to identify a group of navigation links. Typically, nav elements are limited to reusable site-wide navigation elements, such as those appearing in webpage headers, footers, and sidebars. - The
articleelement is used to group together content that makes sense as a standalone unit separate from the webpage, such as a blog post or news article. Articles can contain header, footer, section, and aside elements. - The
asideelement is used to identify information that should be understood apart from the primary flow of the content in the parent element.
While you don’t have to use all of these elements when designing webpage structure, they are available for use as appropriate to provide a clearer picture of the semantic meaning of each portion of the page.
If we revisit our div-soup layout and revise it to implement these new tags, we get something that looks like this:
<main>
  <header>
    <nav></nav>
  </header>
  <section>
    <article></article>
    <aside></aside>
  </section>
  <footer>
    <nav></nav>
  </footer>
</main>
Textual Semantic Elements in HTML5
In addition to the structural elements we’ve covered, HTML5 also introduced a number of elements to imply specific types of meaning to bits of textual content. Let’s take a look at them:
- The
addresselement is used to identify address information that pertains to the author or owner of a webpage or article. - The
figureandfigcaptionelements are used to identify and caption visual content that is related to the content of a webpage — such as a graph, diagram, or illustration — but that does not need to appear inline with the content of the document. - The
marktag is used to identify text that has specific meaning in the current context. For example, it could be used to indentify each occurrence of a search term in a page displaying search results. - The
timeelement identifies a bit of text as representing a specific point in time. Thedatetimeattribute can be used to add a machine-readable version of the specific point in time to the time tag. - The
bdielement is used to reverse the directionality of a piece of content for languages that follow a right-to-left pattern. - The
ruby,rp, andrtelements are used to provide pronunciation aids, or rubies, for certain Asian language characters.

Dynamic HTML
When you think about the modern web page, you typically don’t envision a static website. Thanks to the advent of scripting languages like JavaScript and PHP, the websites we see today are more interactive and dynamic than their predecessors.
While there are a variety of approaches for creating a dynamic web page, there is one specific technique you’re probably familiar with, though you may not have heard much about: DHTML.
The name “DHTML” is a bit of a misnomer. Unlike the markup language HTML from which it draws its name, Dynamic Hypertext Markup Language is actually a term that describes a number of technologies and languages used in conjunction to create dynamic websites.
These are the four key elements of DHTML:
- HTML: the markup language used to create static pages and apps.
- CSS: the language used to dictate via a stylesheet the presentation of a page.
- JavaScript: the programming language used to develop interactive elements on a page.
- DOM: the programming interface through which a page’s code can be changed.
If you’re interested in learning more about DHTML, the following list of resources include reference material, step-by-step guides, and tools to help you create dynamic web pages using DHTML.
Books
While websites are always a great solid base to start from, you can’t go wrong investing in some tableside resources to walk you through the ins and outs of DHTML.
- JavaScript: The Definitive Guide (2006) by David Flanagan: this is the go-to guide for learning JavaScript as well as an excellent reference material for all matters related to DHTML.
- Interactive Data Visualization for the Web: An Introduction to Designing with D3 (2013) by Scott Murray: once you’ve got a handle on the basics of DHTML, use this step-by-step guide to learn the basics of designing dynamic content.
- DOM Scripting: Web Design with JavaScript and the Document Object Model (2010) by Keith and Sambells: the perfect resource for when you want a better understanding of DOM and practice with real-world applications.
- Web Animation using JavaScript: Develop & Design (2015) by Julian Shapiro: if you’re looking to master animations through DHTML, check this out.
Tools
These third-party contributions to DHTML aim to help developers write cleaner code, debug with ease, and use pre-written scripts to enhance their efforts.
- Dynamic Drive: this website is dedicated to providing developers with free JavaScript (and other DHTML) scripts.
- DHTML Goodies: another online resource that provides free DHTML (and Ajax) scripts.
- JavaScript Kit Scripts: another free resource for finding JavaScript scripts to help in creating a variety of design and animation effects.
Online Guides and Tutorials
Want a step-by-step guide to learning about HTML, CSS, JavaScript, and DOM? Or maybe you prefer some hands-on practice? The following guides will cover all your bases.
- A Web Development Roadmap for Beginners: this “Learn to Code” guide is the perfect place to start working with DHTML as it’ll take you from the basics of HTML (Chapter 1) all the way through JavaScript and jQuery (Chapter 5).
- W3Schools DHTML Tutorials: W3Schools offers a variety of tutorials on DHTML, broken up by the three different programming languages.
- Mozilla Web Technologies Tutorials: the Mozilla Developer Network has one of the more comprehensive (and well-organized) guides available on the various programming languages involved in DHTML.
- QcTutorials DHTML Tutorial: looking for a simple and straight-forward approach to learning DHTML? Walk through this tutorial and then keep their DHTML and HTML DOM examples on hand for future reference.
- Beginner’s Guide to DHTML Tutorial: an introduction to DHTML which includes a number of tutorials to get you started.
- Web Developer and CSS Tutorials: there is a lot you can learn to do with CSS, so don’t limit yourself to just the basics. This resource includes a variety of CSS tutorials based on your specific website’s needs.
- JavaScript Tutorials: another guide from JavaScript Kit, only this one focuses specifically on JavaScript-related tasks.
- CSS Reference: use this simple resource as a quick reference guide when writing CSS.
- DOM Reference: learn more about the different DOM objects here.
Get to Work!
If you’re planning to create dynamic content for your website, it’s important to have a firm understanding of how each element works and how they all play together under the umbrella of DHTML.
The above reference guides are a good place to start, but nothing beats hands-on practice if you want to push the limits of opportunity posed by learning a new programming technique.

.sourceCode span.kw
.sourceCode span.dt
.sourceCode span.dv
.sourceCode span.bn
.sourceCode span.fl
.sourceCode span.ch
.sourceCode span.st
.sourceCode span.co
.sourceCode span.ot
.sourceCode span.al
.sourceCode span.fu
.sourceCode span.re
.sourceCode span.er
Composing Good HTML and Using Validators
We’ve touched on the subject of composing good HTML, but we will go in depth here. Also we will discuss validators and how to use them.
Part 1 – Composing Good HTML
Knowing all the rules of proper grammar does not make you a good writer, and knowing every function and construct of a language does not make you a good programmer. There is something more that is required — good style.
Writing HTML is the same way. You might know the ins and outs of every markup element, and still put together sloppy documents that are hard to read and design for. But this doesn’t have to be the case — you can learn how to write good, well-styled HTML.
Why bother with good HTML?
Since HTML isn’t intended to be seen by your end users and online audience, you might ask:
- What difference does it make?
- Why bother worrying about the markup?
Answering that question is the first step toward good HTML style: thinking about who you are writing HTML for.
There are a handful of “audiences” for your HTML:
- The current designer/developer who has to write CSS
- Future developers and designers who might need to redesign your website
- Google and other search engines
- Facebook, and other social media sites that post page excerpts
- RSS readers
- Screen-readers for the visually impaired
- Your regular users, ultimately.
All these different audiences — only some of which are human people — have different needs, all of which are well-served by good, well-style HTML.
Good Document Structure
The most important aspect of HTML style is to structure the overall document properly.
The overall structure should look like this:
<!DOCTYPE html>
<html>
 <head>
  <title>The Title of the Document</title>
  <!-- CSS Links -->
  <!-- Favicon Links -->
  <!-- Meta data: Description and Keywords -->
  <!-- Open Graph Details -->
  <!-- Other Semantic Data -->
 </head>
 <body>
  <header>
   <h2>Title of Site</h2> <!-- H1 if Home Page -->
   <h1>Title of Document</h1> <!-- This can go here or in <main> -->
   <nav><!-- Main Navigation Menu. Usually a <ul> --></nav>
  </header>
  <main>
   <article>
    <header>
     <h1>Article Title <!--OR--> Document Title</h1>
     <!-- Article Meta Data -->
    </header>
    <!-- Article Content -->
    <footer>
     <!-- Article Meta Data -->
    </footer>
    <aside>
     <!-- Comments -->
    </aside>
   </article>
  </main>
  <aside>
   <!-- Sidebar(s) -->
  </aside>
  <footer>
   <!-- Site Footer: Contact info, copyright notices, navigation menu, disclaimers, etc. -->
  </footer>
  <!-- JavaScript -->
 </body>
</html>
Note that you may not need every element specified here. For example: you might not want to put the <header> element into your <article> of you aren’t including meta-data details at the top of the article — a simple <h1> or <h2> tag, at the same “level” as the article content would be just fine.
For more details about structuring your document properly, see the Structural HTML section of this article.
Ordering Your Major Elements
The <title> and content-related <meta> should be early in your <head>. When your SEO consultant is trying to figure out what’s going on with how Google or Facebook is displaying your pages, don’t make them sort through a dozen CSS links and random JavaScript code.
Even if your navbar is stuck to the top of your window, and the main title for the site is below it, put your main site title in an <h1> or <h2> tag, and place that first inside <header>. Put the navigation menu after the title.
The <main> element should be the first element after the <header>. Even if you have a left-side sidebar, use CSS to move it over to the left side; don’t put your <aside> before the main content.
The page <footer> should be the last content element inside of <body>. There should be no visible HTML elements after </footer>.
Place as much of your JavaScript as possible after the </footer> closing tag. Only put JavaScript into the <head> if it absolutely has to be there for some reason (there usually isn’t).
Making your structural markup easier to read
Sometime you just have to include a lot of <div> tags, or you have multiple <aside> sidebars at different levels. Or maybe you have a lot of nested lists.
One of the most helpful things you can do is indent your code. Consider the following two examples:
<!-- Example 1 -->
<header>
<div class="mast-head">
<h1>Document Title</h1>
<div class="nav-bar">
<div class="main-nav">
<nav>
<ul>
<li><a>Menu Item</a></li>
<li><a>Menu Item</a></li>
<li><a>Menu Item</a></li>
<ul>
<li><a>Menu Item</a></li>
<li><a>Menu Item</a></li>
<li><a>Menu Item</a></li>
</ul>
<li><a>Menu Item</a></li>
</ul>
</nav>
</div>
</div>
</div>
</header>
<!-- Example 2 -->
<header>
 <div class="mast-head">
  <h1>Document Title</h1>
  <div class="nav-bar">
   <div class="main-nav">
    <nav>
     <ul>
      <li><a>Menu Item</a></li>
      <li><a>Menu Item</a></li>
      <li><a>Menu Item</a></li>
       <ul>
        <li><a>Menu Item</a></li>
        <li><a>Menu Item</a></li>
        <li><a>Menu Item</a></li>
       </ul>
      <li><a>Menu Item</a></li>
     </ul>
    </nav>
   </div>
  </div>
 </div>
</header>
The second one is much easier to read, isn’t it? This is very helpful for designers and developers who are trying to make sense of your document.
Make sure that you are consistent with how you indent — one space, two spaces, a tab. What you pick doesn’t matter that much, but the important thing is to keep it consistent.
But what about generated HTML?
Most of the HTML on the internet today is generated by one Content Management System or another. You can’t always make the code indenting work the way you want it — especially if the code that generates the HTML is spread across a lot of different theme and plugin files.
The answer is to use meaningful classes or IDs and comment ending tags. This can be especially helpful for repeated blocks of generated content, such as comments or items in a sidebar.
<header>
 <div class="mast-head">
  <h1>Document Title</h1>
  <div class="nav-bar">
   <div class="main-nav">
    <nav>
     <ul>
      <li><a>Menu Item</a></li>
      <li><a>Menu Item</a></li>
      <li><a>Menu Item</a></li>
       <ul>
        <li><a>Menu Item</a></li>
        <li><a>Menu Item</a></li>
        <li><a>Menu Item</a></li>
       </ul>
      <li><a>Menu Item</a></li>
     </ul>
    </nav>
   </div> <!-- /.main-nav -->
  </div> <!-- /.nav-bar -->
 </div> <!-- /.mast-head-->
</header>
<!-- Comments -->
<div class="comments">
  <div class="comment" id="comment-39874693029">
  <!-- Comment -->
  </div><!-- /#comment-39874693029 -->
</div> <!-- /.comments -->
<!-- Sidebars -->
<aside>
 <div class="sidebar-item" id="subscribe-form">
  <!-- Subscribe form -->
 </div><!-- /#subscribe-form -->
 <div class="sidebar-item" id="archives">
  <!-- Blog Archives -->
 </div><!-- /#archives -->
</aside>
As a general rule — if an element’s opening and closing tag are not on the same line, and the element requires a class or id, it is a good idea to comment the closing tag.
Meaningful Classes and IDs
First of all — make your class and ID attributes consistent and easy to read by:
- using only lower case letters
- separating word with hyphens.
Next, make sure that your class names and IDs make obvious semantic sense and are not all about design and display.
Good class and ID names:
- nav-menu
- blog-post
- sidebar-widget
- comment-meta.
Bad class and ID names:
- green-box
- left-sidebar
- fade-in-banner.
Sometimes, the nature of your front-end framework or CSS will cause you to need extra elements, and you’ll find yourself using layout-specific class names like wrapper.
This is okay if you can’t help it. Just make sure you are keeping things general. There’s nothing worse than a redesign that creates CSS that looks like:
.green-box
    background-color: blue;
}
Use Content elements wisely
Within the main section of your article or other content, use sectional content tags to organize your document properly.
Headlines and Sections
Headlines for sections are very important. Don’t neglect them. Your final content is much easier to read if there are several titled sections and sub-sections, rather than one giant block of content.
- Use heading tags (
<h2>,<h3>,<h4>,<h5>) to title sections and subsections. - Make sure your hierarchy of headlines forms a reasonable outline. Don’t put an
<h5>after an<h2>without an<h3>and<h4>intervening. Make sure your content has a rational and understandable structure. - If you are using
<strong>to markup section headers, something is wrong.
Also, be sure to put id attribute on section titles so that you and others can create in-document links.
<h3 id="title-of-section">Title of Section</h3>
...
<a href="#title-of-section">This links to that location.</a>
Finally, don’t abuse the horizontal rule ( <hr> ). If you are using sections and headlines appropriately, there is almost never any reason for it.
Links
The only required attribute for an anchor tag is the URL of the linked document.
But including a title tag is very helpful, as it lets people know where they are going before they click the link. It also helps Search Engines determine what the link is about.Ideally, the title tag will be the title of the linked document.
Another issue with links is the anchor text — the actual text which the user clicks (or taps, or selects) in order to follow the link.
Try to avoid Click Here if possible. Sometimes it is inevitable, but whenever possible you should try to make the anchor text meaningful. This is helpful for your readers and also for the document you are linking to (which may be your own).
<!-- bad anchor text -->
Learn more about HTML by <a href="">clicking here</a>.
<!-- good anchor text -->
We provide a lot of <a href="">information about HTML</a>.
Images
An image is only required to have a src element — the URL of the image. But including a title and alt text can help.
- screen readers for the blind can read the description to a user that can’t see the image
- search engines can index the image and have some idea of what the image is about.
Definitions, Quotes, Acronyms
There are several very helpful span-level markup elements that are never used.
These provide fine-grain information about the word on your page. They can help users better understand your content, and they can help computers (search engines, artificial intelligence) make better sense of what you have written.
<dfn>— The definition tag. This can be for the first time you use and define a technical term.<abbr>— Used for abbreviations. You can put the expanded form of the abbreviation in thetitletag.<q>— Most people just use typographical quote marks to delineate quotations, but using the markup makes it more explicit, and allows you to reference the source of the quote with the<cite>element.
Learn More and Care More
Writing good HTML is a matter of:
- learning a handful of basic principles
- caring enough about your content and your site to follow them.
We can only help you with the learning part. You have to make the decision to care.
Most of our advice can be summed up in one sentence:
Make sure your HTML clearly communicates what you want to communicate.
Part 2: HTML Validators
With the advent of modern, standards-based web browsers and HTML, there has been a increasing interest in validation — making sure that the source code of a website is free of errors and conforms to the relevant specifications.
This is is a good thing, of course — the web is generally a better place when websites follow “the rules.” But too much emphasis on validation can also be counter-productive.
Here’s what you need to know.
What is HTML Validation?
Validation just means checking to see if your web page’s source code conforms to the specification for the language laid out by the W3C. This checking is done by a software tool called an HTML Validator.
This is analogous to proofreading — making sure that all the words are spelled right and that conventional rules of punctuation and grammar are followed.
The specification for a markup language spells out (in excruciating detail, sometimes) how each HTML element is to be used, what its potential attributes can be, and how it related to the other elements on a page.
To say that an HTML document is valid just means that it follows each and every one of those rules.
What is HTML Validation not?
HTML doesn’t actually tell you if your website is any good, or looks the way you think it should, or will help you achieve your marketing goals. It only tells you if your markup conforms to the specification.
This is a little like the difference between editing and proofreading — validation is like proofreading.
HTML Validation also is only concerned with the HTML — not the CSS, the JavaScript, the underlying PHP. It also has nothing to do with things like forms working properly (form validation is a whole different thing).
Why bother with validation?
Running your HTML through a validator can help you catch mistakes that can creep into your HTML from a variety of avenues.
Simple Typos
Probably the most common source of validation errors is just simple typographical errors. If an element’s tag name is spelled wrong, or a right angle-bracket is hit instead of a left one, you’ll get a validation error. These are often the most important to find and fix, and also the easiest as well.
Version mismatch
Each version of HTML has a slightly different set of rules, and things that are included in the language. If your HTML is valid, that means you have followed all of those rules, and only included things that are officially a part of the language.
For example, the <article> HTML tag is new in HTML5 — it was not present in the HTML 4.0 specification. That means that if you were validating against that specification, and you included <article>, it wouldn’t be valid. You’d get an error.
Another example of something that has changed is the way null elements close.
The image tag ( <img> ) is a null element — it has no content, only attributes (the image itself is an attribute pointing to the image file, not the content of an element). In the past, null elements had to be closed, so you would see this:
<img src="http://example.com/some_image" alt="Some Image" />Now, in the HTML5 specification, this is not preferred, and the same image would look like this:
<img src="http://example.com/some_image" alt="Some Image" >Validation is important for a number of reasons:
- There have been many different specifications over the years
- Sometimes multiple specifications active at the same time
- Coders have developed habits based on various ways of doing things.
Bad Server-Side Code
Most websites today use some underlying Content Management System or server-side scripting to generate HTML. This adds a layer of complexity that can introduce additional errors.
For example, if a particular condition isn’t met or a template file isn’t loaded, the closing tag for a large element might not get included in the output.
It can also be difficult to see the whole HTML document when working on server-side dynamic scripts — the template for a single page is often spread across a number of different files.
Included Bad Code
Along with Content Management Systems, most website owners use a number of third-party plugins to help generate their websites. These are not always as high-quality as they should be, and can be a source of typos, bad markup, and poorly-written code.
Simply not knowing the HTML specification
There is a lot of minute detail to the HTML spec — things that a lot of beginner and intermediate developers may not know or understand.
Did you know that you can’t put a list ( <ul> or <ol> ) inside a paragraph ( <p>)? It’s not just invalid — from the standpoint of the HTML specification (and most HTML parsers), it is literally nonsense.
There are a lot of rules like that in the HTML specification — some of them explicit, some of them implicit. A validator will catch if you are breaking any of them.
Why is Valid Markup important?
Many basic problems (such as typos or missing tags) can cause a problem with the way a website displays in a browser. A missing </div> can throw off the alignment and layout of every element after it on the page. A misspelled <img> tag probably means the image won’t be displayed at all.
But there’s more to validation than catching typos.
If use the HTML specification wrong (or in a “nonstandard” way), browsers won’t be able to parse and display your site correctly. The whole point of a standard is to make sure that every browser or client knows exactly what each detail of a document means, and how to display it to a user.
Validating helps to make sure that you conform to the specification.
Valid Markup is all important
That being said, it is important to realize that not all invalid markup is wrong. You may get errors and warnings from a validator that you can simply ignore. This can happen for at least two reasons:
- Sometimes, common industry practice has evolved away from the official standard. If you follow the common practice, you may get an error, even though it doesn’t matter.
- Sometimes, validators are just wrong. This doesn’t happen often, but it does happen.
As of the time of this writing, all five of the most popular websites on internet have validation errors on their main page. But if you look into each error in detail (as, I’m sure, the teams behind those sites have done), there is a reason why they have made each choice.
How to Validate
The easiest way to check if a site has valid markup is to use one of the many available validators.
Tutorials on HTML Validation
- HTML Validation Tutorial is a short video tutorial on HTML validation from Treehouse.
- What Is HTML and CSS Validation? Should You Validate Your Web Page? is an in-depth article on site validation, exploring why validation is important, and how to track down errors and correct them.
- Same DOM Errors, Different Browser Interpretations is an interesting look at what happens when you don’t validate your HTML. The article illustrates how the same HTML errors will display differently in different browsers.
Online HTML Validators
- The W3C Markup Validation Service is the authoritative HTML validator, maintained by the World Wide Web Consortium, the standards body that manages the HTML specification. You can use the tool to validate a live site, an uploaded file, or via direct form input. There’s even an API, so that you can connect to the validator from your own tools.
- The Nu Validator allows you to validate the content of a live URL, an uploaded file, or pasted text. You can validate against several standard schemas, or against your own. The Nu Validator is describes as “an experiment”, but it is quickly becoming the new standard, and even the W3C hosts an implementation of it.
- OnlineWebCheck validates HTML, and also performs a number of other checks such as CSS validation and checking the cache manifest. They also have a downloadable desktop app for Windows.
- This HTML/XML Validator at arbola.net offers the option to show suggested repairs for any HTML errors.
- WDG HTML Validator is a validator from the Web Design Group that can be used for individual or batch URLs. It provides more feedback than the W3C’s canonical validator for technically valid, but potentially problematic, HTML.
Validation Tools for Local Use
These are validation tools that can be downloaded and installed locally or on your own server. Some of them are standalone applications, and some are libraries and extensions which can be included into other projects.
- The Nu HTML Checker, mentioned above, can be downloaded and run locally as a Java app. There are integrations with Grunt, Travis CI, Gulp and other tools, which makes it easy to integrate Nu into any development and deployment workflow. Nu Validator is also behind the clever Let Me Validate That For You tool, which auto-validates HTML included in code samples that are linked to GitHub issues.
- Tidy (or “HTML Tidy”) is a cross-platform console application that corrects and cleans up HTML. It doesn’t just point out errors — it actively fixes your code. At the core of the HTML Tidy project is
libtidy, a C library that can be included into nearly any application. Most contemporary programming languages have at least one wrapper forlibtidy. - HTML Validator for Firefox and Mozilla is a browser extension that displays the number of HTML errors on a page.
- W3C HTML Validator by Micheh is a PHP library that uses the W3C Validator API.
- Validator Suite by the W3C is a Java application that provides a set of validation tools that can be run locally. The suite is built on Play Framework and MongoDB. Active development of the suite has ended, but the project is open source, and W3C is encouraging interested developers to fork the project.
- Total Validator develops set of tools, including a paid product and a free desktop app. The tools perform several types of HTML validation. It also checks for broken links and bad spelling.
- HTML Validator Browser Add-On for Firefox automatically validates every page you visit and displays the number of validation errors in a small icon at the top of your browser.
- Django Output Validator automatically validates HTML generated by a Django app, keeping a log of any pages that fail validation. This is done in real time, as pages are requested (not at deployment).
- CSE HTML Validator for Windows is a commercial software product that does validation on HTML and CSS and performs a number of other checks, such as accessibility, SEO, broken links, and spelling.
Does Validation Really Matter?
It’s easy to feel like validation doesn’t really matter, especially if you know that Google’s home page contains a whole bunch of validation errors. And so does Facebook. And YouTube.
In fact, we tested the top 10 most popular sites on the web, and every single one of them had validation errors.
So, is it worth bothering?
Yes.
It is safe to assume that the engineers at Google, Facebook, and Amazon all know what they are doing, and routinely test their front-end output.
Those pages are the way they are because of a relentless and never-ending process of optimization. This is something you, on your site, probably do not have the ability to do.
HTML Validation lets you know if there are any potential problems in your markup. It’s a little bit like spell-checker. You may have some specific reason for not fixing an error, but most of the errors are typos and mistakes that really do need to get fixed.
The goal is not to get zero errors from an HTML validation tool. The goal is to have clean markup that renders properly in every browser and can be well-understood by search engines. HTML Validation is one useful step in pursuit of that goal.

Conclusion
HTML and its related technologies have been a major part of our lives for a long time. And there doesn’t seem to be anything that will change that — except maybe that we will become even more dependent upon it. And now you likely know enough to at least create basic pages.
If you’ve worked through this entire article, you have doubtless learned a lot. This is a book-length article, after all. However, you might want to refer back to it. There is a lot to learn! And after you master everything here, there are resources that will take you even further.
Happy trails!
Related Reading
We have more guides, tutorials, and infographics related to HTML:
- Get Started Developing with JavaScript: a great way to get started coding in JavaScript.
- CSS3 — Intro, Guides, and Resources: this is a great place to start learning webpage layout.
- ASP.NET Resources: a guide that will get you going with Microsoft’s .NET framework for creating webpages.
Confused about what programming language you should learn to code in? Check out our infographic, What Code Should You Learn? It not only discusses different aspects of the languages, it answers important questions such as, “How much money will I make programming PHP for a living?”

Main text written by Adam Michael Wood with additional material by Jon Penland and Brenda Barron. Compiled and edited by Frank Moraes.


Marko
July 25, 2019
Cool article. Any suggestions for code editors? I’ve sworn by Sublime Text for a while - currently using v3.
Notepad++ is not in my good books, probably because I’m too used to sublime. Any new players out there to consider?
Sherrie
September 18, 2019
Love Sublime as well. I have it set up the way I like it, with some favorite packages like Emmet installed and the Soda (dark) theme.
I’ve also used Komodo, Notepad++ and poked around in Atom, Brackets (not my taste), and Visual Studio. But sticking with Sublime for now.