How to Use the Pingdom WordPress Plugin
 Pingdom, a remote site monitoring service, has introduced a new WordPress plugin that displays service status at a glance.
Best of all, it is free and can be used with any self-hosted WordPress installation.
How the Pingdom Plugin Works
First, you need a Pingdom account. There’s a free account for monitoring one site.
You then install the plugin on your WordPress blog, ideally on a different server.
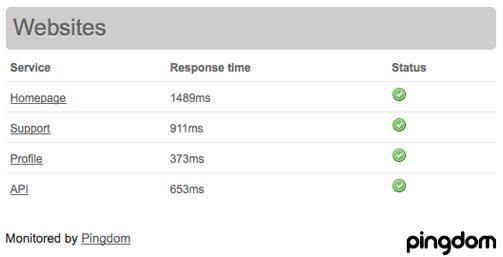
The plugin then creates a status page. It displays the status of your various sites and their response times.
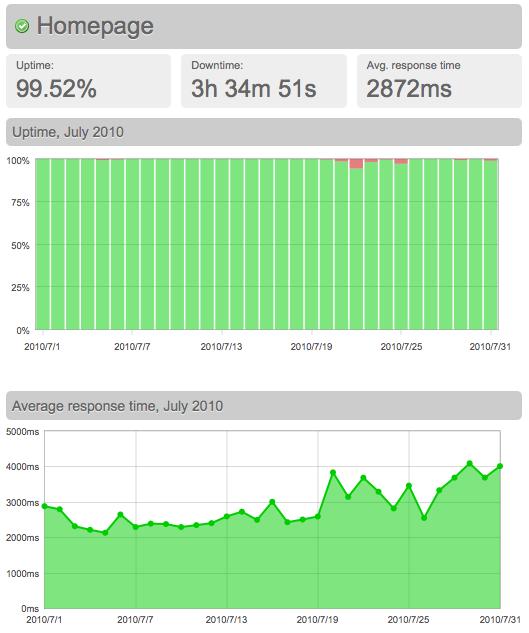
Users can drill down to see the history over the past month.
The plugin allows you to keep some monitors private, theme the status page and regroup data to suit.
Who’s it For?
The Pingdom plugin’s admittedly of limited use to people with the free Pingdom account.
It’s aimed more at resellers, or people who run networks.
But for those who want to make this information available to others in a visually attractive way, Pingdom’s WordPress plugin is probably the easiest solution.
Do You Need the Plugin?
If you have clients who buy hosting, the Pingdom plugin is handy. Casual Pingdom users won’t see much benefit from it, simply because you need two servers for it to run.
If your business isn’t large enough to need detailed monitoring, you’re probably better off taking a pass.
Join our newsletter & be first to hear when we publish new posts.


Discussion
What Do You Think?